My Spring DIY projects!

Spring is a beautiful time to the year.  In pagan beliefs, it is a time for rituals of cleaning, renewal and rebuilding.  With that sentiment, it has seemed to fuel my current DIYs, and this is a douzy of on article with 3 awesome projects for fashion and home that I’d like to share with you all!

#1 Distressed and broken t-shirts

I work at a high end fashion boutique, so when raggedy beat up shirts started showing up at the store and I also saw this look in movies and tv, I wanted to get it.  But I wanted to get it for free.  So of course I would DIY this look, it’s so easy to. Who doesn’t have a t shirt in the drawer that is not getting used these days and could benefit from a make-over?  I used an old graphic tee that I barely wore and after a few tutorials from youtube on how to compose a good distressed pattern, I went out on my own.. and I quite like it. Try it yourself, it is really easy, but I recommend you distress a trial t-shirt you can dispose of first before doing it on the one you want to keep.  It really helps you learn what kind of distressing works and where you want it on the shirt…
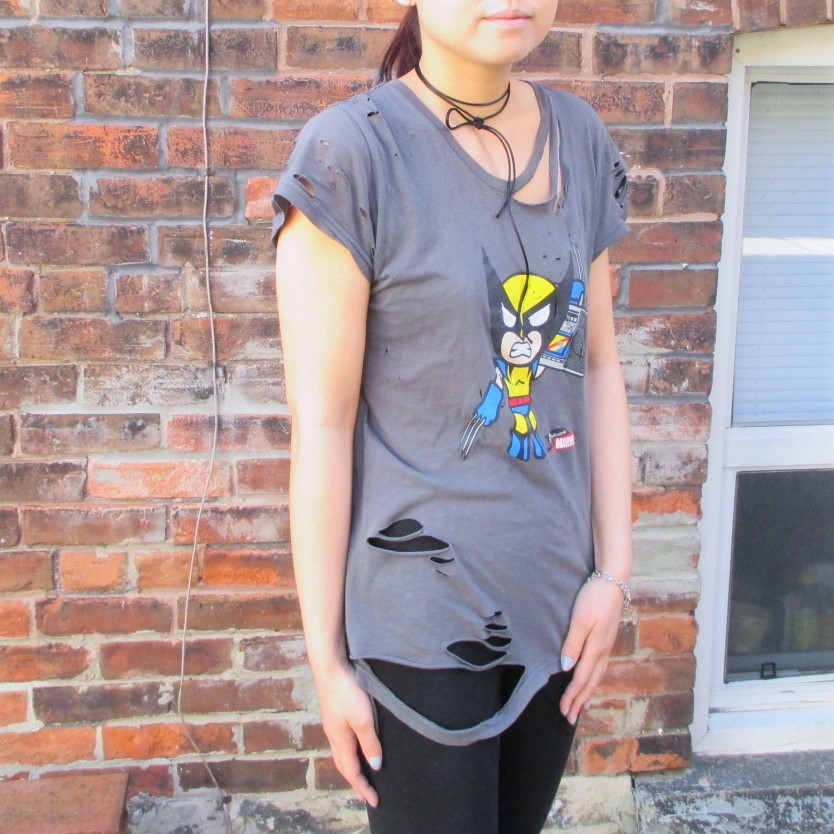
I really like what I did on the hip/edge part of the shirt, and the sleeves are pretty cool too. all I need is to fade the graphic a bit more somehow…

#2 Uneven Jean Hem

This trend is a bit more low key.  I have only seen it a few times, and it looks best with healed shoes or backless mule type slip ons or loafers. I like how it’s edgy, and adds just the right amount of street cred to a boring full length jean.  And it’s far from being the pedestrian looking cropped cuffed jean.  To get this look, you break apart the seams carefully with scissors on both sides of the jean leg bottom. Then cut straight across on the front panel, higher than the cut on the back panel.  I distressed the cut edges a bit too. And voila, you have an interesting looking jean hem that you will love to sport on errand days or for just getting out on the street…
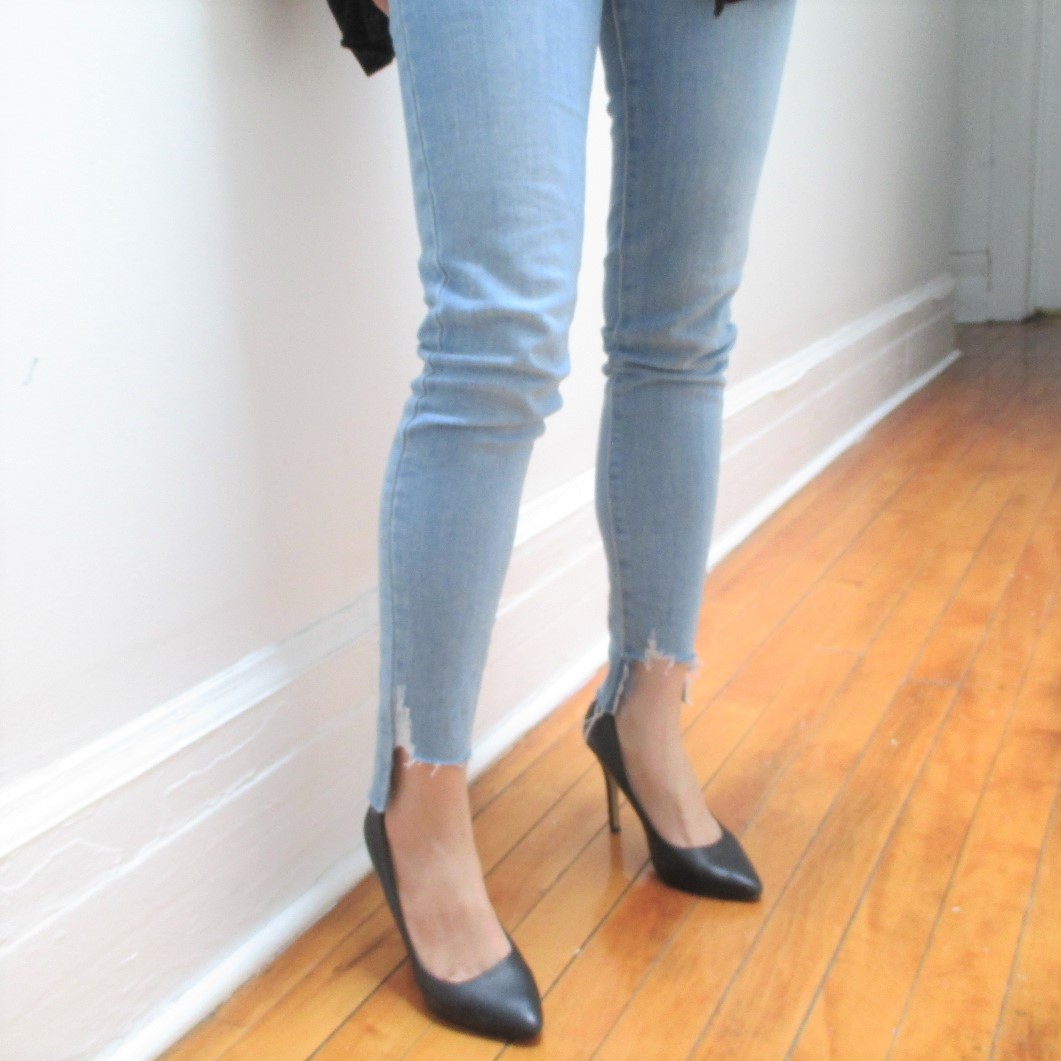
Looks good with any kind of heels, chunky or stilettos. I think mules or slide on flats with it would be cool for the summer too.


#3 Bunnies from unwanted gloves:

Ever wanted to have a cute plush toy made from things you didn’t think could be cute?  Enter these old gloves I had lying around my house that were not pretty enough to be worn in the winter, or too mismatched from losing the other pair over various winters.  I decided to make stuffed bunnies out of them for Easter. I cut off the thumb, the pinky, and middle finger, leaving just two finger for ears.  Then I sewed up all the holes, and added some leg shapes by cutting a slit at the bottom of the glove for where they would be.  I stuffed the gloves, and added whiskers and a ball tail.  And now I have the cutest stuffed bunnies this side of the world!  I am selling these on Etsy, so if you want one, just make an enquiry!
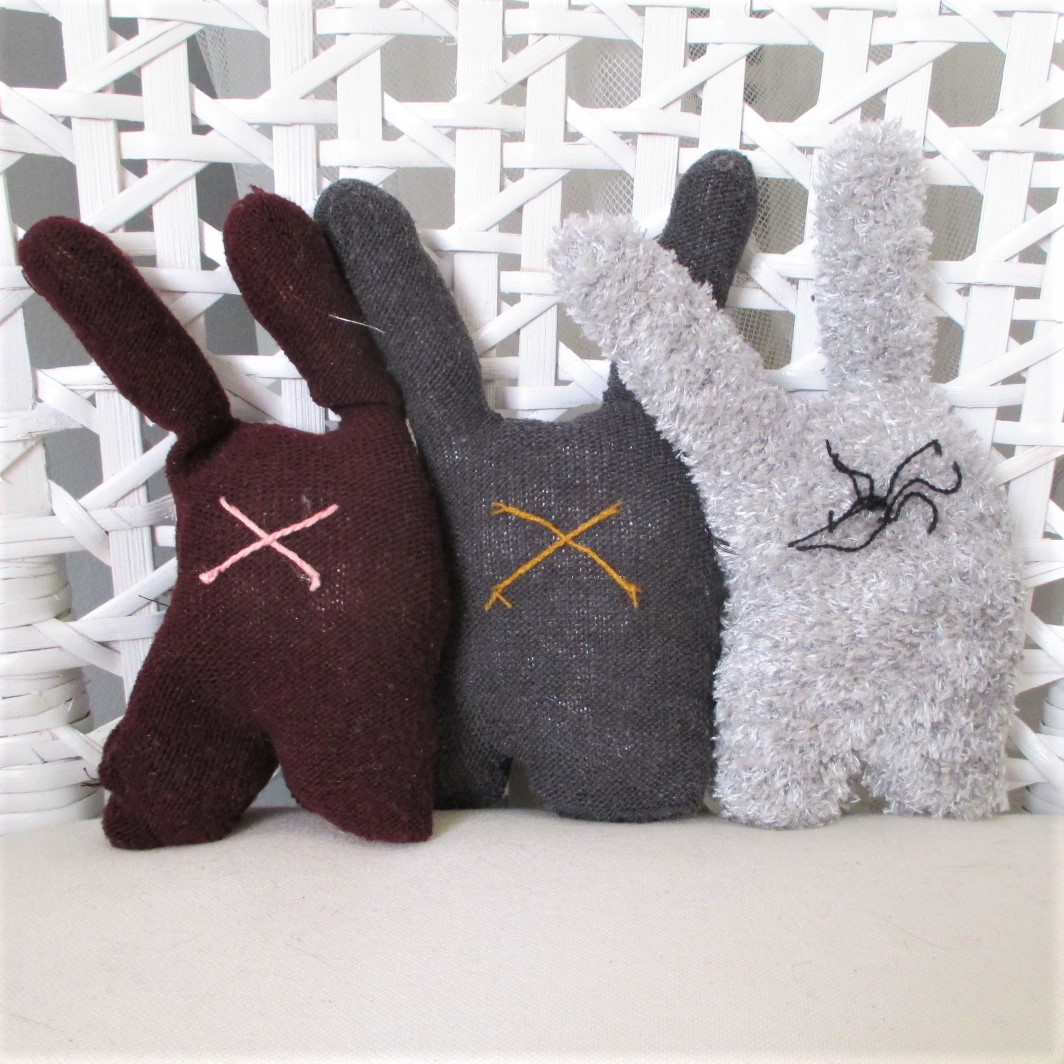
So cute, and handmade looking. Their appeal is the simplicity of the bunnies and the idea to reuse gloves.

What do you think of my Spring DIYs?  Are they fun and easy enough to inspire your projects?  I love being creative and re-inventing materials to make clothes work better for oneself’s life…
MY DIY Halloween Get Up: Katana from Suicide Squad!

This summer when Suicide Squad came out, it crossed over into the Batman universe with characters like Harley Quin and the Joker. The premise of the film was super villains joining forces to complete a mission that could save the world…sounds more pulled together than the film’s execution of the story…but visually it was still a treat.

I am not really into super heroes that much…but the year before I did a simple Tomie costume, a character from a manga series by Junji Ito…so I couldn’t resist making another Japanese inspired costume when I found out there was a Japanese hero in Suicide Squad: Katana!  Forget Harley Quin, one of the most done of female costumes of this year, but the character of Katana; a deadly and strong willed woman of honor who has superior samurai skills was the way to go for me.

Suicide Squad looked great visually, and the costumes had a street vibe interpretation!
Karen fukuhara, an new unknown actress took over the role well.


The back story on Katana is is that she was originally the daughter of a great samurai, who while being trained in the skills of fighting, also won the hearts of two brothers.  They both sought her out, and in the end, she chose the more honest man to marry and have kids with…leaving the rejected brother to be jealous and turn even more evil. There was a dual between the brothers and Katana’s husband was killed by his evil brother, and the children died in the resulting fire.  After she lost her husband and kids, Katana became a force for good, using her magic sword (who still possesses her husband’s soul) to fight evil as a means to cope with her tragic loss.  Katana has worked with Batman, Birds of Prey  and for the movie Suicide Squad she was Rick Flag’s body guard.  Anyways, enough about her back story, let’s take a look at my costume.

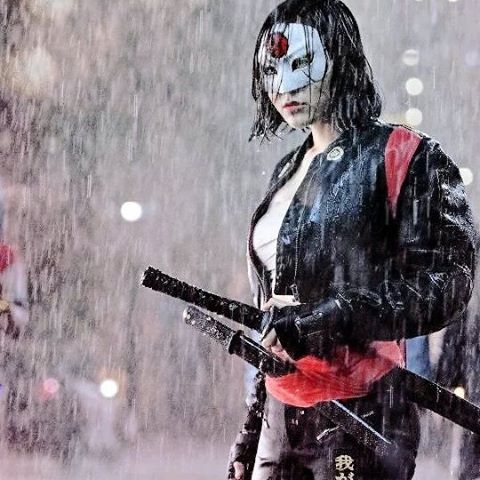
This is my take on Katana from Suicide Squad. Am I menacing?

I made this costume mostly with clothes I already had.  Such as a white tank/top, tight black jeans/pants and a black bomber style jacket. I pinned it in on the bottom to create a cropped effect.  I also already had the sword from a previous costume (Kyo from Black Bird) The only thing I actually bought was the white half mask, the red sash, and gold metallic paint for the flowers.  I painted the red dot on the mask with red nail polish and reshaped and cut the eyes to resemble Katana’s mask more.  Then I painted gold petal shapes on duct tape and then cut them out and stuck them in a flower pattern in the bottom right corner of the jacket. Then I looped the long red scarf around the arms of the jacket and pinned in place.  All in all, this costume only cost me $10 for the scarf, paint, and plain white mask! I had everything else!  But it was really fun getting to be Katana for a day on Halloween.

What DIY costumes have you made in the past that was both cheap and made use of things you had?


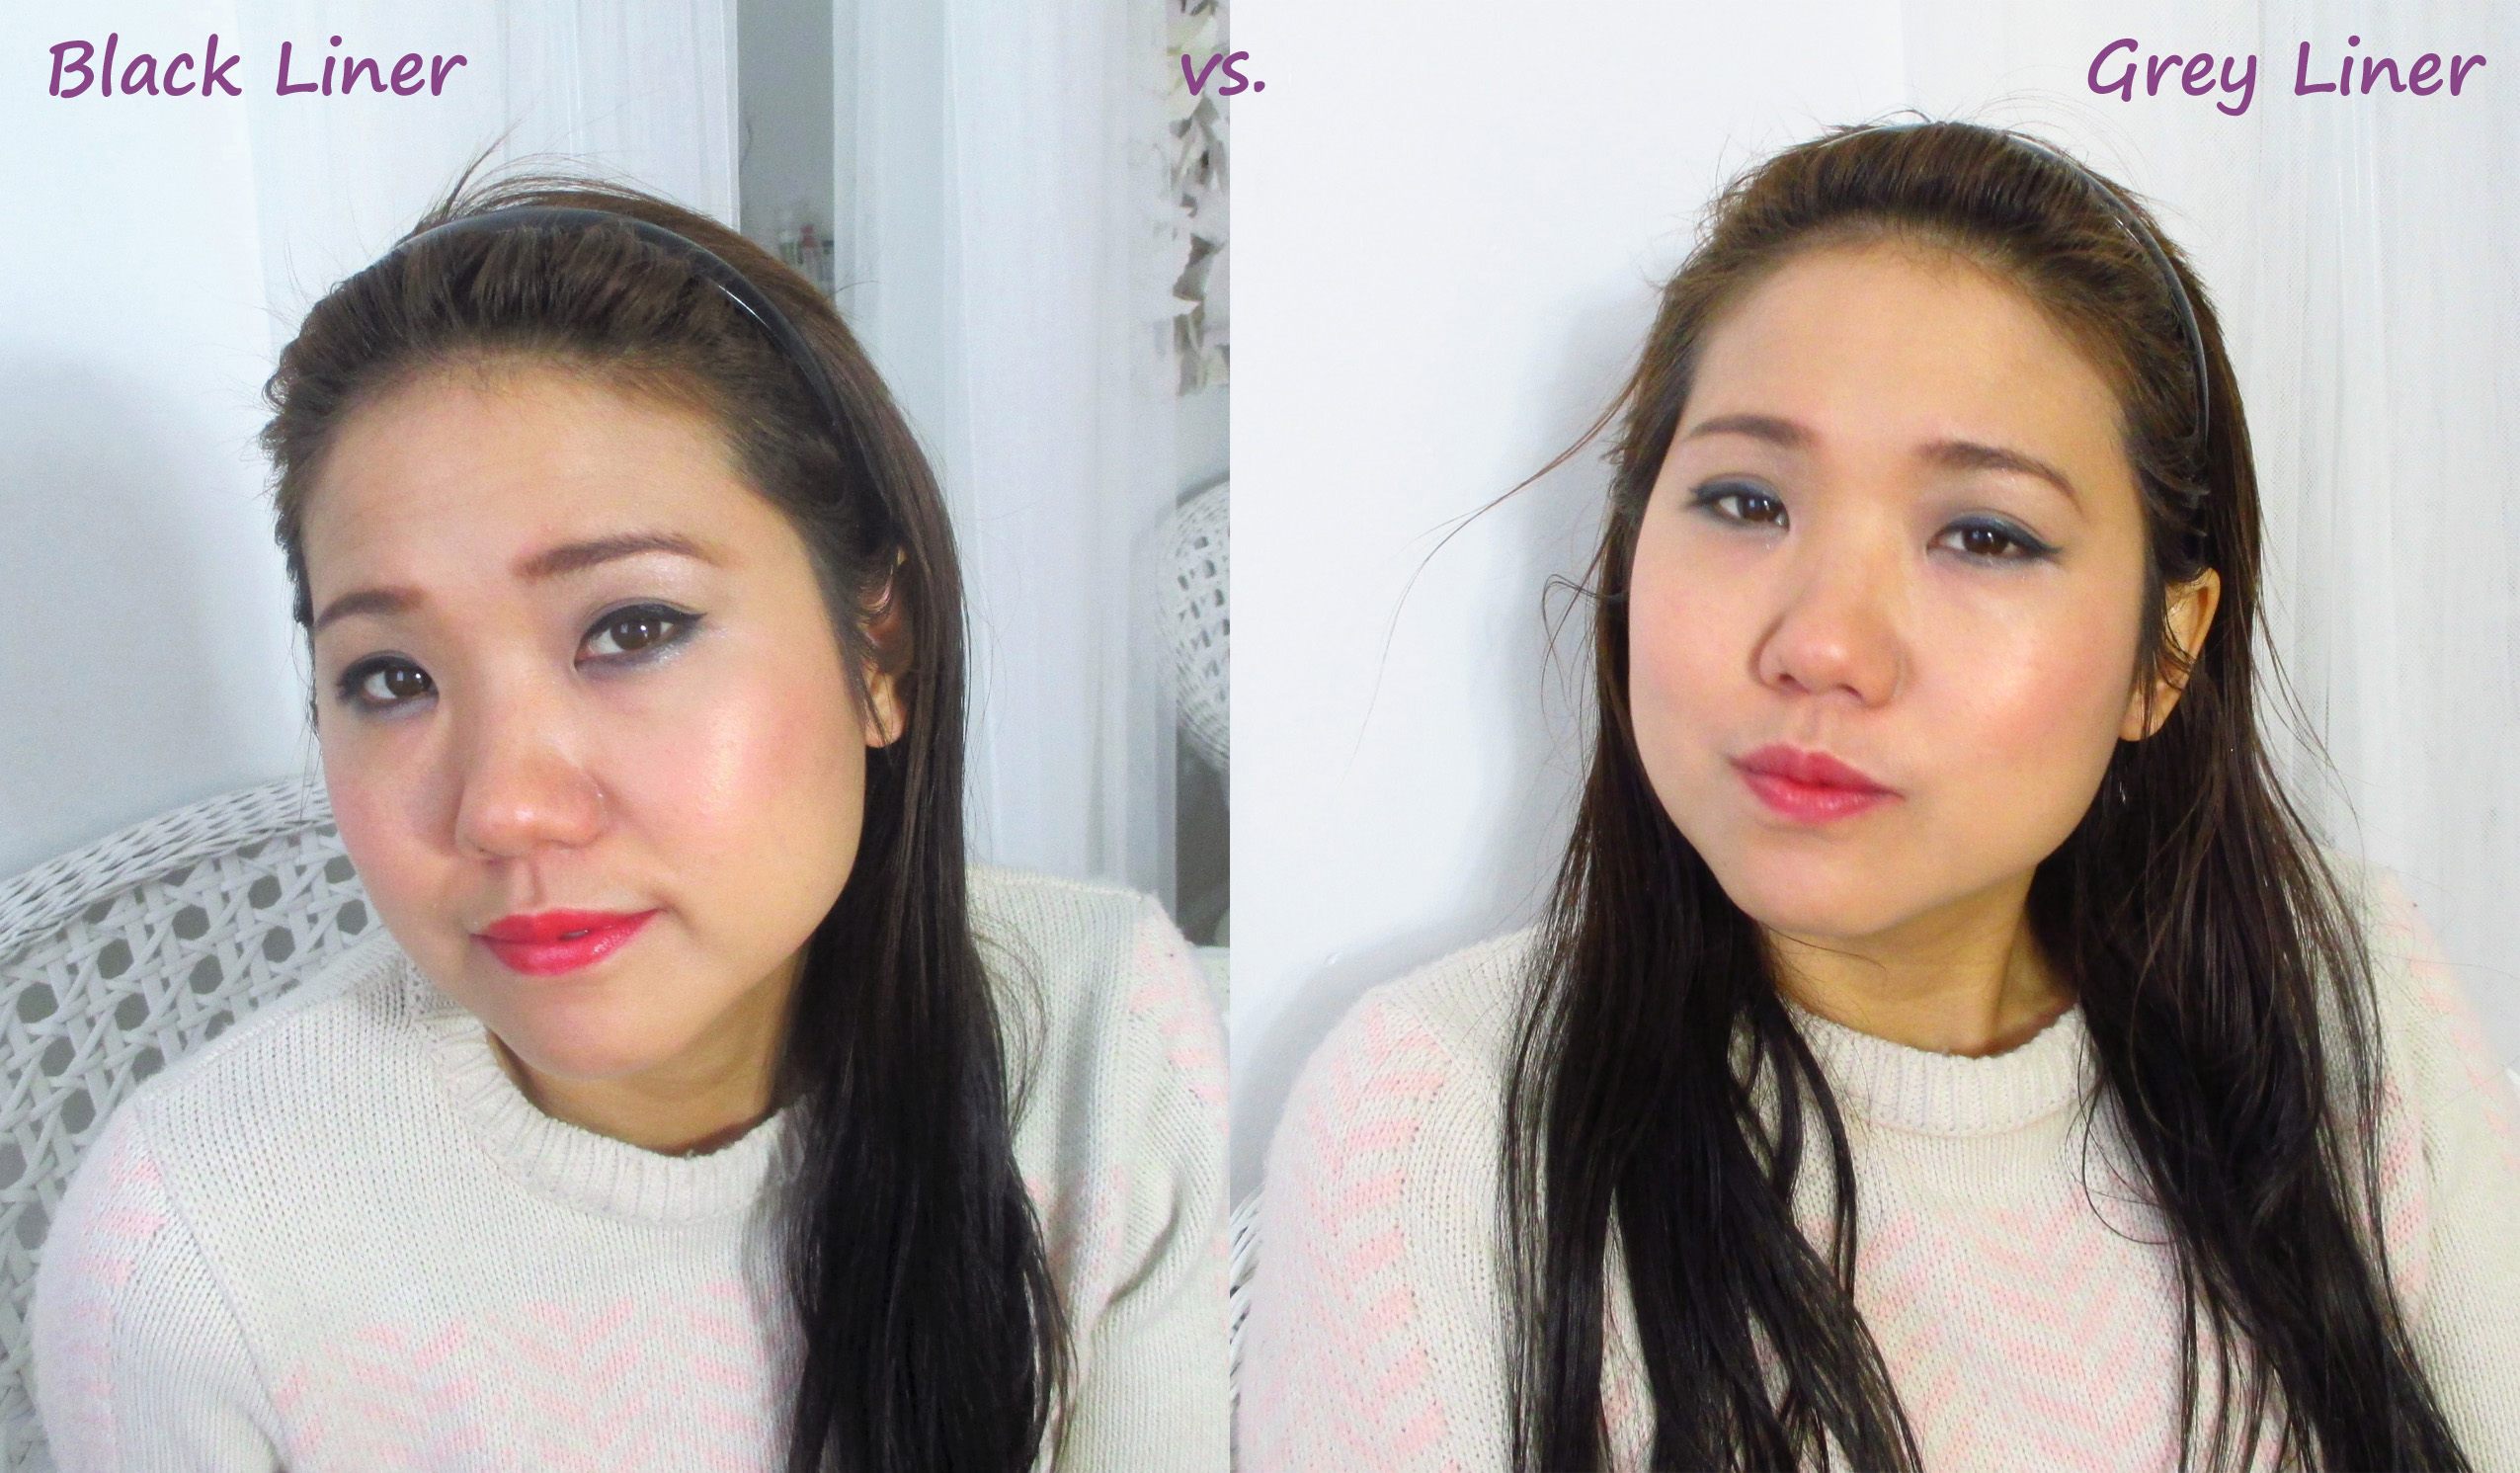
Graphic liquid Liner…can basic black be replaced by grey for everyday?

An inky black marker type liquid liner, verses a brush on liquid grey liner...
An inky black marker type liquid liner, versus a brush on liquid grey liner…

There is no make-up look I’ve seen more worn by women than that of the ubiquitous “cat eye” makeup.  It is usually done in a combination of ways, but always involves liquid liner to produce that hard edge top eyelid line that defines a graphic “cat eye” make-up.  And with a flick up in the corner, any girl can instantly get daily glam without feeling too made up.  When buying liquid liner, by default I always go to black, for some reason and I get it in pen style for ease of use.  Liquid liners with a brush and a bottle go on too black and thick for me and for some reason and I end up looking too hard, but pens can still be really harsh if they are very dark…like the one I use now. My eyes are like daggers lined by black ink.  I accept that black is the fashion… But  I recently discovered that charcoal grey is a great alternative, if you like the polished elegance of the cat-eye, want to still be in vogue, but don’t want to look as stern with super black lined graphic eyes.

So the left photo is black liner and the right photo is grey liner.  All other make-ups are the same.  Can you spot the difference?
So the left photo is black liner and the right photo is grey liner. All other make-ups are the same. Can you spot the difference?

So as you can see with my photos, there is a only subtle difference between black and grey.  But you can see how grey liner is a lot softer, and gentler, it opens up my eyes a bit more and still is a cat eye make-up.  In the black liner photo, I used all the same make-ups as the grey liner photo, but with black, you can see how my eyes are more emphasized and I look harder and edgier.

So which do you prefer?  Hard edgy black, or sweetly composed grey?  These days I’ve been going for charcoal grey liner since I find that sometimes, less darkness on the face can actually be appealing, and maybe even more youthful.  Try it out and let me know what you think.  Make-up and being a girl is all about the details and small things!