DIY recipe for a Slim Down Tea!

I grew up as a girl, so it was hard to avoid seeing all the fads diets, the pills, plans, everything marketed at women to buy into and believe some product that would make you slimmer.  The problem with big business using vanity to dupe us and get an extra buck has always been there. It seems to be a way for companies to grab the last dollar you have at the bottom of your messy purse…As if life wasn’t hard enough with everything to juggle, but we also have to constantly weed out false marketing scams and claims of companies bent on taking advantage of the situation. What a hard sell! But I know we’ve all fallen at least once for any of these product claims.  Wouldn’t it be great to find something that really works, is healthy, simple and DIY?

So recently I concocted something I believe to be the real deal.  All natural, detoxifying and healthy.  I’ve made an awesome tea drink with simple ingredients that can fight the bodily malfunctions that add short term gain to the frame.  Things such as water retention, bloating, gas.  These are huge factors in the difference between having a slim pretty day, and a bloated chubby day.  And I will share this recipe with you, because, you know…we’re friends! 🙂  Best thing of all? It’s caffeine free!

It looks kind of murky, like pond water, it will be a greenish brown! It tastes kinda bitter and spicy, but it works!
It looks kind of murky, like pond water; it is greenish brown in colour! It tastes kinda bitter and spicy, but it works!

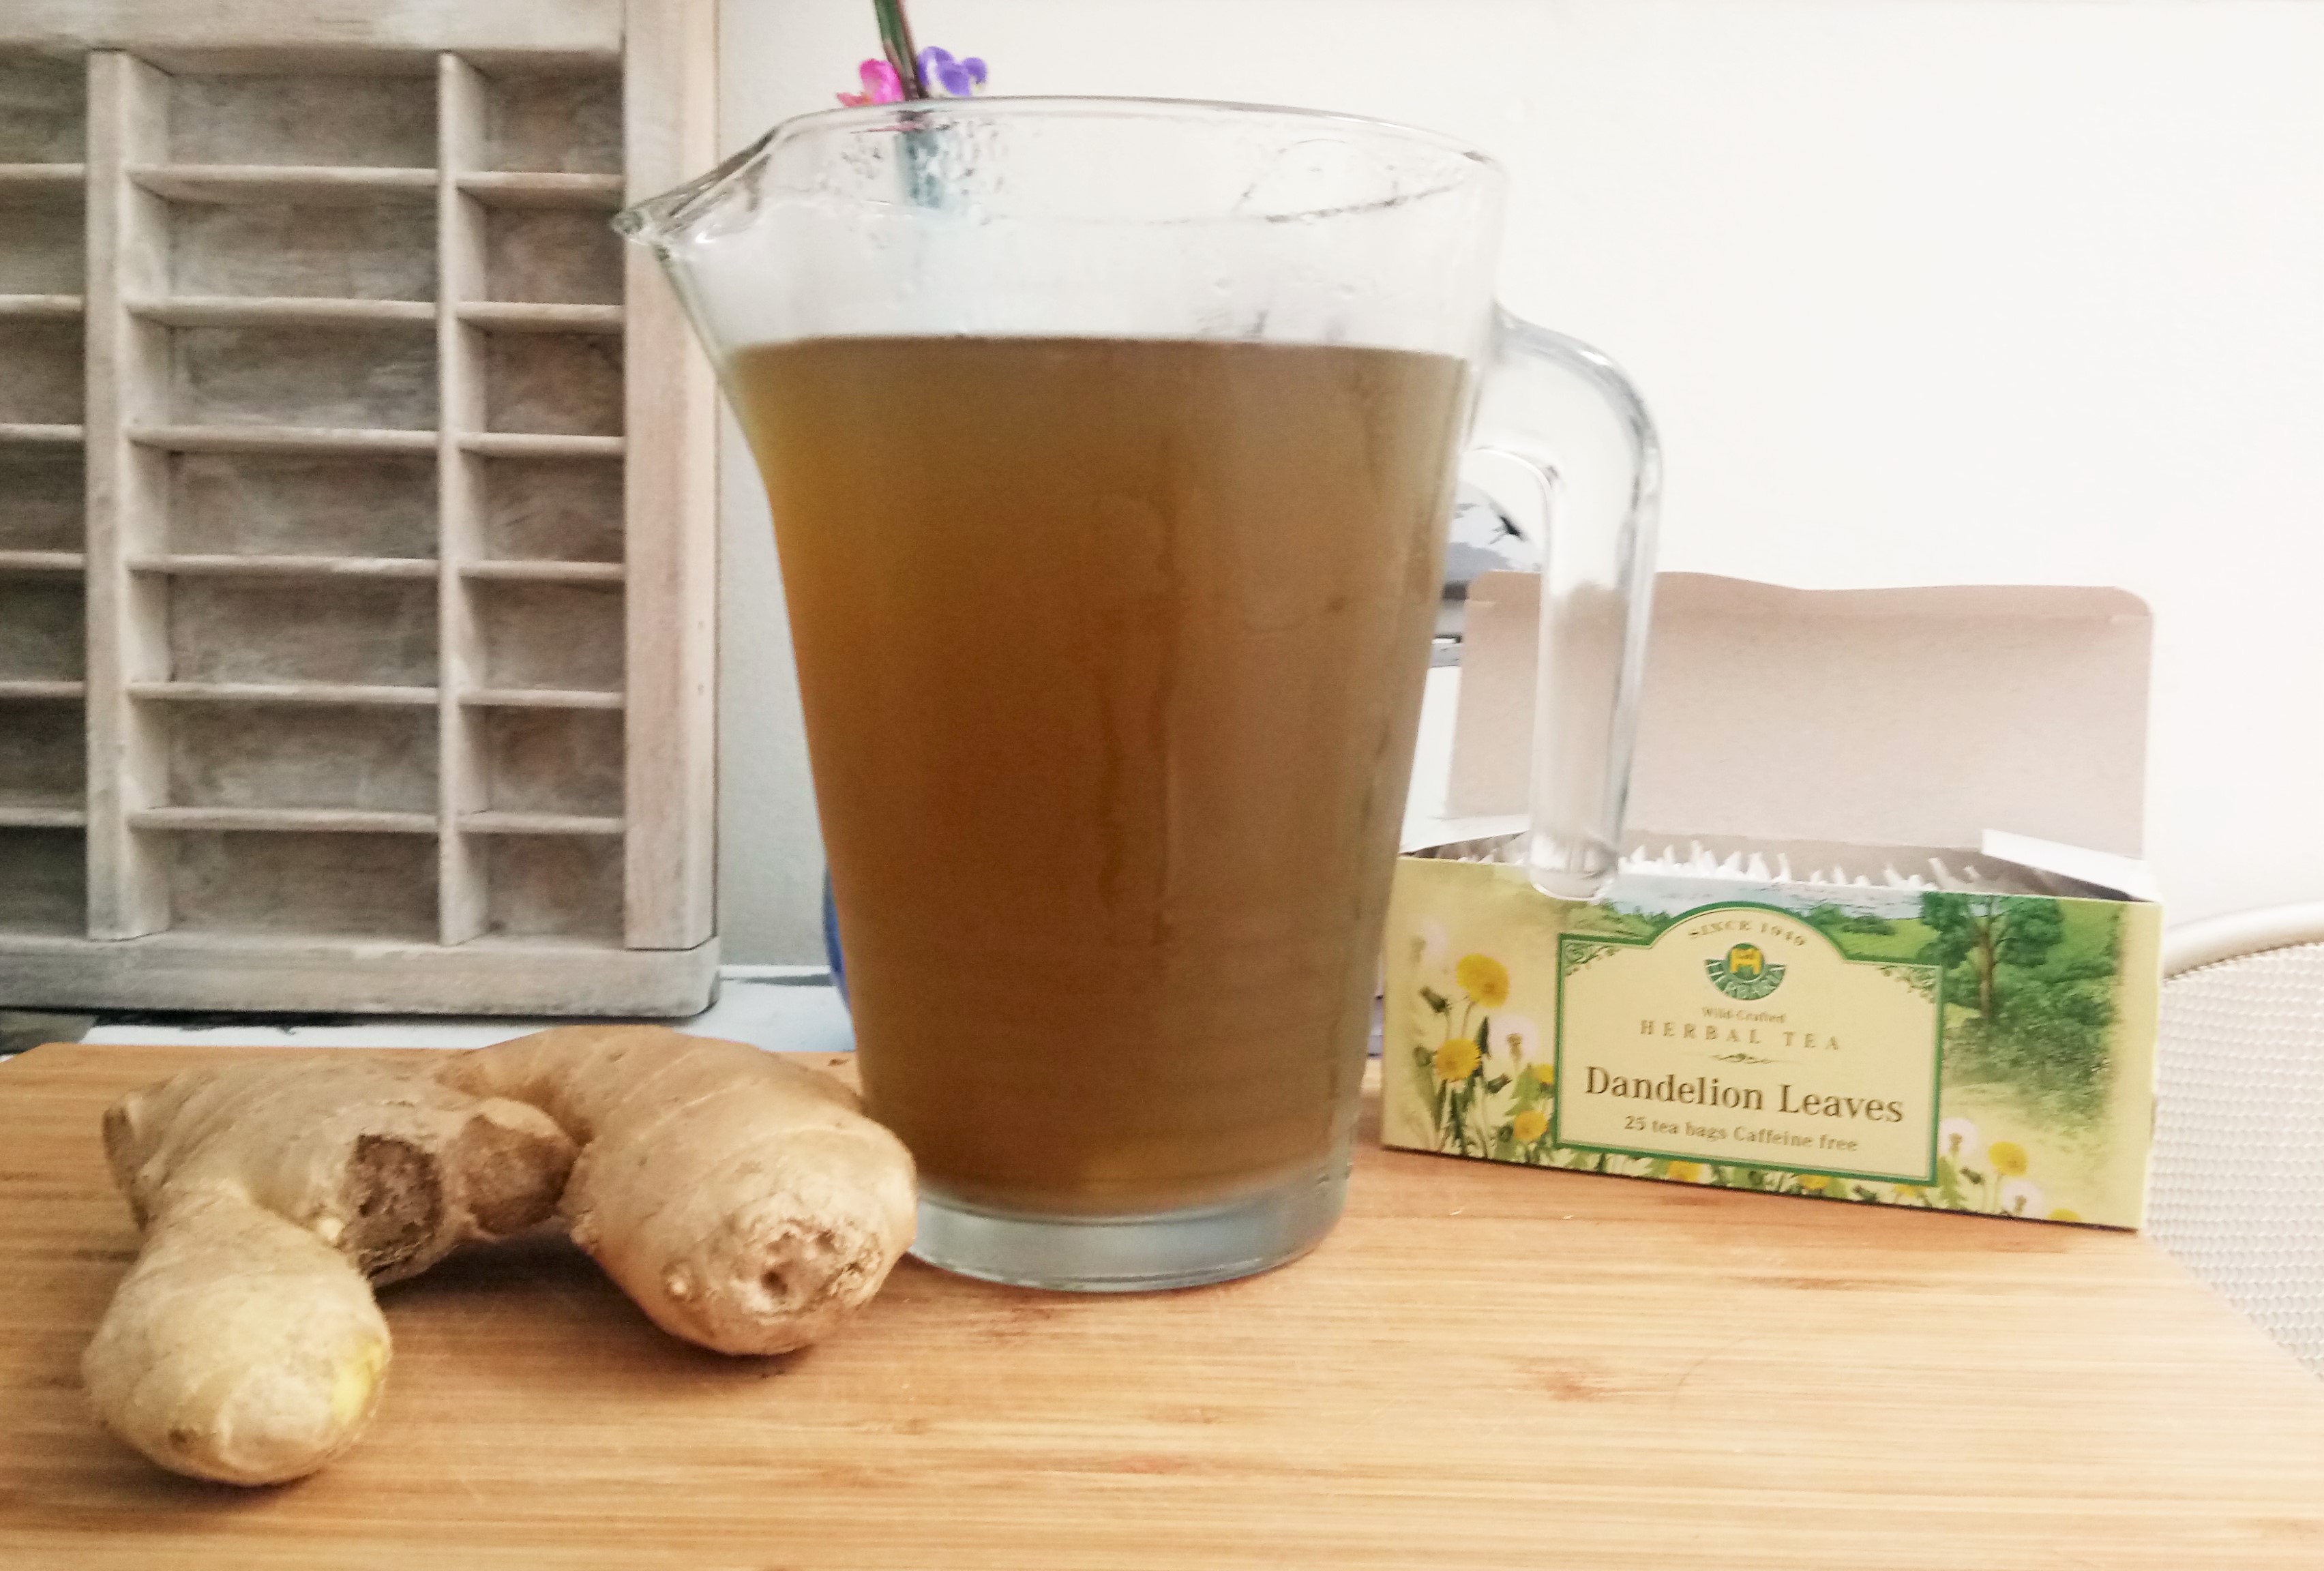
Recipe for my “Slim Down Tea”

  • 1/4 cup of finely sliced ginger root (fresh)
  • 2 bags of herbal dandelion leaf tea (find it at health food stores)
  • 1.5 liters of fresh cold water
  1. Start to boil the water in a a small/medium sauce pan
  2. Slice up a knob of ginger finely. I like to do 1″ long thin slivers of ginger because I think the ginger really releases all its magic into the tea when it is cut finely.
  3. Place the sliced ginger into already turned on pot of water…wait for it to reach rapid boil, then lower the heat to a gentle, but rolling simmer.
  4. Simmer the ginger for 15-20 min. Any longer and it gets kind of bitter and burned, too soon and you don’t have the ginger spiciness in it.
  5. Turn off the heat.  Drop the bags of dandelion leaf tea into it, and cover the pot with a lid, while steeping everything for another 30 mins.
  6. Remove tea bags and strain the tea with a spoon while pouring into a pitcher.  Refrigerate and enjoy for up to 1-3 days!

Why does this concoction work? The reason is because ginger is a soothing cure all to stomach pains and digestion problems.  It can also control bloating to a minimum.  It is also super good for you! Antioxidants!  Dandelion leaf is a natural diuretic and aids in helping your body shed excess water, discouraging water retention and also providing potassium, a mineral which many people lack day to day. Put these two plant powers together and your stomach and body will be thanking you, and you will feel a difference.  I like to take this tea cold, in the afternoon to evening…and also all day before any big event! What tricks do you pull to give you an extra edge against feeling pudgy?

Yummy! I like using this tea all day before an event in the evening.
Yummy! I have a tendency to retain water like crazy, but little tricks help me.

Make your own dry shampoo so you can sleep-in during mornings!

Lazy is good.  It’s great actually.  When it comes to shampooing hair, there is nothing more healthy for your scalp and hair than skipping as many days as you can between shampoos.  The reason is simple.  Shampoos are harsh.  They strip away natural oils, you use a lot of friction to make them lather, and your hair (unlike a pair of distressed jeans), do not look better when they are put through the washer and dryer.  On the other hand, oily strands of hair do not look polished or pretty either.  A solution?  Dry shampoo.  When I use dry shampoo, I can go a up to a week between washing with a regular shampoo.  This is great in two ways:  It is healthier for your hair, and also it saves you plenty of time in the morning because you don’t have to shampoo and condition in the shower, and you don’t have to restyle/shape your hair again. I dust dry shampoo in my hair roots, and it looks as if I had showered and re-curled my hair! A handy and healthy short cut to clean hair.

So this is my hair after a few days without washing.  Kinda gross and oily as you can see.
So this is my hair after a few days without washing. Kinda gross and oily as you can see.

The best part is it really isn’t cheating.  Your hair is actually getting cleaner with the use of a dry shampoo.  The reason is is that oily hair is a magnet for dust and dirt.  When your hair is oily, particles of dirt stick to it, making your hair more “dirty” as each day without a wash passes. Dry shampoo works by soaking up the oil, along with any unwanted dirt, then falling out of your hair.   So technically, a dry shampoo really does “shampoo” your hair and clean it.  It is not a cosmetic effect, it  cleans by absorbing grease and oil and it is not as “gross” as some people may think.

Doesn't my hair look a lot cleaner and better?  It took two minutes with a dusting of dry shampoo.
Doesn’t my hair look a lot cleaner and better? It took two minutes with a dusting of dry shampoo.

How I use my own homemade dry shampoo is simple. On day 3 or 4 I dust in a thin amount of dry powder into the roots to mid shafts of my hair all over.  I actually use a blush brush and dip it into the bowl of dry shampoo and then brush it all over.  I like using a blush brush because there is more control, but you can also use a shaker type container to shake it in.  Then once applied shake and massage your head and hair so it can do it’s magic.   Then simply comb gently.  Thou’st ready to go out now!

Simple recipe for home made dry shampoo:

1 part cornstarch (absorbs oil like crazy)

1 part arrowroot flour (absorbs oil, but is softer in the hair)

1/3 part cocoa powder ( this ingredient is optional for those with darker hair)

Mix and blend all three powders until consistency is smooth and uniform.  I like to add jasmine and rose oil drops to make the shampoo smell amazing!

I keep my dry shampoo in a tin and dust it into my hair with a blush brush.  So easy, and fast too!
I keep my dry shampoo in a tin and dust it into my hair with a blush brush. So easy, and fast too!

I work in the financial district, but I’m still dying my hair purple!

*disclaimer*: This is how I lift and colour my black hair…but everyone’s hair is different and reactions vary.  Before attempting to colour process your own hair, please use precautions like gloves, or sample test hair.  Also, my instructions are for the brands that I use.  Be sure to read the label of your own products for instruction and always consult a professional if in doubt!

I always get people asking me about how I colour my hair to be a such a vibrant colour, (ie. punchy red) without bleaching out my naturally black hair. Most vibrant colour dye such as manic panic, adore…etc will not show up in black hair, not without bleaching out the natural colour first.

I, however, don’t need to bleach because I am not trying to get the bright, or pastel punk colours that “alternative” girls are sporting.  Bleaching is unhealthy for the hair, and because I am modest,  I don’t want all that attention over my hair colour.   Also at my age, it is harder to wear neon bright hair colours because I want a job that is not at a goth store or at piercing/tattoo parlour, no offense to those that have those jobs.  But still, I want to be different. So what I settle for is lightening my hair 2-3 shades to a honey brown colour, and then adding the vibrant colour to that.  That way, I get to stay a brunette, that shines a vibrant colour when my hair hits the light.  This process does not need bleach, but uses high volume peroxide mixed with an ash colour toner that lifts and tones in the same step!  Toning is the KEY.  Toning neutralizes the red/orange tones in dark hair that are in over abundance when one starts lightening hair.  If you’ve ever tried lifting dark hair, you’ve probably been horrified to see that it turns an ugly rusty orange colour when in mid process.  Not pretty at all.  Not only is this orange/red pigment ugly, it interrupts the way we perceive any colour you put on top.  Toner helps mute this effect. I went to art school, so this is how colour works.  Vibrant tones are cancelled out by rusty colours.

This is what you will need to lighten and tone.  Don't forget gloves!
This is what you will need to lighten and tone. Don’t forget gloves!

I do my roots with 40 volume peroxide, which is the strongest I’d recommend, mixed with Wella Colour Charm gel in Ash Blonde.  The ratio is 2:1.  (This combination of gel colourant mixed with peroxide is similar to what you find in the pharmacies prepackaged.  But getting them separately at a barber/beauty supply gives you more control over the performance and quality of the product.  So try not to get those “boxed colours” if possible.  And you save money too.) Then I applied it to my roots.  The dye turned dark blue, which seems odd, but trust me, that is the toning process happening.  In half an hour, I’ll wash off the toner to reveal a beautiful honey brown, almost blonde colour.  Yay, no roots!

Section out hair and apply to those untimely roots!

After shampooing the toner and peroxide out, I skip conditioning and lightly towel dry my hair.  It is important to skip conditioning, because most vibrant colours don’t use peroxide to penetrate the hair, but instead use conditioners to.  Leaving your hair clean and thirsty for conditioning makes vibrant colouring stick better.  The brand that I use is Adore.  I’ve been using a bright pinky red the last few times, so this time I changed it up with a redish purple colour called Violet Gem.  I mix the dye with conditioner to get the right consistency and to stretch it out.  Then I apply it all over my hair.  Since there is no peroxide in the colouring, it actually feels nice going on.  And it smells pretty good too!

IMG_0444
Purple mess! but after you wash it out, it’s worth it!

I leave it in a plastic cap for about an hour, treating it with heat from a hair dryer occasionally to help it set and absorb into the hair.  After an hour or more, I rinse out the Adore colour and am left with a rich burgundy purple colour!

The thing to remember when colouring hair is that your hair dictates how the results will end up.  Adore’s violet gem colour is actually a very mid toned purple colour.  But I noticed that my hair has a lot of trouble absorbing blues and purples into the strand, even after processing with toner.  Sometimes, to get the results you want, you may have to experiment…and some colours turn out better than others.  My first trial of using Violet Gem disappointed me because it was not as intense as I wanted and washed out quickly…so I repeated the step of using Violet Gem colourant on shampooed hair again the next day with a less diluted, more concentrated colour and got better results!  Always be willing to experiment when trying things at home…and redo if nessesary!

yay, I'm a purple haired goddess now!
yay, I’m a purple haired goddess now!