Make your own dry shampoo so you can sleep-in during mornings!

Lazy is good.  It’s great actually.  When it comes to shampooing hair, there is nothing more healthy for your scalp and hair than skipping as many days as you can between shampoos.  The reason is simple.  Shampoos are harsh.  They strip away natural oils, you use a lot of friction to make them lather, and your hair (unlike a pair of distressed jeans), do not look better when they are put through the washer and dryer.  On the other hand, oily strands of hair do not look polished or pretty either.  A solution?  Dry shampoo.  When I use dry shampoo, I can go a up to a week between washing with a regular shampoo.  This is great in two ways:  It is healthier for your hair, and also it saves you plenty of time in the morning because you don’t have to shampoo and condition in the shower, and you don’t have to restyle/shape your hair again. I dust dry shampoo in my hair roots, and it looks as if I had showered and re-curled my hair! A handy and healthy short cut to clean hair.

So this is my hair after a few days without washing.  Kinda gross and oily as you can see.
So this is my hair after a few days without washing. Kinda gross and oily as you can see.

The best part is it really isn’t cheating.  Your hair is actually getting cleaner with the use of a dry shampoo.  The reason is is that oily hair is a magnet for dust and dirt.  When your hair is oily, particles of dirt stick to it, making your hair more “dirty” as each day without a wash passes. Dry shampoo works by soaking up the oil, along with any unwanted dirt, then falling out of your hair.   So technically, a dry shampoo really does “shampoo” your hair and clean it.  It is not a cosmetic effect, it  cleans by absorbing grease and oil and it is not as “gross” as some people may think.

Doesn't my hair look a lot cleaner and better?  It took two minutes with a dusting of dry shampoo.
Doesn’t my hair look a lot cleaner and better? It took two minutes with a dusting of dry shampoo.

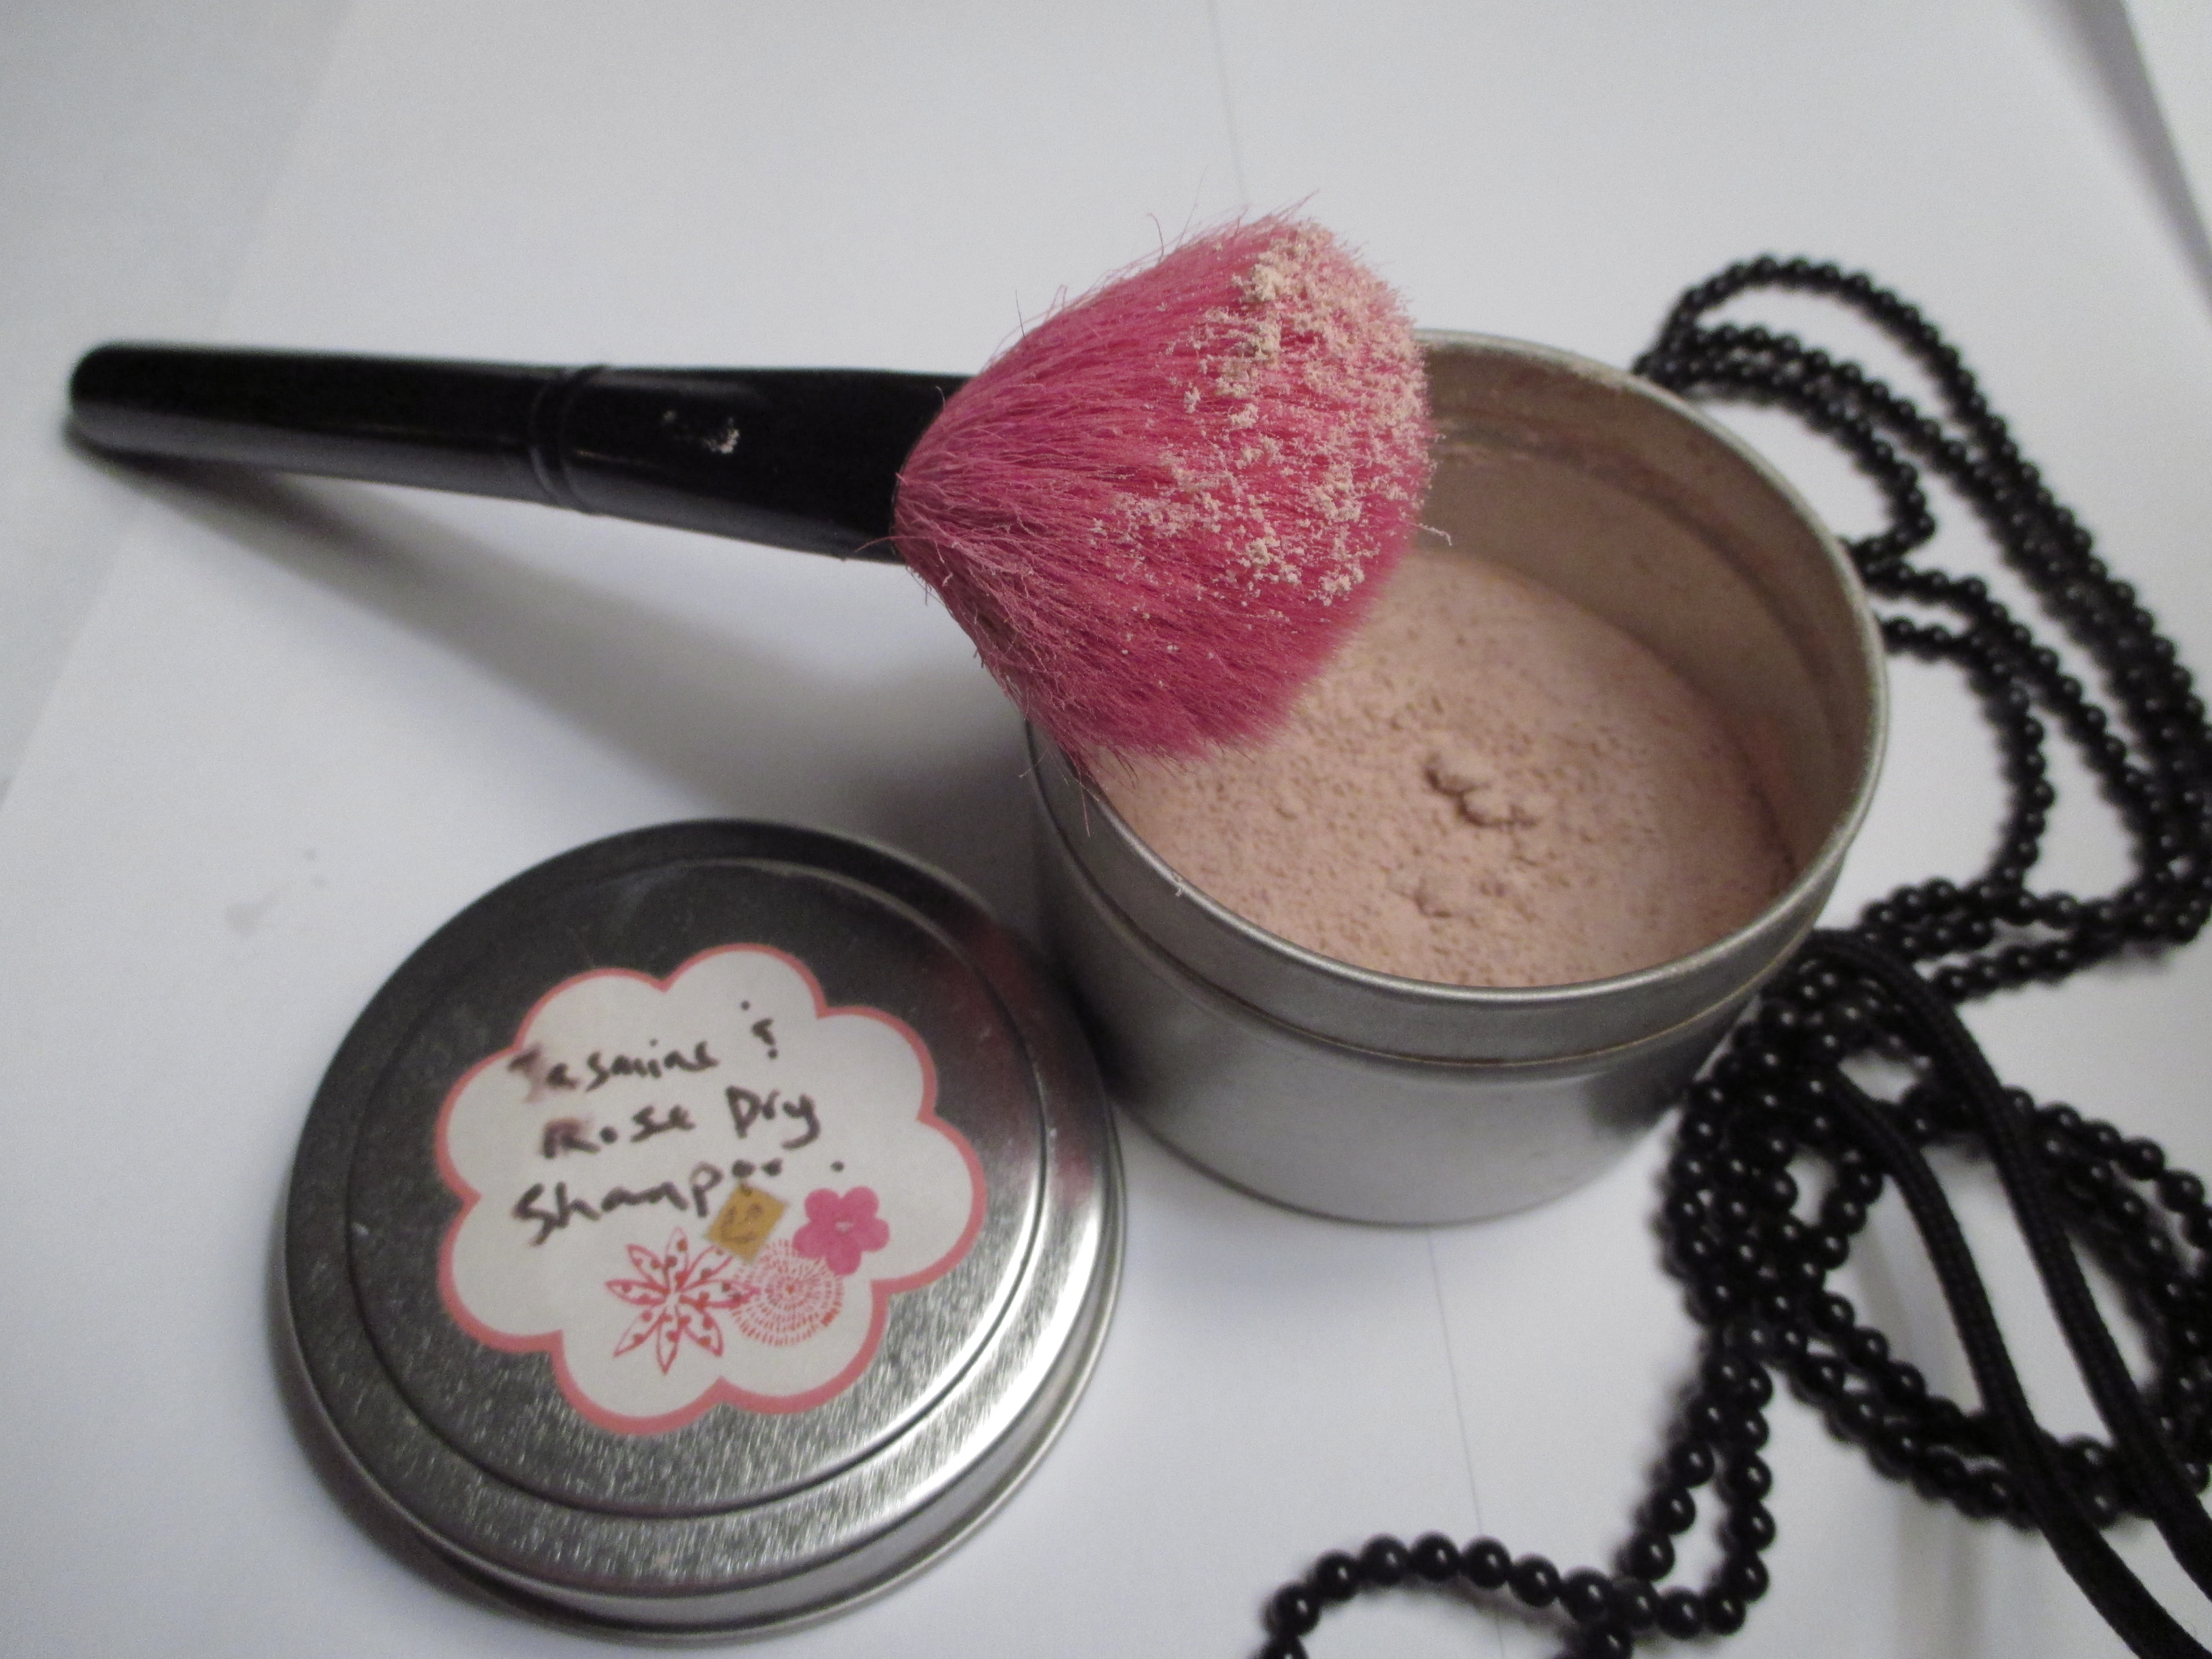
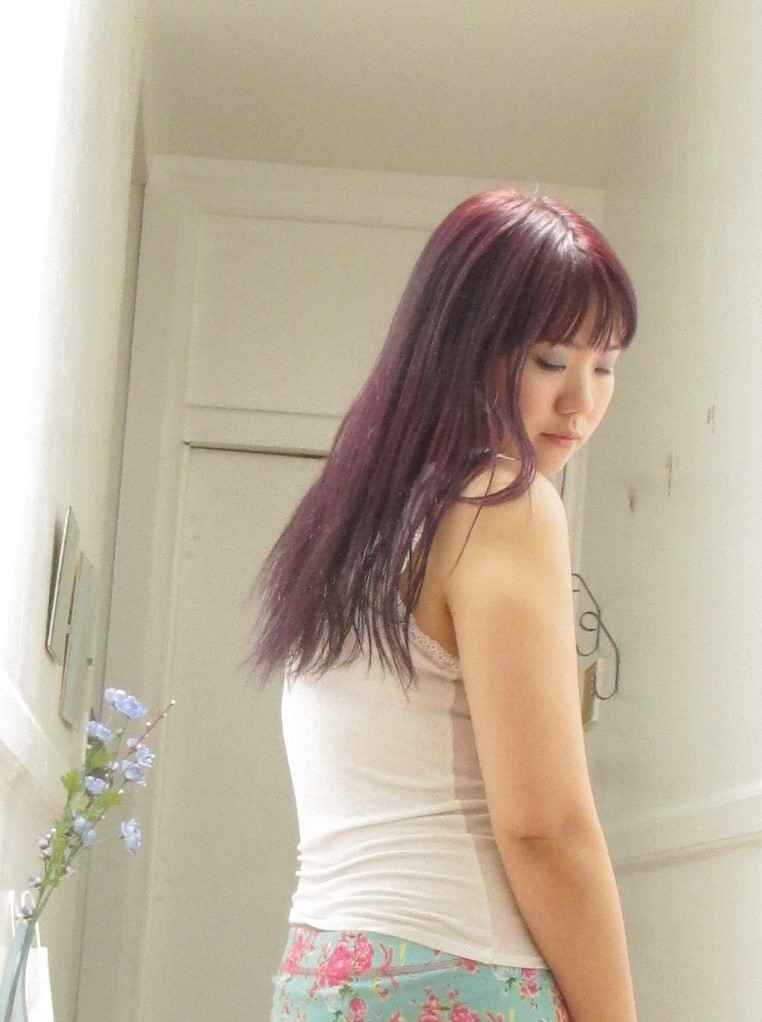
How I use my own homemade dry shampoo is simple. On day 3 or 4 I dust in a thin amount of dry powder into the roots to mid shafts of my hair all over.  I actually use a blush brush and dip it into the bowl of dry shampoo and then brush it all over.  I like using a blush brush because there is more control, but you can also use a shaker type container to shake it in.  Then once applied shake and massage your head and hair so it can do it’s magic.   Then simply comb gently.  Thou’st ready to go out now!

Simple recipe for home made dry shampoo:

1 part cornstarch (absorbs oil like crazy)

1 part arrowroot flour (absorbs oil, but is softer in the hair)

1/3 part cocoa powder ( this ingredient is optional for those with darker hair)

Mix and blend all three powders until consistency is smooth and uniform.  I like to add jasmine and rose oil drops to make the shampoo smell amazing!

I keep my dry shampoo in a tin and dust it into my hair with a blush brush.  So easy, and fast too!
I keep my dry shampoo in a tin and dust it into my hair with a blush brush. So easy, and fast too!

How I got my hair to grow past that stopping point…

If you’re like me, growing really long hair these days is not a small feat.  It is terribly difficult. However, occasionally I see ladies with extremely long and healthy hair, no breakage, with full hair all the way to the ends, and I don’t know how they did it.  Because my own hair seemed to be stuck just below shoulder length for so many years, I thought that it was at its maximum growth length, and that the hair actually stopped growing then.  This puzzled me, because my roots would keep growing, and I would re-colour them often, but the ends of my hair were always feathery and thin, and hit the same spot below the shoulders.  I finally thought to myself, it had to be something else happening, because hair doesn’t stop growing.  And even though I couldn’t really see it happening, it had to be that the ends were self trimming themselves by breaking off when I wasn’t looking.  And that was why I constantly had to wait a year for a centimeter of growth!  One visit to an over enthusiastic hair dresser, and any length I had gained would be gone, and my hair would get even shorter.  It doesn’t help that my hair is naturally super dry, it makes aged hair ends very brittle, and break off.

I didn't really like my hair length six months ago.  I started using a wide tooth comb then to see if it would help it grow thicker and longer...especially on the ends...
My hair isn’t really that short in this photo, but this was my stopping point.  It would never grow past below the shoulders!

Not that there is anything wrong with short, or medium lengths.  I’d really love to try a wavy, layered bob one day, but not until I conquer some super long locks and defy what I thought was my stopping length.  There is just something romantic and overly feminine about long, wild unruly hair.  Another reason I’m not cutting my hair short is because if I ever get married again, my bridal hair-do has to be super long for drama, and to show it’s something I worked for…and trust me, growing hair is a lot of work. (a metaphor for getting engaged and a successful marriage, perhaps? Nah.)

Tips for bettering/helping hair growth!

1. SATIN.  Okay, so I’ve always loved my luxurious-feeling satin bed sheets that I got from Urban Outfitters on sale years ago.  But I love them even more now, since I read somewhere that rubbing your hair on cotton sheets while you sleep can cause breakage.  If you don’t have satin pillowcases and sheets, I heard that a silk scarf on your pillow case works just as well.  Sounds a little crazy, but who knows, it might work.

2.  Get yourself a wide toothed comb.  I was using all these thick hair brushes, with rough bristles for the longest time, and seeing huge amount of hair collected in the brushes after I comb.  Common sense spoke to me that a big part of my hair growth was being thwarted by dense brushes.  I now comb gingerly over knots and kinks with my wide-toothed comb that is low tech, and wonderful.  It only cost me a dollar at the local barber supply.

3.   Condition like CRAZY.  Go further than using a conditioner labeled for “dry hair” by adding coconut oil and honey to the conditioner to amp it up.  I wrote an article about this once, so click here if you want some inspiration on that topic. Also use a leave-in conditioner/oil.  I love, love to use organic coconut oil.  Softens your hair so much and smells heavenly…apply to the ends and midshaft daily to discourage breakage.

4. You have to BABY YOUR HAIR.  Don’t do anything to it that may make it stressed out.  No teasing, no hairspray, nothing that causes tangles.  No harsh chemical treatments such as bleaching or perming.  Braid it or put it in a bun, if it is bothering you, so that it stays protected and out of your way.  Limit the shampooing you do to it.  Invest in a good dry shampoo, or better yet make and use your own dry shampoo.  The less your rub it, the better.  Don’t tug on it, and just treat it well.  And in 3 months you should notice a difference in fullness and length, I really did.

Here I am showing off the length of my hair.  It grew about two inches in six months.  That is with trims occasionally so it's actually good!
Here I am showing off the length of my hair. It grew about two inches in six months. That is with trims occasionally so it did grow a lot! 🙂


I work in the financial district, but I’m still dying my hair purple!

*disclaimer*: This is how I lift and colour my black hair…but everyone’s hair is different and reactions vary.  Before attempting to colour process your own hair, please use precautions like gloves, or sample test hair.  Also, my instructions are for the brands that I use.  Be sure to read the label of your own products for instruction and always consult a professional if in doubt!

I always get people asking me about how I colour my hair to be a such a vibrant colour, (ie. punchy red) without bleaching out my naturally black hair. Most vibrant colour dye such as manic panic, adore…etc will not show up in black hair, not without bleaching out the natural colour first.

I, however, don’t need to bleach because I am not trying to get the bright, or pastel punk colours that “alternative” girls are sporting.  Bleaching is unhealthy for the hair, and because I am modest,  I don’t want all that attention over my hair colour.   Also at my age, it is harder to wear neon bright hair colours because I want a job that is not at a goth store or at piercing/tattoo parlour, no offense to those that have those jobs.  But still, I want to be different. So what I settle for is lightening my hair 2-3 shades to a honey brown colour, and then adding the vibrant colour to that.  That way, I get to stay a brunette, that shines a vibrant colour when my hair hits the light.  This process does not need bleach, but uses high volume peroxide mixed with an ash colour toner that lifts and tones in the same step!  Toning is the KEY.  Toning neutralizes the red/orange tones in dark hair that are in over abundance when one starts lightening hair.  If you’ve ever tried lifting dark hair, you’ve probably been horrified to see that it turns an ugly rusty orange colour when in mid process.  Not pretty at all.  Not only is this orange/red pigment ugly, it interrupts the way we perceive any colour you put on top.  Toner helps mute this effect. I went to art school, so this is how colour works.  Vibrant tones are cancelled out by rusty colours.

This is what you will need to lighten and tone.  Don't forget gloves!
This is what you will need to lighten and tone. Don’t forget gloves!

I do my roots with 40 volume peroxide, which is the strongest I’d recommend, mixed with Wella Colour Charm gel in Ash Blonde.  The ratio is 2:1.  (This combination of gel colourant mixed with peroxide is similar to what you find in the pharmacies prepackaged.  But getting them separately at a barber/beauty supply gives you more control over the performance and quality of the product.  So try not to get those “boxed colours” if possible.  And you save money too.) Then I applied it to my roots.  The dye turned dark blue, which seems odd, but trust me, that is the toning process happening.  In half an hour, I’ll wash off the toner to reveal a beautiful honey brown, almost blonde colour.  Yay, no roots!

Section out hair and apply to those untimely roots!

After shampooing the toner and peroxide out, I skip conditioning and lightly towel dry my hair.  It is important to skip conditioning, because most vibrant colours don’t use peroxide to penetrate the hair, but instead use conditioners to.  Leaving your hair clean and thirsty for conditioning makes vibrant colouring stick better.  The brand that I use is Adore.  I’ve been using a bright pinky red the last few times, so this time I changed it up with a redish purple colour called Violet Gem.  I mix the dye with conditioner to get the right consistency and to stretch it out.  Then I apply it all over my hair.  Since there is no peroxide in the colouring, it actually feels nice going on.  And it smells pretty good too!

IMG_0444
Purple mess! but after you wash it out, it’s worth it!

I leave it in a plastic cap for about an hour, treating it with heat from a hair dryer occasionally to help it set and absorb into the hair.  After an hour or more, I rinse out the Adore colour and am left with a rich burgundy purple colour!

The thing to remember when colouring hair is that your hair dictates how the results will end up.  Adore’s violet gem colour is actually a very mid toned purple colour.  But I noticed that my hair has a lot of trouble absorbing blues and purples into the strand, even after processing with toner.  Sometimes, to get the results you want, you may have to experiment…and some colours turn out better than others.  My first trial of using Violet Gem disappointed me because it was not as intense as I wanted and washed out quickly…so I repeated the step of using Violet Gem colourant on shampooed hair again the next day with a less diluted, more concentrated colour and got better results!  Always be willing to experiment when trying things at home…and redo if nessesary!

yay, I'm a purple haired goddess now!
yay, I’m a purple haired goddess now!