My current Hair Color: “Bronde” and how to get it…

(**Disclaimer! I’m not a hair professional, but have just done my research and worked with my own hair to get results I’m happy with. But whenever dying your own hair at home, please follow manufacturer’s directions and consult with a professional when possible or in doubt)

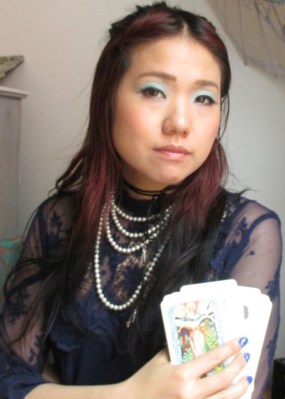
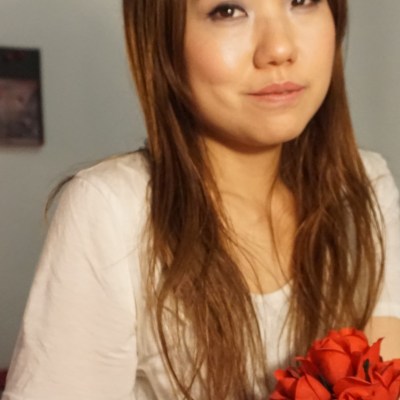
As you all know…I’ve been lightening and coloring my hair since late last year, in an attempt to get a lighter color that is neither brassy, or too harsh/dark for my complexion. Check out my articles on hair coloring and soap capping. And recently I’ve been rocking a hair color that I found out was called “bronde”; too light to be a solid brunette, and too dark to be a blonde. Kind of a caramel color in between two opposites. A nice neither region that I would like to reside in for the next little while. Why? It’s not as high maintenance as a light blonde, and it’s not as brassy as that rust color dark hairs get when they lift too little color. It’s just peachy. Check out this Vogue article about this hair color to get some inspiration. But for how, here are some famous “brondes”:

Jessica Alba: at the tonight show with just the perfect balance of light and dark caramels and soft, bouncy waves.
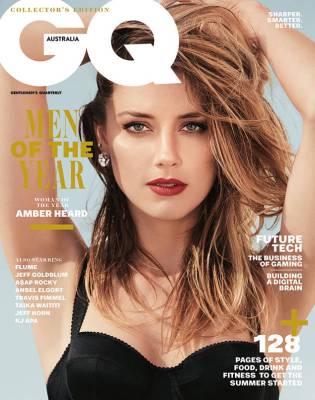
Amber Heard on GQ? As a darker blonde than she normally is, I think she’s got a lot more mystery and allure…
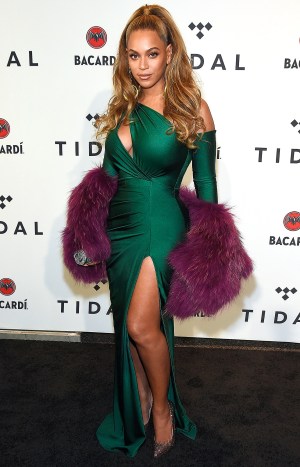
Beyonce is Bey-youtiful with a hair colour that compliments and warms her complexion. 

Okay, so you get the idea…how the color should look, but now how to achieve this neutral tone, middle level “bronde”color…Go to an expert hair stylist who does great hair color, or try it at home with these tips!**

For Brunettes want to go Bronde:

Step 1: Lighten enough: Believe it or not, us brunettes (black or brown hair) have to lift a level or two above middle lightness to achieve ‘bronde”. It’s not fair, but it’s just the way it is. For those doing this at home, you need to get to a level 7 lightness, at least. Check out swatches on how light a 7 level is.

Step 2. Tone/Glaze: This is so important as it adds the finishing shine and touches to a lighter hair color. Lightening dark hair always brings out warmth. And warmth is the enemy when trying to achieve a gentle tone in hair. Use a demi permanent hair dye with a low peroxide developer to add ash (blue/green) pigment to your strands. Use a lighter level than your hair is. So as a level 7, get a level 8/9 ash tone color. Toning with an dedicated hair “toner” only works for hair that has been lifted past a level 8.

A bit on the warm side, but I will be toning/glazing with a demi in the next week or so.

For blondes wanting to go darker to Bronde:

I’m not the most experienced in this matter, since I am a brunette, but here’s what I do know:

  • Use a demi-permanent hair color, since you are depositing only and not lifting levels. It’s gentler and from what I hear, shinier!
  • Stay away from ash tones. Ash upsets the darkening process by getting too dark/green too fast and then you’re stuck with it.
  • Always use a demi color one or two levels lighter than you want to achieve. So if I were a light blonde, I would do a 7 or 8 with warm/golden tones to get to caramel. Depending on the intensity of bronde you want, diluting the hair color formula with a clear gloss demi would be smart for avoiding over saturation and it looking flat and fake whenever dying darker.

Hope these tips help for all that want this hair color. I find it suits all skin tones and ages and just looks really healthy. Try it today.

**DISCLAIMER: all advice I give is based on my own personal experience with hair color. I’m not a professional hair stylist, so use my advice with a bit of caution and never hesitate to consult to a professional! Thanks!


Spring DIY: 4 ways to uniquely transform your T-shirts

Yay. It’s spring. So…ya…but it’s still cold here in Toronto. *sigh. In anticipation of warmer days, I wanted to keep busy with a few t-shirt DIY’s to get me through the last of the cold gloomy winter, as these days summer only feels far away…but it’s coming! And a great summer basic is the T-Shirt, and knowing that distressed cut up tees are still in, why buy when I can DIY? What I love about transforming these clothings is that it’s super easy, no sewing and wearing them just has got a crafty cool, edgy vibe to them. And when I saw Forever 21 recently had a buy 1 get 1 free sale on all sale items, I wanted to take advantage. Buying really cheap sale clothes to cut up makes sense, since the sale stuff are often pretty boring, they are left over stock after all…and asking for transformation via distressing/cutting! Here are the 4 shirts/shifts that I bought from there and will be cutting up:

My “buy 1 get 1” haul from Forever 21. Let’s start cutting and distressing!
  1. Long Beige T-shirt dress with cuffed sleeves:

For this DIY, I wanted to use this shirt as a sleep shirt, long and comfy, no shorts or pants needed to lounge in around the house! But with the thick cuffed sleeves it was not that comfy, or cool looking. So first I cut out the cuffs, for an unfinished sleeve look, and then, cut vertical slits 1 cm wide in the front upper portion and got this:

I like it a lot more now. It’s airy with the slits and so comfy to sleep in. Long enough to wear without sleep pants and not be scandalous!

2. Black tank dress with lace trim:

This dress had all kinds of wrong things going on. It was a thick stiff cotton shift material, the lace trim was too long and not delicate, and the way it hung on me originally was just not flattering. After cutting it up, and doing a “bow tie” tee cut up on the the back, I liked the way it hung a lot more, and it looks more like a party dress now, don’t you think?

“Bow tie” cut up at the back consists of two horizontal cuts and then cinching the material together with another frabric. Super easy and shows off the back…

3. Plain White tee with Pink Trim

I loved the open neck line and soft material of this tee even before I DIYed it. But this tee was still a bit on the boring side, and the big side. I figured that a back weave and side weavings might make it smaller if not more interesting. If you really like this look, it’s easy to find instructions on line on how to do it. It’s actually as easy as braiding hair.

I thought the back/side view of this tee was more interesting, but I did keep the pink collar v-neck trim more visible from the front.

4. Super plain blue pocket tee:

So this t-shirt reminded me of a shirt that an artist/painter might wear in her studio. Loose, flowy, and distressed beyond recognition. But as a new tee, this  shirt wasn’t going to tell that story. So, after sandpapering holes, cutting holes and just destroying the colour of the shirt with bleach, I got a more raggedy worn-in look. Now the shirt tells the story that I might be a struggling artist and this shirt has been destroyed since I use it for art making and everything else the imagination will allow. Kind of cool…

Faded, and with tons of holes, this shirt is just asking to be replaced…but loving that worn in, and careless look.

So after 4 T-shirt transformations, I’m not sure which is my favorite look. Do you have a favorite? Just a note about why I didn’t post instructions on how to do these looks; I wanted this article to be more about being inspired to transform your own clothes in easy effortless ways, but not as a tutorial. But I learned all these techniques online via articles and youtube, so just type in “DIY shirt cut up” and you’ll find all you need to do this too! And other tutorials would probably explain it better than me anyways. Happy Spring DIY-ing!

Why the hesitation to use natural/food grade ingredients in cosmetics?

I never really thought of this before. It’s kind of logical to me. In a battle of best cosmetic ingredients between natural and chemical, natural is just better. If I can eat something, like coconut oil, and then also use it on my hair to moisturize, that’s a win win situation…I have always thought that if it is safe to go into our bodies, it is safe to put on our bodies…but I recently found out not everyone thinks this way…There is a point of view that cosmetics should remain a chemical science, and that putting food on ourselves is just well, kinda dirty. Where did I get this idea from? A man working at a hair supply shop told me this, when I mentioned I used a bit of coconut oil for my dry ends. He said the problem with food grade is that it mixes with microbes and such on our bodies and can easily become rancid and/dirty.

Hmm…Dirty? I never realized this point of view before, and while I think the shop guy might be right to some degree, I still think it’s an exaggeration at best. The outsides of our bodies can take a bit of dirt and microbes. Our own bodily oils are teaming with loads of bacteria and such, it’s all over us…adding food grade ingredients does not necessarily add to the microbial community…maybe it would if we never showered…but the average person in North America probably showers at least once a day; not enough time for coconut oil or any food grade oil to become rancid, and thus dangerous to our health. Advocating for chemicals and chemical preservatives to remain the standard for quality hair care, is a bit unfounded. Many of the chemicals in cosmetics are known to be drying, irritating to the skin, cause allergic reactions, and even have traces amounts of carcinogens. Yikes.

The trend to go natural is so strong actually, that many big cosmo companies now say they have squeezed natural ingredients into their formula. I’ve seen so many times the advertising and labeling of big brand products claiming to use honey, botanicals, fruits, natural oils and butters. The ironic thing is the natural inclusions are often very denatured/altered and it’s a very minute amount that’s used. Why moisturize with a vat of silicones and trace amounts of cocoa butter, if cocoa butter is the actual desirable ingredient? I have to toot my own horn when I say I make a solid lotion at Dream E that is a third made of cocoa butter and all natural other ingredients, except for a small amount of fragrances. But 95% natural is better than 1% natural any day in my opinion.

At my local Shoppers Drugmart: look at all these chemical and chemically preserved products! Don’t get me wrong, I still use them sometimes…but if I had a natural alternative, probably not.

I think as a society, the culture is moving away from chemical dependencies as a whole in general. I do feel that people prefer food that hasn’t touched pesticides, and are organically grown without fertilizers…Society seems to want more natural things in bodies, so why not reflect this view when it comes to cosmetics, if possible? Don’t get me wrong I like my chemical stuffs too, I use at least a dozen different chemical make-ups everyday; I wrote an article singing the praises for a superstay lipcolour formula that has the lasting power of car paint enamel! But when I can, I readily choose natural: I remove make-up with coconut oil. I use olive oil to amp up my hair conditioner…Vitamin E capsules used externally for my face at night, sugar face scrub, glycerin setting spray…anything that is food for internal can be also be food for skin or hair…

So here is the food isle at my local drugmart: I have been known to use many food grade items for cosmetic purposes: sugar, honey, yogurt, olive oil, coconut oil, cornstartch…etc. just to name a few…

In the end, I don’t think food grade ingredients at their purest, simplest form can ever be harmful. Think about in the past, before industrialization…people had to resort to what was around them to take care of their skin. Shea butter from the shea nut…is still used for cooking and moisturizing skin in many places of the world, with amazing healthy results…nut shells for exfoliation…cocoa butter, aloe vera…all of these plants derived food ingredients are still widely used on the body externally…and there is no scientific study or test needed to formulate and manufacture then truth that they work well. It just makes sense they do because sometimes Nature knows more about beauty, than chemical Science does.