Mishaps in Home Hair Colouring 101

I like doing things myself, and for the longest time, I used to go to hair dressers to do my haircuts, my colouring…etc. But for the last couple of years I have been doing everything myself.  And I’ve learned so much from this.  It wasn’t easy.  Doing your own hair means making a few mistakes here and there, and taking time to correct it. But don’t fret.  Doing your hair yourself also means you get what you want, and you don’t have to pay hefty fees to stylist that sometimes make mistakes too!  They are professionals, but they are not flawless.

Back to Brown

I recently decided I wanted to go lighter than my natural black again.  I used to rock a dark blonde way back when, but this time around, I decided I wanted to do an ashy light brown instead because it is healthier since it is less levels of lightening.  My hair had grown out at the roots and was virgin black hair to my ears, and below was pre-lightened brownish hair stained with a tinge of purple from when I rocked purple hair.  So here begins my misadventures.  I want to tell you right off the bat that if you have hair that is not uniform in chemical treatments, this is where colouring gets tricky. I mean really tricky.  But still, I am not bowing down to the professionals yet.

So I grab the light ash blond colorant I always use when I used to do a dark blonde. It has a base of dark blue toner, to combat any orange colours in hair that arrive when trying to lighten hair.  I know this time I was aiming for brown, but I still wanted the toning effect to get rid of excess brassiness, so I thought the same colorant can be used, but to get brown, I would just use weaker volume peroxide for less lift.  Okay…so guess what?  I was right about using a weaker peroxide, but wrong about the blonde ash toner in my colorant! It saturated the middle shafts of my hair–the parts of the shaft that were the most porous, and when I washed out the colorant, I had stained the mid sections an ashy green!  I also still had some purple tint on the very ends, and my roots were a warm brown colour, because it was healthy virgin hair that resisted the stain of the ash green. I basically had 3 colours in my hair! Not what I wanted at all.

I don't know if you can see it. Photos are deceiving. But my midshaft is green, my ends are ashy, and my roots/top is overly warm brown!
I don’t know if you can see it. Photos are deceiving. But my midshaft was green, my ends were ashy, and my roots/top was a warm brown!

Trying to fix Tri Coloured Hair!

So not happy, I start researching how to get rid of the greenish part in my hair.  I figured that I could live with a bit of uneven hair colour tones, but just not ashy green.  I heard remedies from bleaching again, to ketchup, to salt!  I decided on using a lemon juice soak to get it out.  After an hour of soaking the bottom half of my hair in a mixture of lemon juice and conditioner, I washed it out to find little to no change.The ash colours were still there.  And I was still unevenly coloured.

After the lemon juice to try and fix the green. I still had a lot of ash to my mid section, and if anything, the lemon juice just lighted everywhere. Still tri-coloured! Yikes.
After the lemon juice: I still had a lot of ash to my mid section, and if anything, the lemon juice just lighted everywhere. Still tri-coloured! Yikes.

Emergency Box Colouring:

I don’t usually use box colour kits from the pharmacy, but waking up to tri-coloured hair was bothering me a lot.  Warm roots, grey/green mid-shaft, and greyish purple tips was driving me mad.  I walked to my corner pharmacy to fix this once and for all! Two boxes of colour kits since my hair is long.  I figured where I had gone wrong was in using a colourant with a ton of toner in it to begin with.  The ash blond colourant was made for people who were aiming for blonde, not brown, so there was no darker colour but bluish toner to fill in areas that I had pre-lightened before, therefore staining it green. The science of hair colour finally hitting me in my face.  Every hair color has a tint of either red/gold/green. But there is also a base colour of different concentration depending on how dark you wanted to go.  Ash blond does not have any base colour. Where as if I wanted brown, I would have to use a brown base especially where I had pre lightened before!  Too complicated for words.  After the redo in a light golden brown colour from the store, the green was finally covered.  But then a new problem presented itself. Dull brown hair!
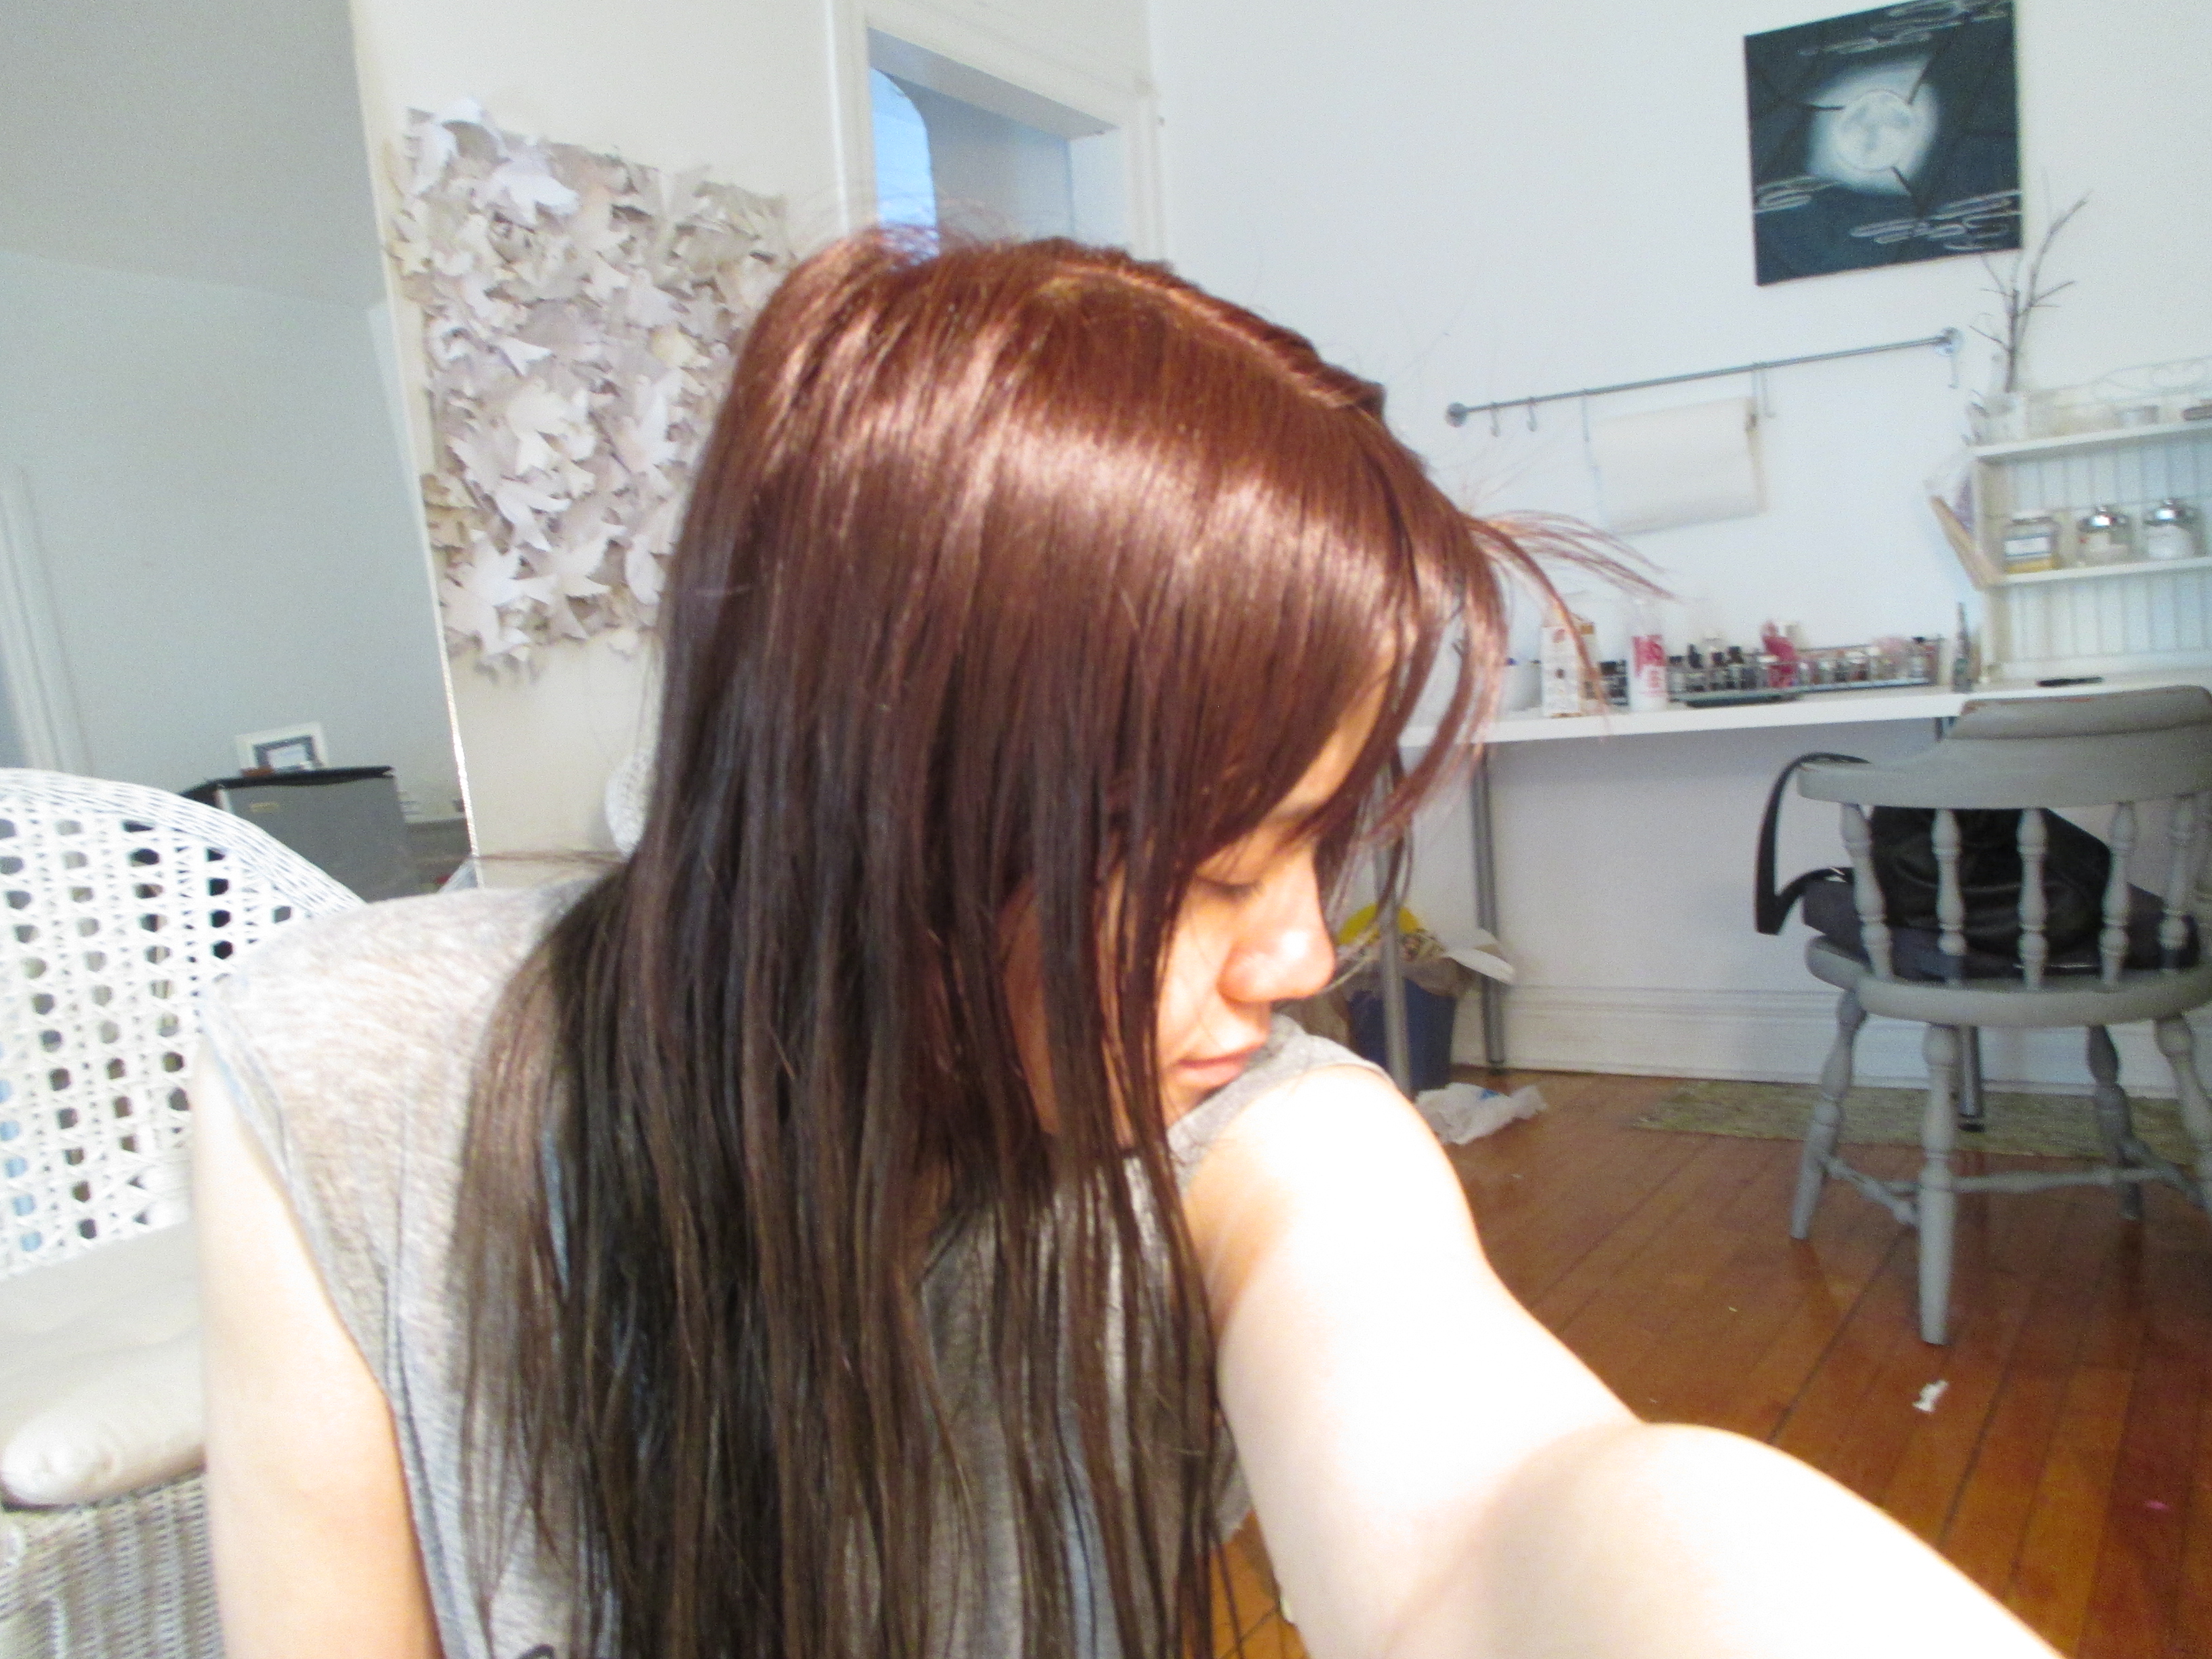
I got rid of the greeny part in the middle, but now the ends were stained by dark colourant, making the colour flat, especially from the bottom half down.
I got rid of the greeny part in the middle, but now the ends were stained darker than the top, making the colour flat. My roots/top was also still warmer than the bottom!

Clarifying to remove the over dye:

I put lemons into my hair again to remove the over-dye.  When hair has over dye in it, the strands are too saturated, they can’t shine because of it and are weighed down.  This is when one can use different remedies and products to remove some of the dye. I used lemons, because I had some, but I think clarifying shampoo works too. After this I shampooed twice.  The result the next day was this:

My ends are still darker, but at least it doesn't look like a different colour in the middle. With more shampooings, I think the colour will lift a bit more to be more even
My ends are still darker, but at least it doesn’t look like a different colour in the middle. With more shampooings, I think the colour will lift a bit more to be more even.

So at the moment I am rocking a slight reverse ombre, which is lighter at the crown, and gradually darker in the ends, which is not the worst thing.  If it really bothers me, in a few weeks, after my hair has rested from all the peroxide, I can always lighten the ends and recolour.  But my main point is still true.  DIY hair colour may require tweaks done over the course of several weeks to give your hair a rest. So no, the professional stylists have not won, but I know now to have a bit more respect for how hard hair colour chemistry can be.
The Babes of Horror Movies: Make-up Inspiration

People who know me, knows that I likes me them horror movies! My boyfriend is stuck with the tedious duty of watching them with me and letting me squeeze his hand and burrow my face into his shoulder all the way through every jump scare, freaky monster, and demonic possession out there in this high energy genre of film that is often underrated artistically. Pulling off what is called a “B movie” takes a lot of talent… And I am grateful for this genre for scaring the bejebers out of me. It makes my life seem less scary…

But did you ever notice that horror is loaded with foxy ladies? Let’s dissect my favourite leading ladies of horror and how to possibly achieve some of their gorgeous, babe-alicious make-up and hair looks:

#4 Ana de Armas in Knock Knock

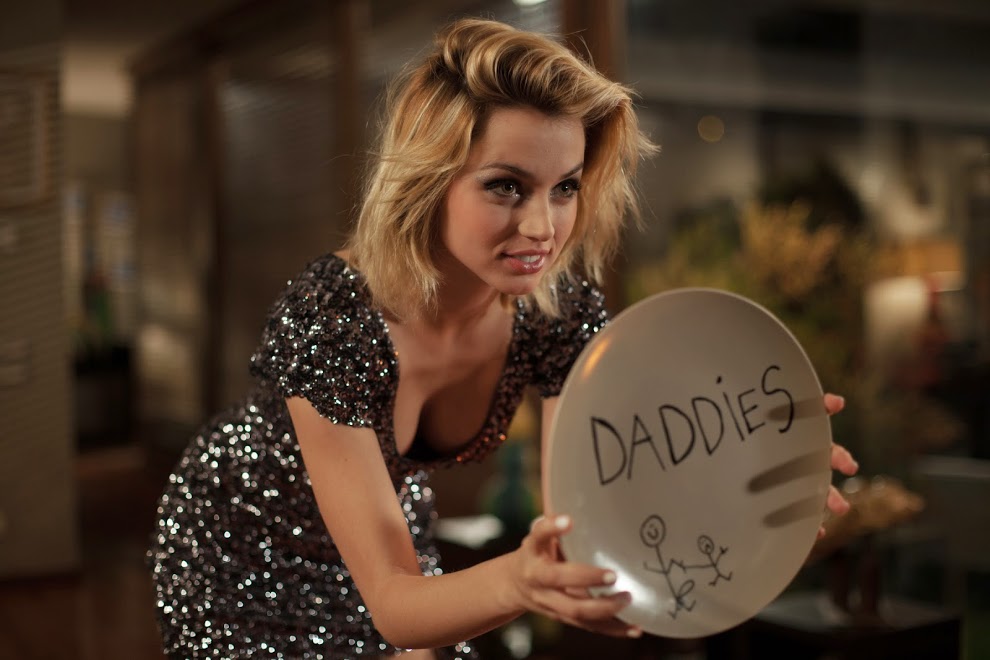
Ana de Armes is a Spanish actress that is just gorgeous, with her big innocent eyes, and cute baby face. Most recently seen in the thriller Knock Knock with Keanu Reeves, I thought she stole the show in her skimpy out fits and cute blondie ways.

Here she is stealing the show in a glamourous sparking body con dress. I love her short blonde hair and black lined eyes.
she looks great with less make-up, more than anything else. Recreate by doing neutral eyes paired with a dark magenta lip.
She looks great with neutral eyes.  Recreate by doing neutral eye shadow,paired with a dark magenta lip. Heavy mascacra and false lashes add drama to already big eyes.

#3 Emma Stone in Zombieland

Emma Stone is known for being a Hollywood glamour queen, but before she made it big, she was in a small little horror comedy called Zombieland.  It was so funny, and so fun, and quite scary at times, I loved this movie.  Emma stone was so cute in it, because she really knew how to rock a darker brunette hairstyle that was both edgy and soft at the same time.

I loved Emma Stone's hair in this movie. The side swept bangs and bouncy wavy hair made her darkly lined eyes that much more feminine!
I loved Emma Stone’s hair in this movie. The side swept bangs and bouncy wavy hair made her edgy black lined eyes that much more feminine!

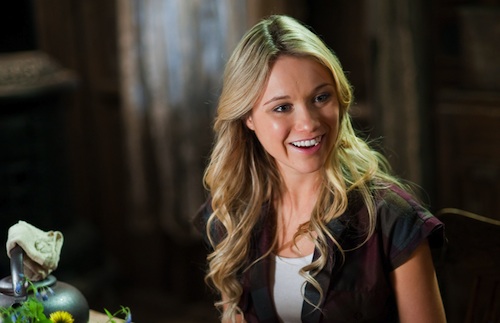
#2 Katrina Bowden in Tucker and Dale Vs. Evil

I loved Katrina’s performance as the damsel in distress and romantic lead in this hilarious horror comedy about college kids going to the backwoods, and learning that hillbillies are not as scary as them preppy young selves.  So funny.  And Katrina was so foxy with her tousled wavy hair, and minimal make up.  I think she is following that trend in South Korea of just rocking really nice dewy skin.

You can't have a B movie without a hot babe of some sort. And Katrina Bowden fits this bill. But her performance was also super funny.
You can’t have a B movie without a hot babe in her knickers. And Katrina Bowden is up to task! But her performance was also super funny.
Nice wavy hair like this can be achieved with a curling iron and rollers. Pair it with little to no make up for Katrina's look.
Nice wavy hair like this can be achieved with a curling iron and rollers. Pair it with little to no make up if you dare for Katrina’s look.

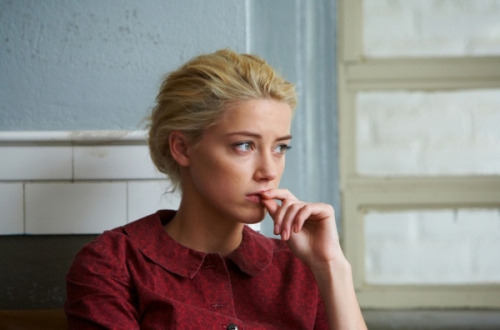
#1 Amber Heard in The Ward

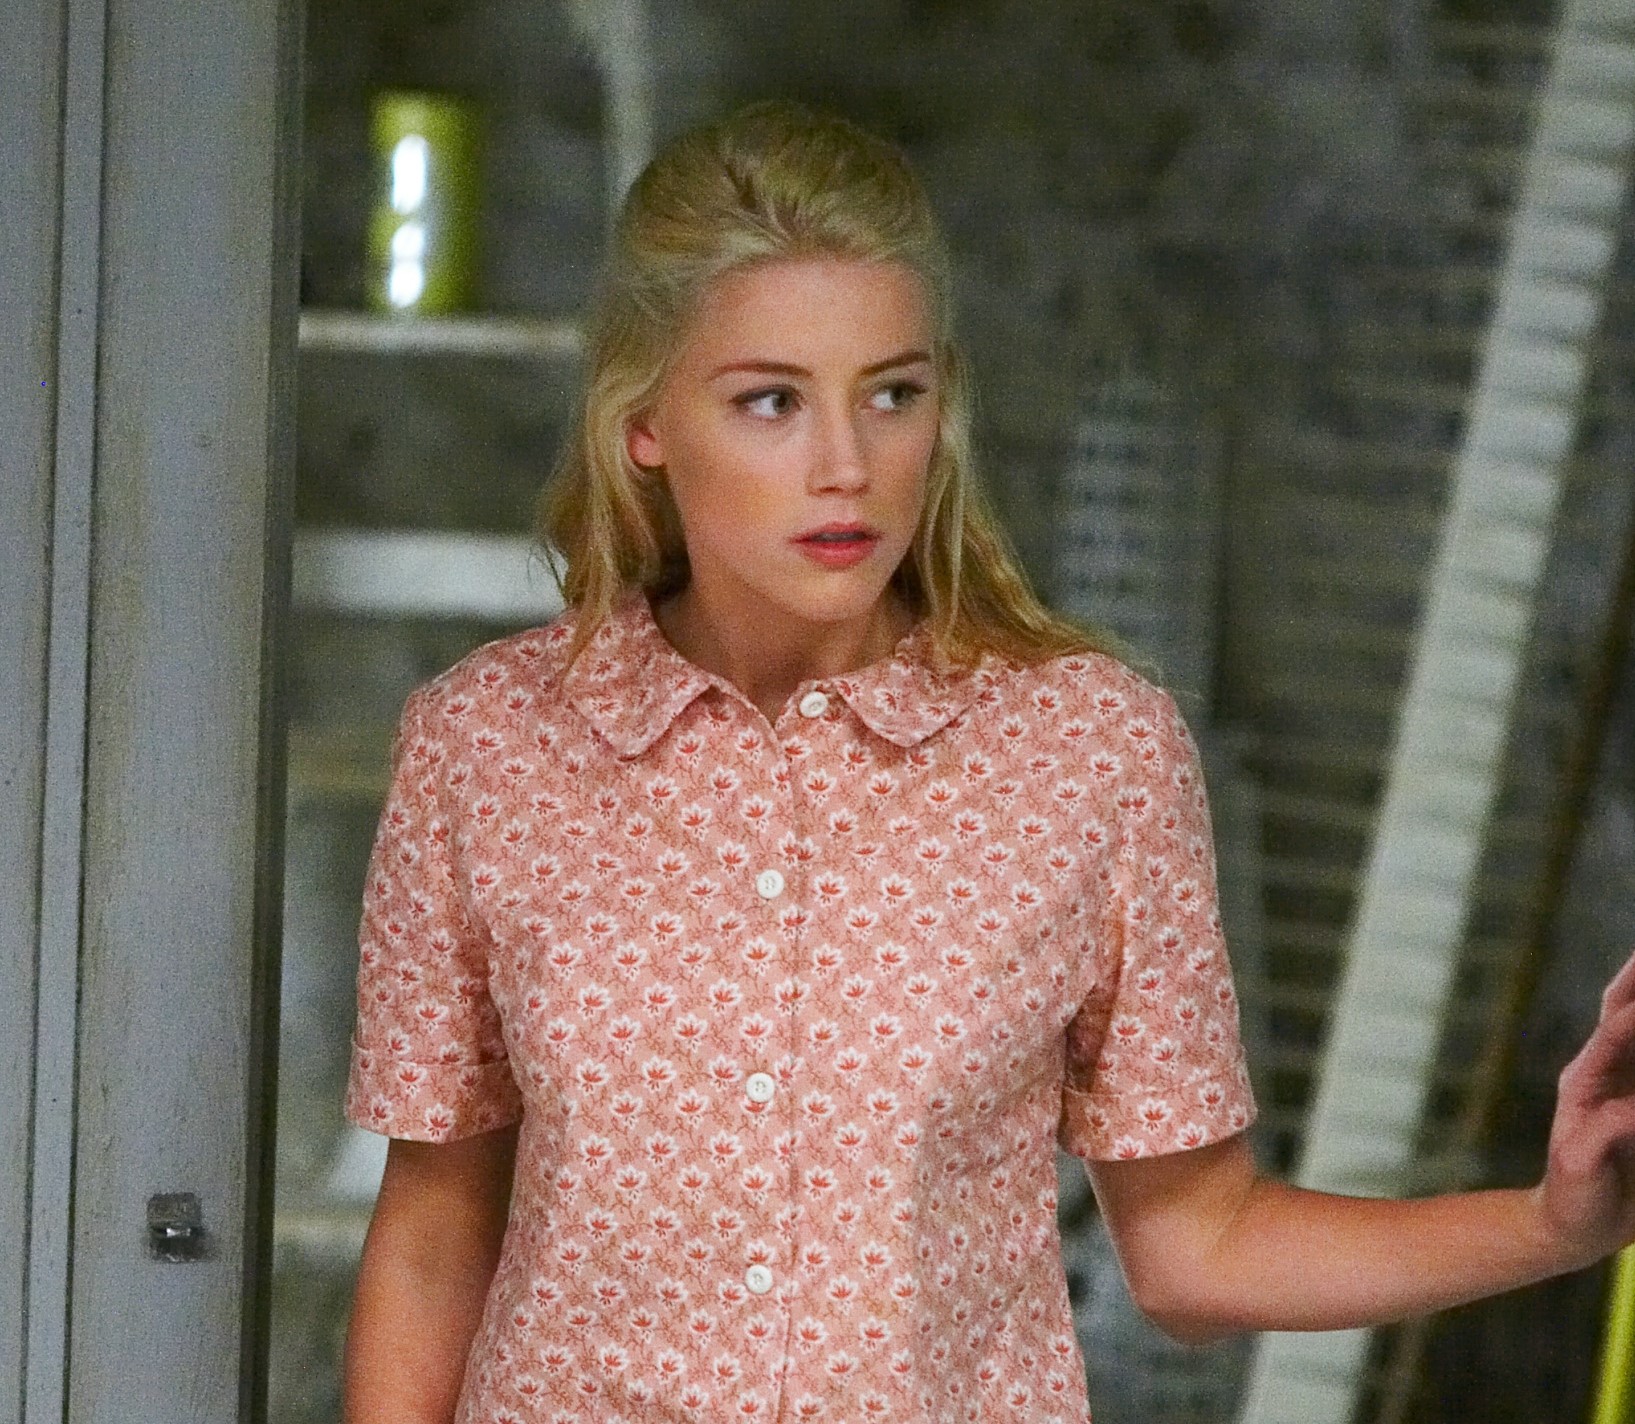
And my number 1 pic has to be Amber Heard who is no stranger to being a siren in horror movies.  She was Mandy Lane in the slasher All the Boys Love Mandy Lane, but I want to focus on her make-up and hair in her lesser known movie The Ward.  This movie has great twists and turns, I do recommend checking it out.  If not for Amber’s strikingly gorgeous look and portrayal of a disheveled young blonde, then for the mysterious intrigue that happens in it, as it is set in a psych ward full of disturb young women.

Amber Heard's character does a lot of worrying in this movie, but look and the simple pastel palette that is used on her eyes and mouth.
Amber Heard’s character does a lot of worrying in this movie, but look at the simple pastel palette that is used on her eyes and mouth, and accentuated eye lashes.  It is a pale, ghostly and drained palette that mirror her state.
It doesn't look like a lot of make-up, but it is. To get this look, you need disheveled hair, dark lined brows, and a neutral lip. I think it is a youthful make-up.
It doesn’t look like a lot of make-up, but it is. To get this look, you need disheveled hair, dark lined brows, and a neutral lip. I think it is a youthful looking make-up.
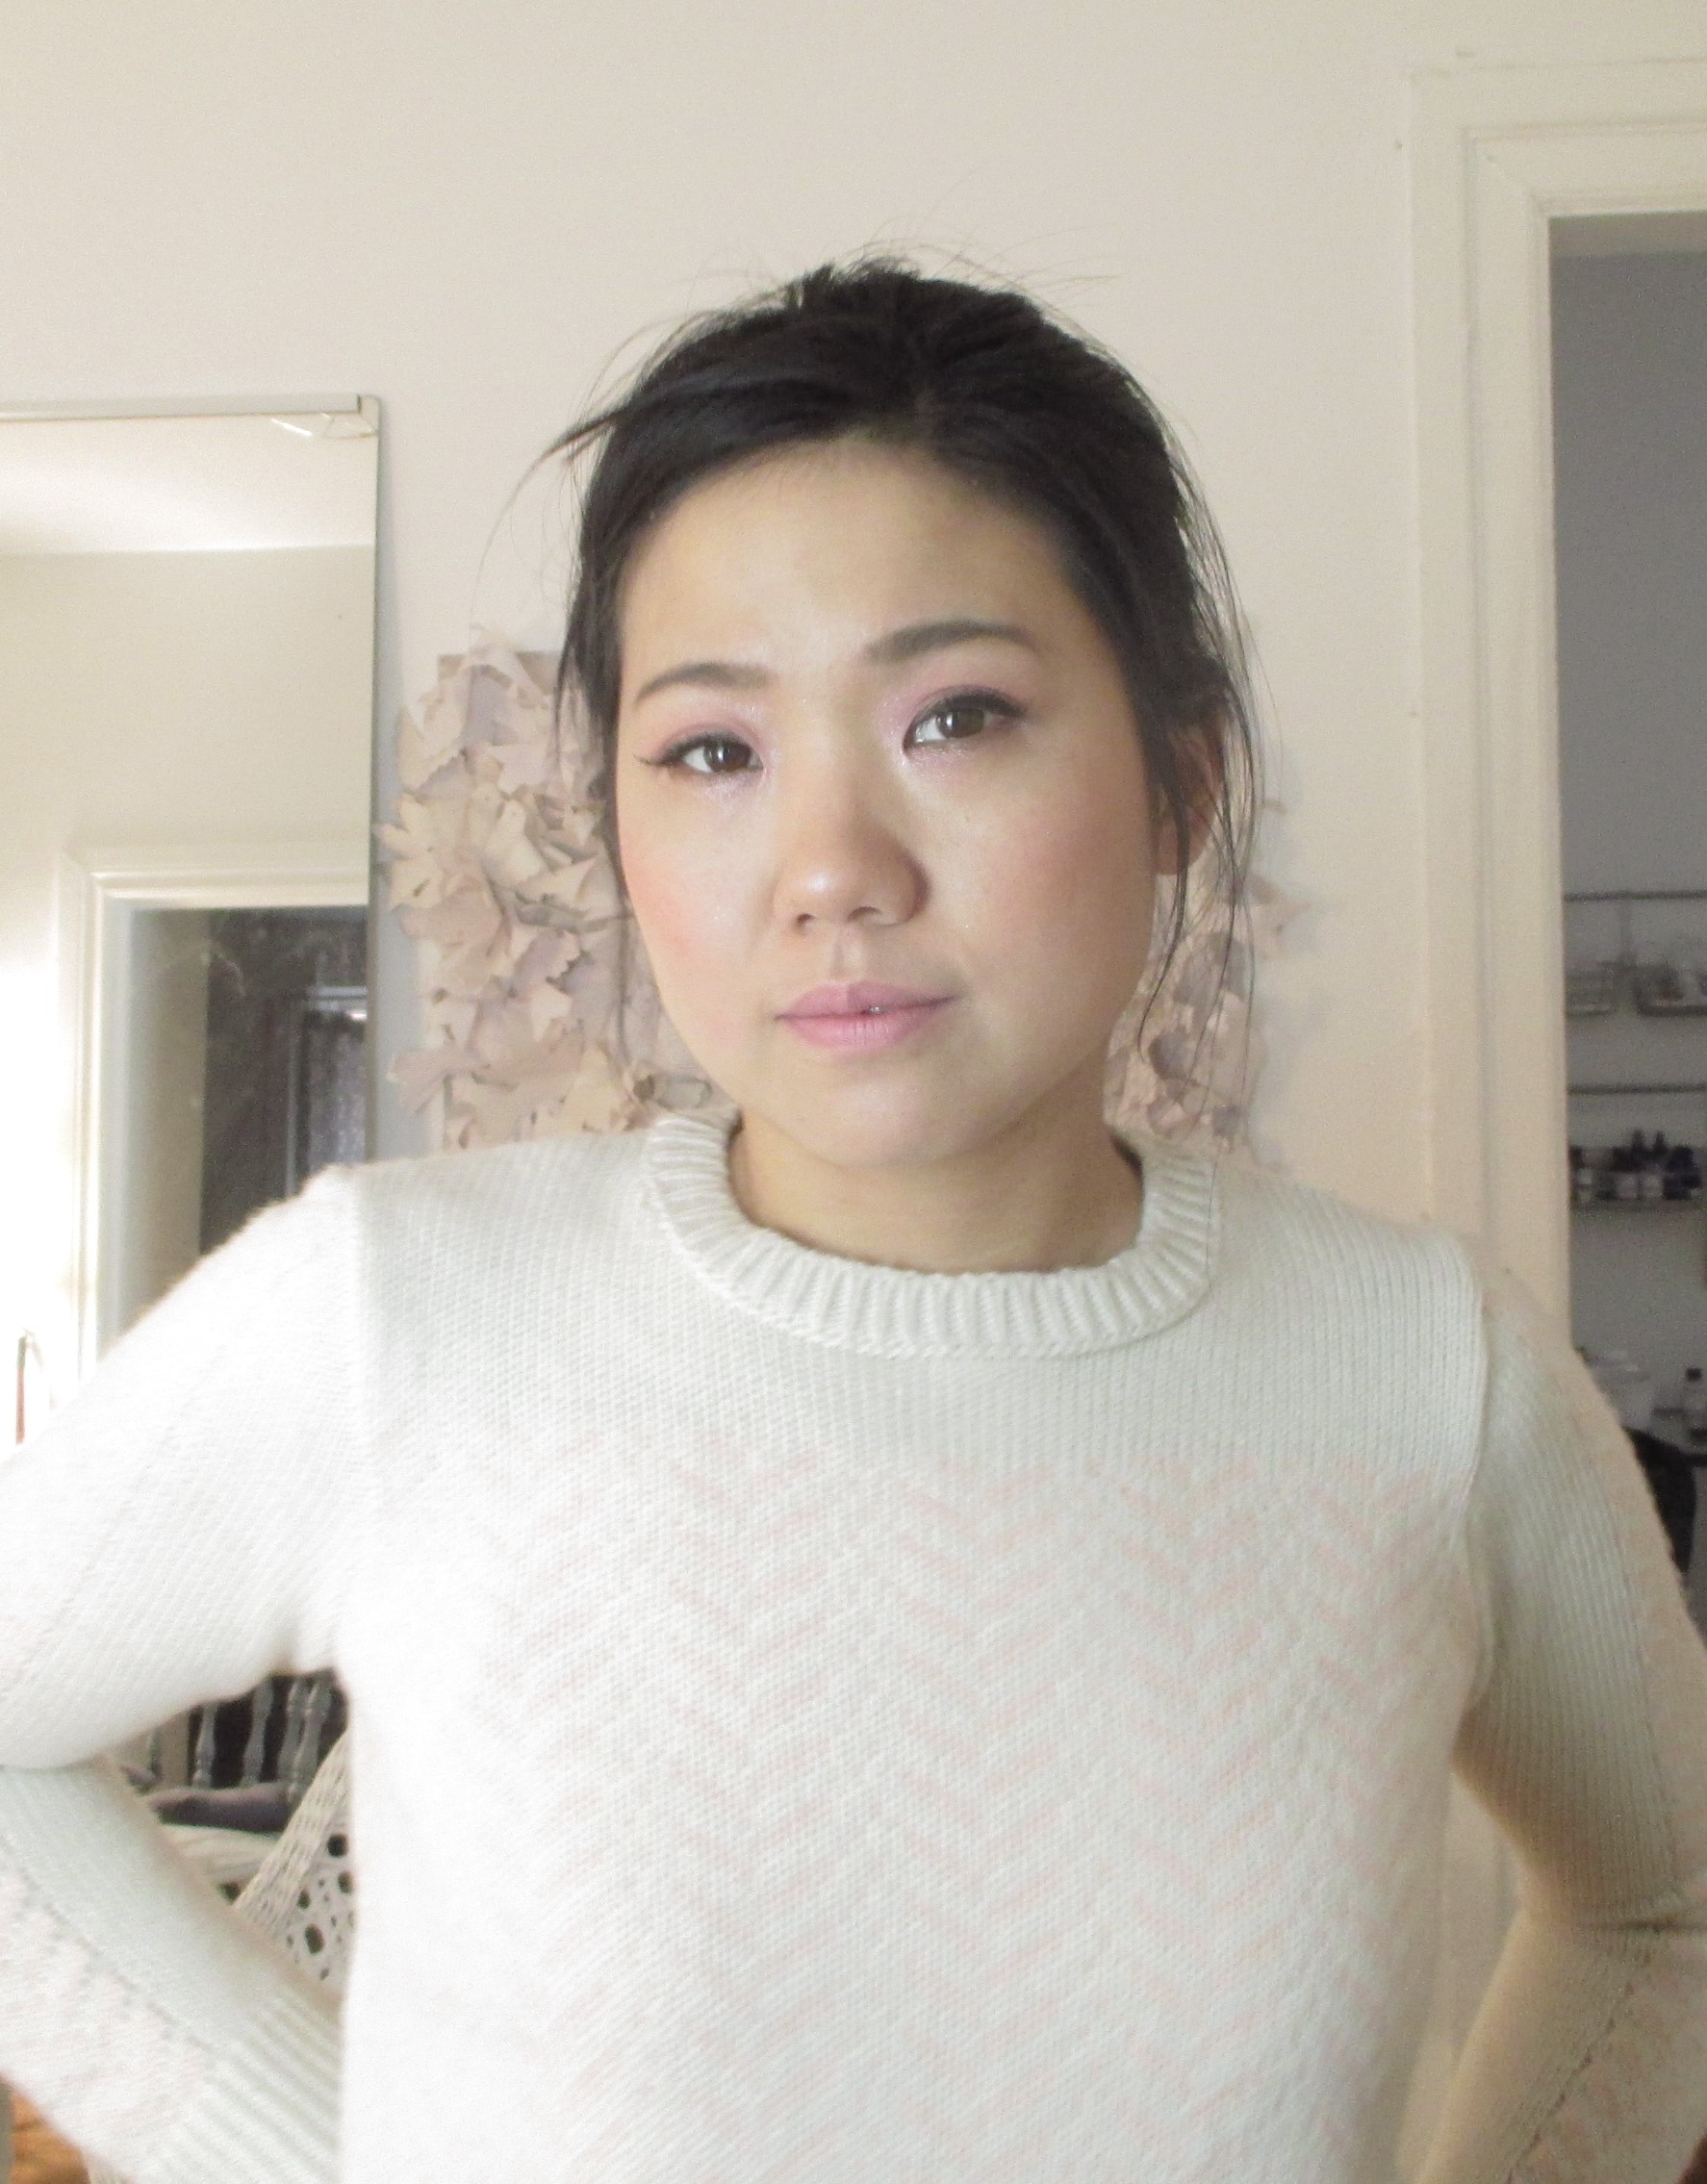
My attempt at achieving the same look. Pastel eye shadow, with darker lined brows, shadow lined eyes, and fake lashes. finish with pastel lip colour/nude.
My attempt at achieving the same look. Pastel eye shadow, with darker lined brows, softly lined eyes, and fake lashes. finish with pastel lip colour/nude.  Hey I’m not Amber Heard, but I tried!  🙂

Vinegar hair rinses…should you give them a go?

A year or so ago, I read on a beauty blog about rinsing your hair in a vinegar water solution after shampooing.  And for some reason, I cringed at that extra step in hair care, and did not consider trying it.  After all, I was already triple conditioning on top of other shower rituals that I had, so measuring out a vinegar solution ratio seemed too much, especially since I didn’t even know what it did.  The article said to use apple cider vinegar mix it with water and pour it into hair after shampooing.  The writer said it balances the hair’s ph.  And since I didn’t know what that meant, I ignored this strange tip.

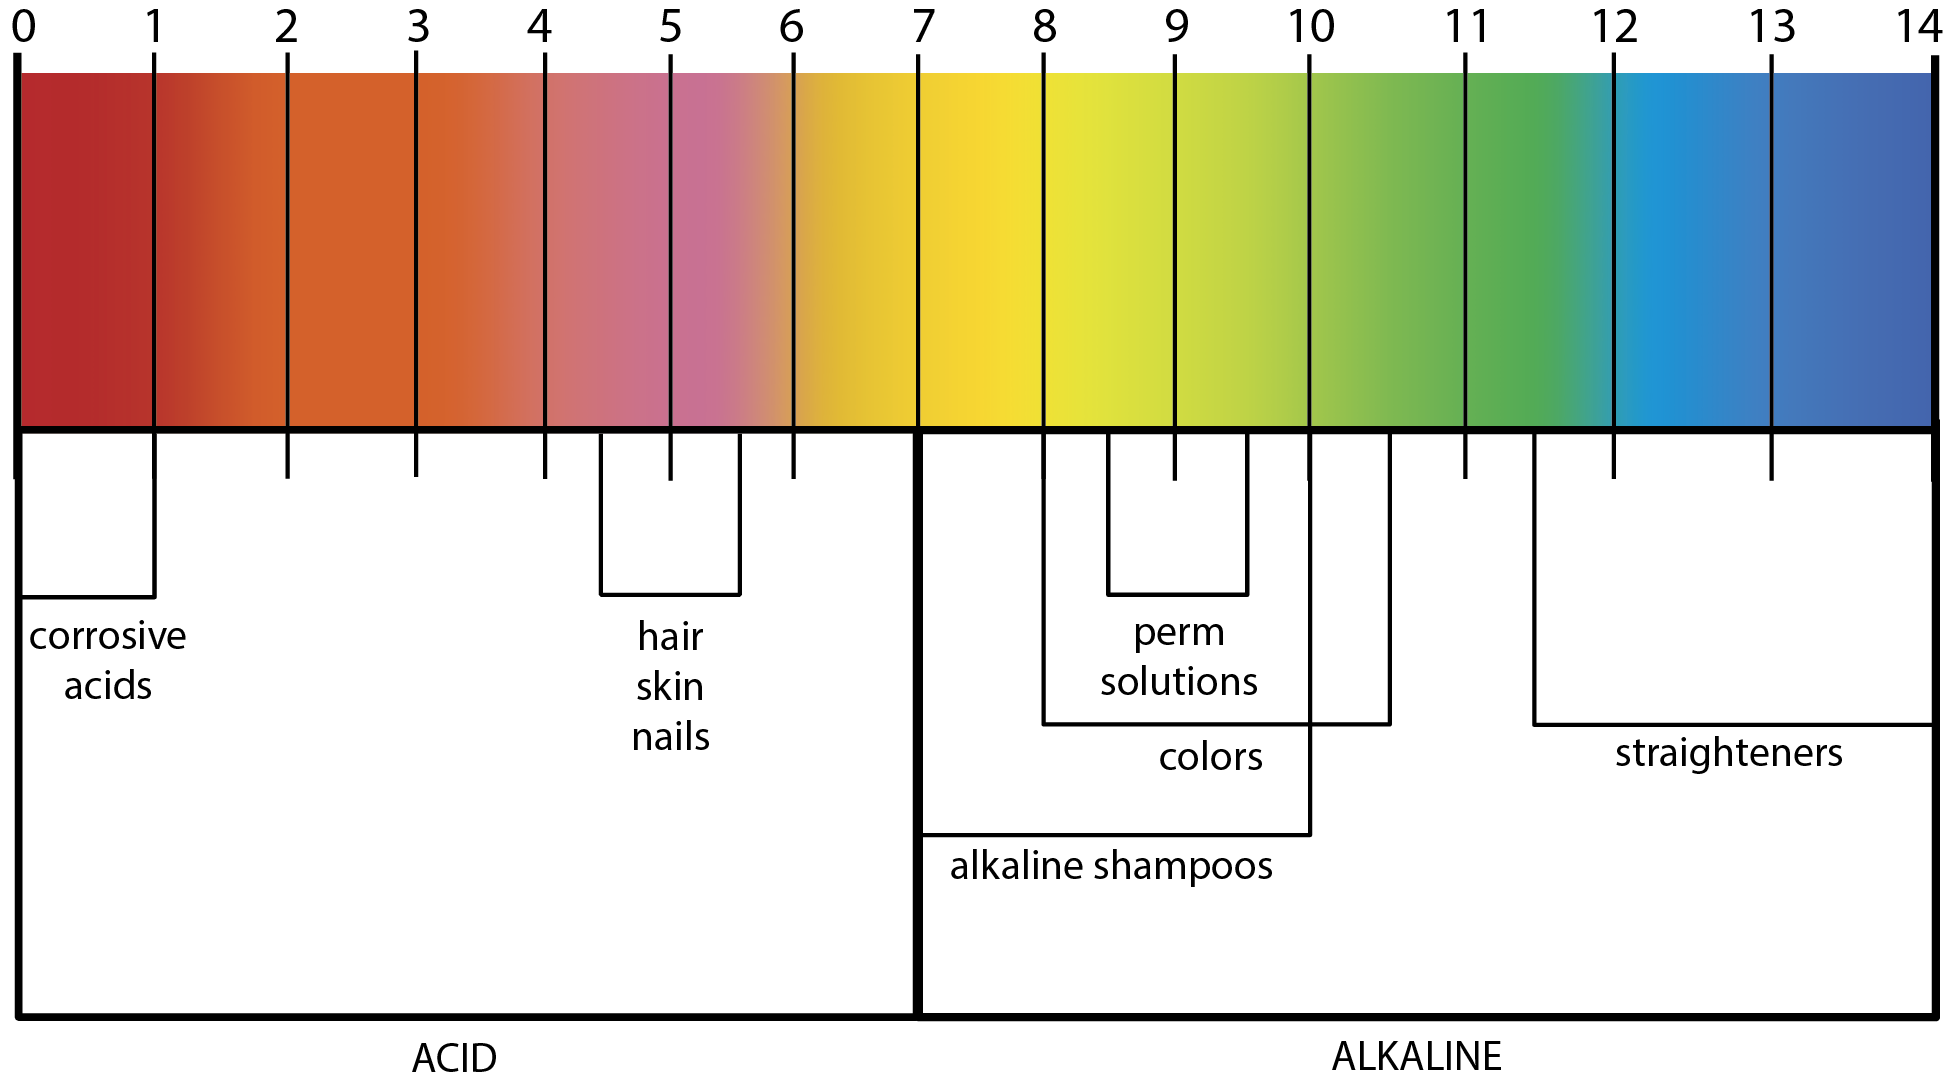
But more recently, I wanted to learn about rinsing with vinegar since I heard it can fix dull, limp hair.  I had been noticing how my hair felt stringy and dry even when it was freshly cleaned.  Adding too much products made it greasy and flat, so after more research, I was brought back to this simple home remedy.  Vinegar does balance the natural ph of hair, since hair is naturally slightly acidic.  After we shampoo, and rinse out our hair with water (neutral ph), our hair shafts remain slightly basic (because shampoo is basic), and that is on the opposite spectrum of acidic.  So your hair is not really “happy” and reacts by being limp, dull, hard to comb and needing tons of product to keep it behaving.  A vinegar rinse is supposed to cancel out what the shampoo did, bringing your hair back to its slightly acidic ph.  Yay, science!  But so what does balanced hair ph do?

I got this chart from the site: It shows how hair and skin is not actually neutral like water, and how shampoos are slightly basic on a ph scale.
I got this chart from the site menscut.com: It shows how hair and skin is not actually neutral like water, and how shampoos are slightly basic on a ph scale.

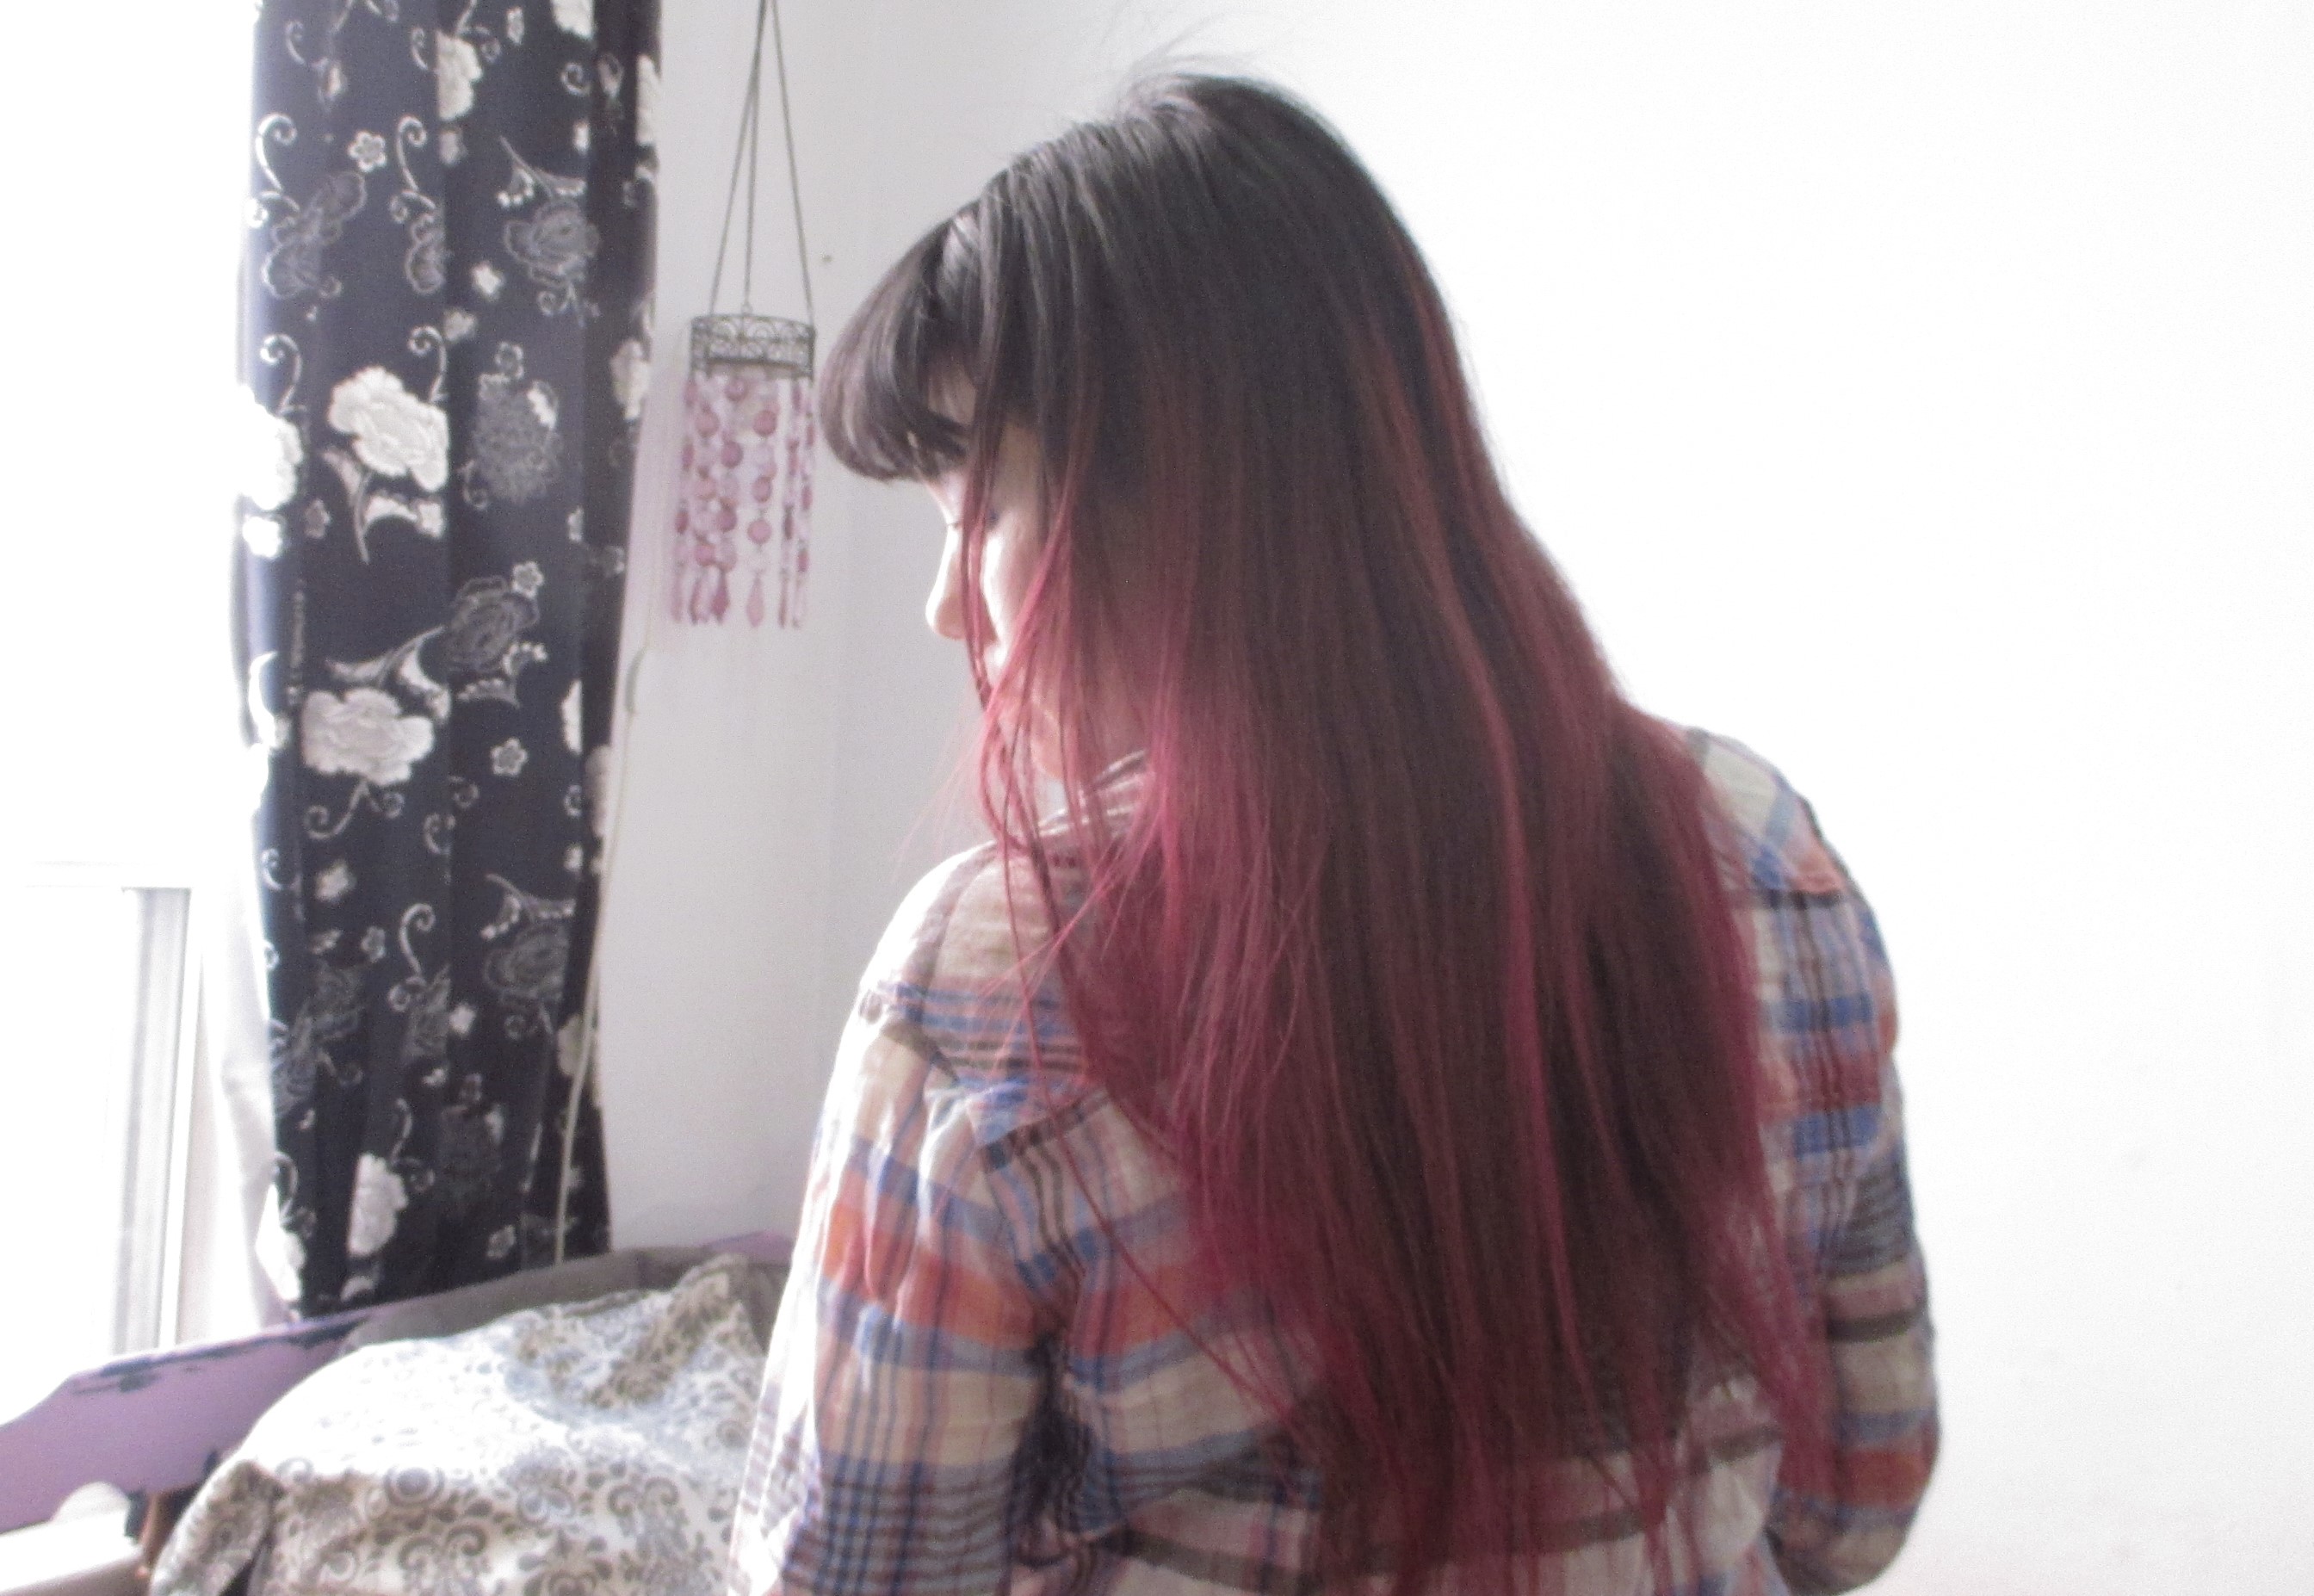
The results are supposed to be shinier hair, more soft and less dry.  A vinegar rinse is supposed to also get rid of product build up too, but I find mostly what it really does is coax your hair cuticles to lay flat and relax, so that it actually looks and feel healthier!  And less tangle-y.  I find after rinsing and drying, my hair feels thicker and stronger like almost like virgin unprocessed hair.  And I do use less leave-in products because it feels more manageable.  Translation, vinegar rinses make good hair days even better.  Infact, my own dad who never notices hairstyles, finally commented that he sees I have it dyed burgundy!  I think I owe this to vinegar rinses because they are rumored to enhance and preserve the dye in coloured hair.  So I would recommend this strange hair care trend indeed! (Don’t do it every shampoo, but every other…I hear that too much is not good? Correct me if I am wrong)

How I do a Vinegar Hair Rinse:

-2 and 1/2 cup of warm water.

-1/4 cup of vinegar (apple cider vinegar, but I actually use white vinegar)

Mix in a pitcher before your shower.  After shampooing and conditioning, seal in your hair cuticles by pouring the mixture all over your head and hair all the way to the ends.  Massage and bring the solution all the way to the tips of your hair.  Leave on for a minute, then rinse out with a blast or two of regular water.  I don’t want to rinse it all out, but I get out the excess because it does have an odor.  However, after it dries, it has no scent.  But don’t be caught in the rain because I find when my hair gets damp again, I can sometimes smell like fish and chips.  Oh well, the results are worth it!

Look at my long strands! After using the rinse and drying, they are still untangled after a night of sleeping on with no products put in! That is usually impossible with my hair.