My Hair Coloring Journey: Soap Capping and Toning

No More Orange Please!

Orange…That is what I am dealing with when it comes to dying my asian hair; it’s full of red/orange brassiness underneath all that mysterious black. Any kind of chemical processing, on my hair will eventually expose brassy tones as a color job fades. So to cope, last spring, I decided to dye my hair to ash brown, but unfortunately it came out way too dark, almost black, but at least no orange! But as summer rolled around, I noticed it was a very flat and boring color. Ash colors are great, but on darker brunettes, the cool tones are just lost, and unnecessary. I decided then to warm up to a strawberry blondish.  But without bleaching first and using just a 30 volume peroxide for lift, I achieved reddish brown hair…not too bad, but slowly, as winter set upon me, and several shampoos after, I noticed rusty orange had showed up harshly and suddenly to ruin the party.
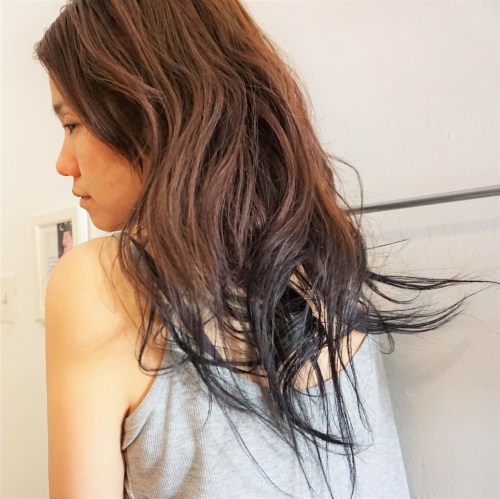
It’s hard to see in this photo, but the brassiness that is peeking out from under neath is kind of visible. My ends are darker because I did a reverse hombre a while ago…
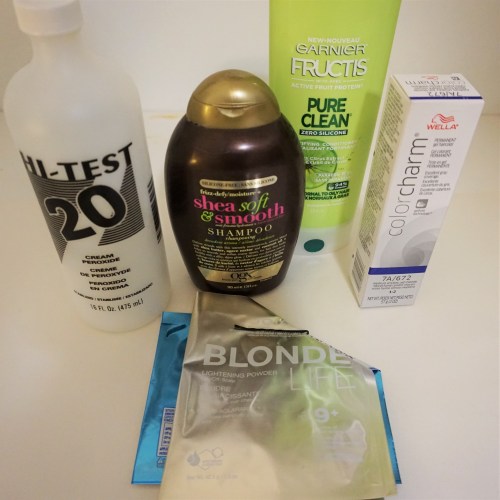
My arsenal for color correction: Bleach powder, 20 vol peroxide, shampoo and conditioner. The Wella color 7A (ash) is for toning that orange after lightening…

I realized my hair turned rusty because without bleaching and lightening my hair first before coloring, the brassy tendency of my hair type would always be exposed in the end. My hair color had to start out light enough to support whatever color I was putting in. So I decided I would do a soap cap to correct it. “Soap capping” aka “bleach bathing” is a formula of bleach and developer then diluted by shampoo meant to be a gentler method of lightening hair. It’s great for removing previous color or lightening a couple of levels. There are articles online on how to do soap capping to lighten hair but the ratio I used was 1:1.5 lightener to shampoo, lathered it into my hair and put a developing cap on it. And it worked. I went from brassy dark brown hair to orange hair! I know, it’s contradictory to have orange hair, exactly what I didn’t want, but once it got to a true orange color (and not the same brassy orange tint I disliked), it was ready to have an ashy color put on top to cover it.

Yikes! this is how it looked after treating with a soap cap! It got rid of the previous color, and lifted my hair to a level 6.5, I am now ready for toning/color…

So to neutralize the orange, I picked up a color with a lot of blue tones…basically an ASHy dark blonde in a level 7 (even though I was a level 6.5, I didn’t want to go darker with a level 6) And voila…the results were pretty nice. I am now rocking a light brown, with no signs of orange, even though I am still on the warmer color side; it’s impossible to totally irradiate the orange, because black hair just has so much of it. But I still think it turned out as close as I could get it with the most gentle and simple techniques.
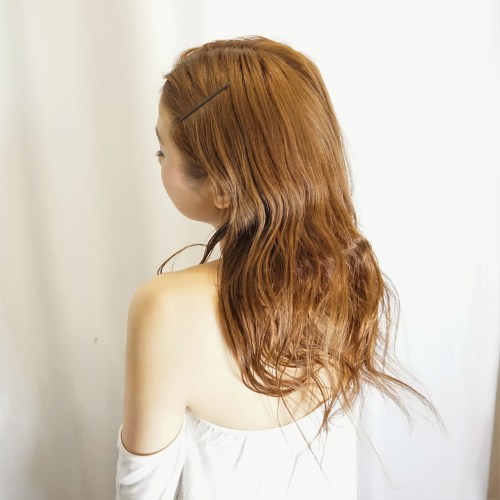
Yay…no more orange…just a neutral light brown all the way. It’s a pretty colour, but I am not done yet…more to come…

So to recap, soap capping is an effective way to achieve gentle hair lightening. When a developer/bleach mixture is diluted with shampoo, it spreads more evenly, strips pigment slower, more predictably, and is safe enough to do at home on your whole head. If it isn’t light enough, you can wait a day or two and then re-soap cap so that your hair is less stressed out with the process.

My Tips for Safe Lightening at home:

  1. Watch the lightening like a hawk under that cap: Things can change every 5 or so minutes, so to get the amount of lightening you want with little error, keep checking the color as it works. And to prevent frying your hair, don’t leave a soap cap/lightener on longer than 50 min.
  2. Choose the weakest method of lightening and repeat if necessary: That is, don’t be in a hurry to get to what you want…Bleach, even when diluted with shampoo is still a very powerful chemical capable of damage. My first soap cap lifted my hair 2.5 shades! And it was only in my hair for 35 min.! Had I used full on bleach, I am pretty sure my hair would have been fried or too light in some areas! So be careful and go slow.
  3. Do redo darker hair spots: Sometimes, depending on where the hair is on the head, or previous chemical processes in the hair, the lifting results vary. For example my ends didn’t lift enough…I had to go back and redo  the ends the next night. But because I used a gentler method, redoing lightening in just some areas will be less damaging.

So am I done? As if!! I am actually aiming for a pinkish brown color. Keep on reading for my part 2 where I will be tinting my light brown hair with a pastel pink semi permanent…

Going from Work to Party: Fashion/makeup hacks

So you have an event coming up at 6:00 and you’ve been working all day and are far from feeling like a model. After the recycled air, computer screens, standing/sitting and fulfilling the demands of clients/employers; and all the stresses of whatever work environment you are in, the bottom line is you’re pooped. And you probably look it too. Not exactly fun to have to scramble home, freshen up, change your clothes and touch up a make-up application that has long expired since the morning when you put it on. It is looking more like an oil slick, than prettily powdered, and well, you’re not exactly feeling primped and ready to go after work in general.. What to do? Let me share with you a few hacks that help me, when it comes to feeling glammed up, rejuvenated and able to face the world, whether for a date, a party or event when you don’t have a whole day to preen:

1. Skip putting on make-up in the morning and just moisturize heavily and allow your skin to soak it up all day. Make-up is drying to the face, which is why skin produces so much excess oil by nightfall. By not wearing make-up during the day, your face skin can breathe. Then you can do your make-up before the event after a quick face rinse or toning, for a fresher application.

2. Dry shampoo is your best friend. Hair gets limp and oily throughout the day. There is no time for a shampoo in the shower, but a little bit of dry shampoo will make sure that by night fall, it looks like you just got a blow out.  I like to do it the night before to make sure hair is not too powdery with residue from the dry shampoo, but if you have really greasy hair, during the day works fine too. Just shake it out lots when you’re done. Check out my article on how to DIY a dry shampoo.

3. Drink lots of water. Dehydration not only dries out your skin, but it also causes water retention, tired puffy eyes, and a look of fatigue in general. Aim for at least 2 litres during the day, especially after coffee. Having a nice hot herbal tea flushes out toxins and helps you de-stress so definitely try that.

4. Pre-plan your outfit. Believe it or not, even if you kinda know what you are going to wear, you don’t. Something you pictured working can suddenly look out of place or odd: ie a skirt your thought would match doesn’t, a sweater/top is too see through, (or not see through enough!) Put on the things the night before so that after work you are ready to go.

5. Over pack your arsenal: Unless you have time to go home (which you probably don’t) Bring all your trade secrets to work to use before leaving: perfume, hair spray, culing iron, straightening wand, combs, hair clips, lotion. Don’t be afraid of looking high maintenance with having to carry a huge bag to the event. Just leave everything at your workplace/office in a discreet bag that is in nobody’s way, and pick it up on your next shift…while you go out with the tiny purse that says you didn’t have to work at it!

6. Eat little meals through out the day. Nothing is grosser than feeling bloated and tired after eating a big lunch, having to digest that, and then topping that off with a big snack at the end of the workday too. Eating small meals through out the day makes your energy better, and lets you not have spiking sugar levels that add to fatigue. Also, it prevents you from getting too hungry so that when you are out, you don’t binge on food.

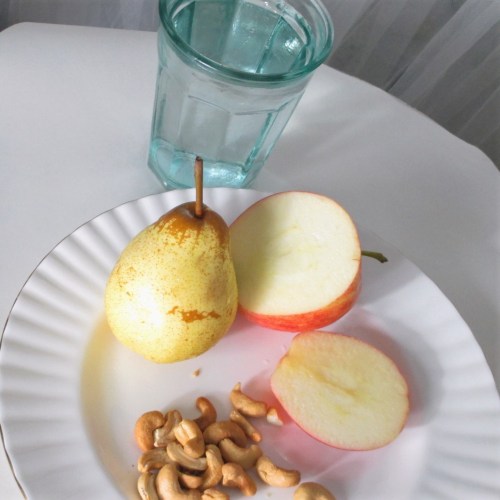
Is this not a yummy sight? Fruit and nuts and water make a great snack on busy work days leading into a night event. They are easy to digest and cause minimal bloating.

7. And the number one tip to looking your best in the least bit of time? Just make an effort to take care of yourself daily, event or no event. Have nice manicured hands, moisturized skin, brush your hair and your teeth. Always eat well and drink lots of water. When you are making self care a habit then the odd times that you have to hustle to glam up for a date are that much easier….because you are often looking your best anyway!

Just before an event I had to go to…and yes, I ate the heck outta that pear!

Silicons in Hair Products, what do they really do?

On the left are products loaded with silicones...hey, they give the results, but are they evil?  On the right, silicone free products from Tresseme.
On the left are products loaded with silicones…hey, they give the results, but are they evil? On the right, silicone free products from Tresemme.

As you all know I craft handmade cosmetics on a regular basis to give my face and hair a rest from the chemical stuff that is out there at pharmacies today: hair spray, lotions, shampoo, conditioner–they all have preservatives, cheap synthetic additives and little to no healthful ingredients.  At home, I stock up on things like organic natural coconut oil, cocoa butter, shea butter and use it in all kinds of handmade natural products. But as much as I believe in the benefits of natural stuff, I know the limitations, cosmetically, of what natural products can do.  I also know that some synthetic ingredients such as silicons are often over vilified based on the fact that they are not naturally derived.

Silicones, the good news and the bad news…

The most common forms of silicone are dimethicone and cyclomethicone.  The actual ingredient name may vary from product to product, but you will see some form of “icone” at the end of the ingredient name if it is a silicone.  The higher it is on the list of ingredients, the more there is in the product.  Now to explain why it has a bad rep: It is a synthetic product that is derived from sand by chemical means and is very processed; its manufacturing and the washing of it into drains is bad for the environment.  When silicons are used in hair, it fills porous areas, giving only the “appearance” of healthier stronger, more hydrated hair.  But the actual effect is cosmetic.  Your hair is not really stronger, healthier or more hydrated.  It is shinier, and thicker because silicons coats each strand with a seal that is water resistant, oil resistant…and makes hair unable to breathe because of that seal. This is the good news: Hair is not alive, it doesn’t need to breathe. Hair is made up of an organic protein called keratin. A coating of silicone on the hair is not suffocating the hair, like I hear so many say, but it actually tames it and makes it shine like diamonds!  It becomes unhealthy when it builds up, and prevents natural oils from penetrating the inner hair shaft, making it dry and brittle.  Over use can turn a little beauty trick for softness and shine into a dependency for function.

Going au naturale…

I often hydrate my hair with coconut oil in salve form on dry hair and also as an additive in my conditioner to give it more conditioning power.  Coconut oil has been known to be able to penetrate into the hair shaft and really strengthen hair, not on just a cosmetic level.  But coconut oil also makes my hair limp, greasy, dragged down, and if it builds up, it takes away shine, actually.  But my hair is actually healthy, and hydrated, even if it looks dirty and unstyled.  I have been able to grow my hair longer these years by using coconut oil and just shampooing and heat styling less.  But boy did my hair love, love, love soaking up all the silicons in this hair conditioner I tried after coloring my hair the other week.  My hair was thicker, bouncier, fluffier, shinnier, and just more smooth feeling after using the silicone heavy conditioner included in the color kit.  I saw first hand how silicones are more powerful at giving an appearance of health than using natural products, even if it is a “fake” look of health, and I couldn’t believe how soft my hair was after using the silicon loaded conditioner.

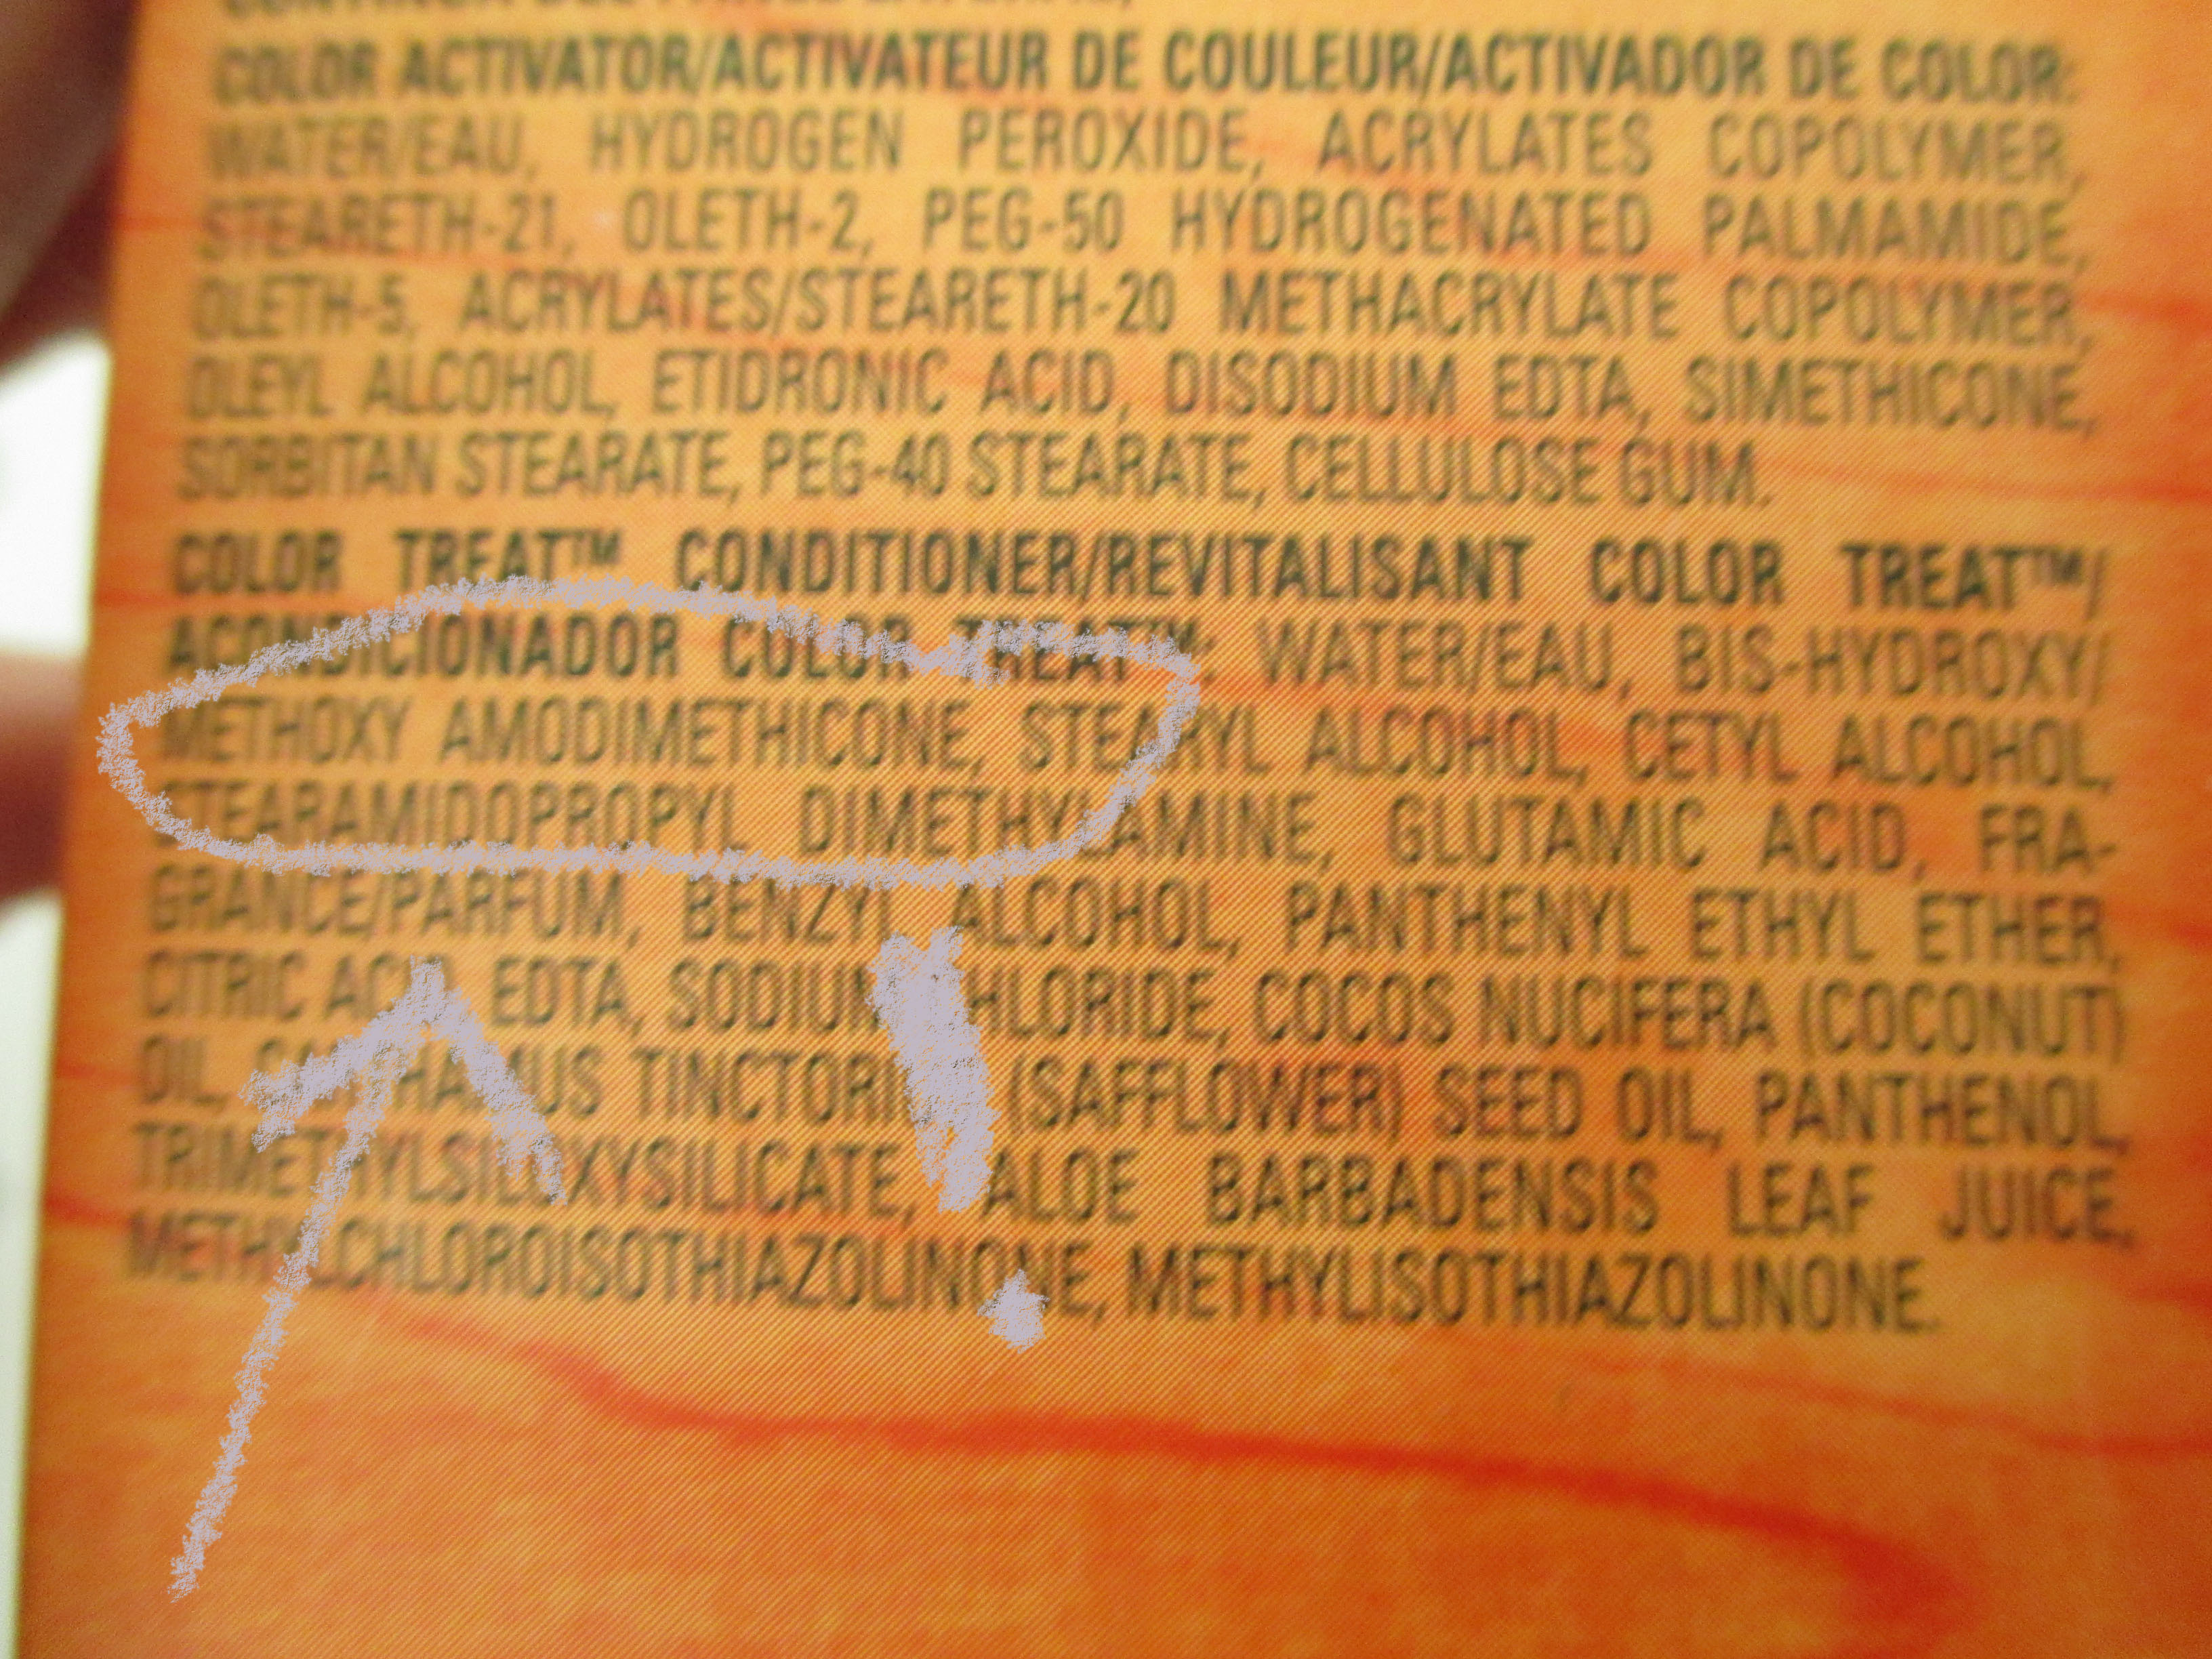
This was the ingredient list for the conditioner in the box kit.  Wow... amodimethicone is the second ingredient.  Amodimethicone is a heavy silicone, and hard to wash off...No wonder my hair shone like the sea after this...
This was the ingredient list for the conditioner in the box kit. Wow… amodimethicone is the second ingredient. Amodimethicone is a heavy silicone, and is hard to wash off…No wonder my hair shone like the sea after this…

So should we avoid or embrace silicones in hair products?

Silicones are not inherently bad, but if over used, they can cause your hair to form a dependency that is bad.  Also, their use and manufacturing causes damage to the environment, lakes and wildlife.  So perhaps the solution is to cut back and rely less on silicons to have healthy hair.  Get healthy hair it the hard and true way by not over heat styling or over chemically processing.  Condition hair with nutritious oils.  Also, avoid shampoos with silicones! Removing build up is key to hair health, so it baffles me why so many shampoos have silicones in them?!  It is like peeing in the tub, you’ll never get clean. Use hair conditioners with less amounts of silicone (lower on the ingredient listing) and/or only use silicones in finishing products as a means to cosmetically boost shine and maintain a style, as a last touch to give your hair the fake confidence it does need!

Shampoo is supposed to clean build up, right?  On my fave shampoo I found two silicone ingredients!  Not in my shampoo too!
Shampoo is supposed to clean build up, right? On my fave shampoo I found two silicone ingredients! Not in my shampoo too! I say, try to cut back.