Taking a passport/ID photo is not as easy as it seems…

No smiling, no tilting the head, no posing, no hair in the face…etc. These are all the restrictions that come with the territory of taking an ID photo.  I used to think it was pretty simple, but now I realize the government doesn’t want you to look good, or look like you are having any fun in these photos.  In all seriousness, they want you to look miserable so they can capture the facial features of the face in a “no frills” kind of way.  As a result, a passport photo that you barely even like, and barely looks like “you”, becomes the representation of you for the next five to ten years.  Yes, you will have to look at it every so often, and see the unflattering lighting, how it hit your face at a bad angle, making you look not your best.  *sigh* It’s not that bad, or is it? Without sounding vain, wouldn’t you want to have the best photo you can get while still meeting requirements the government demands for formal IDs?  Here are some of my tips for making the best of a trying situation:

My Personal Tips

1. Don’t wear dark colours like black, navy or charcoal.  They weigh you down in spirit, which will weigh you down in the photo too.  I like to wear pastels and cheerful colours to reflect a lighter mood, to combat that downer feeling that taking a non-smiling ID photo can give.

2. Don’t smile, but think happy, relaxed thoughts.  Make your eyes smile.  This may sound crazy, but they can smile!  Look into the mirror prior the photo, breathe, relax, and look at your non-smiling expression.  I find practicing your “non-pose” can really help you see if you are making a weird face by default, or just looking too severe.

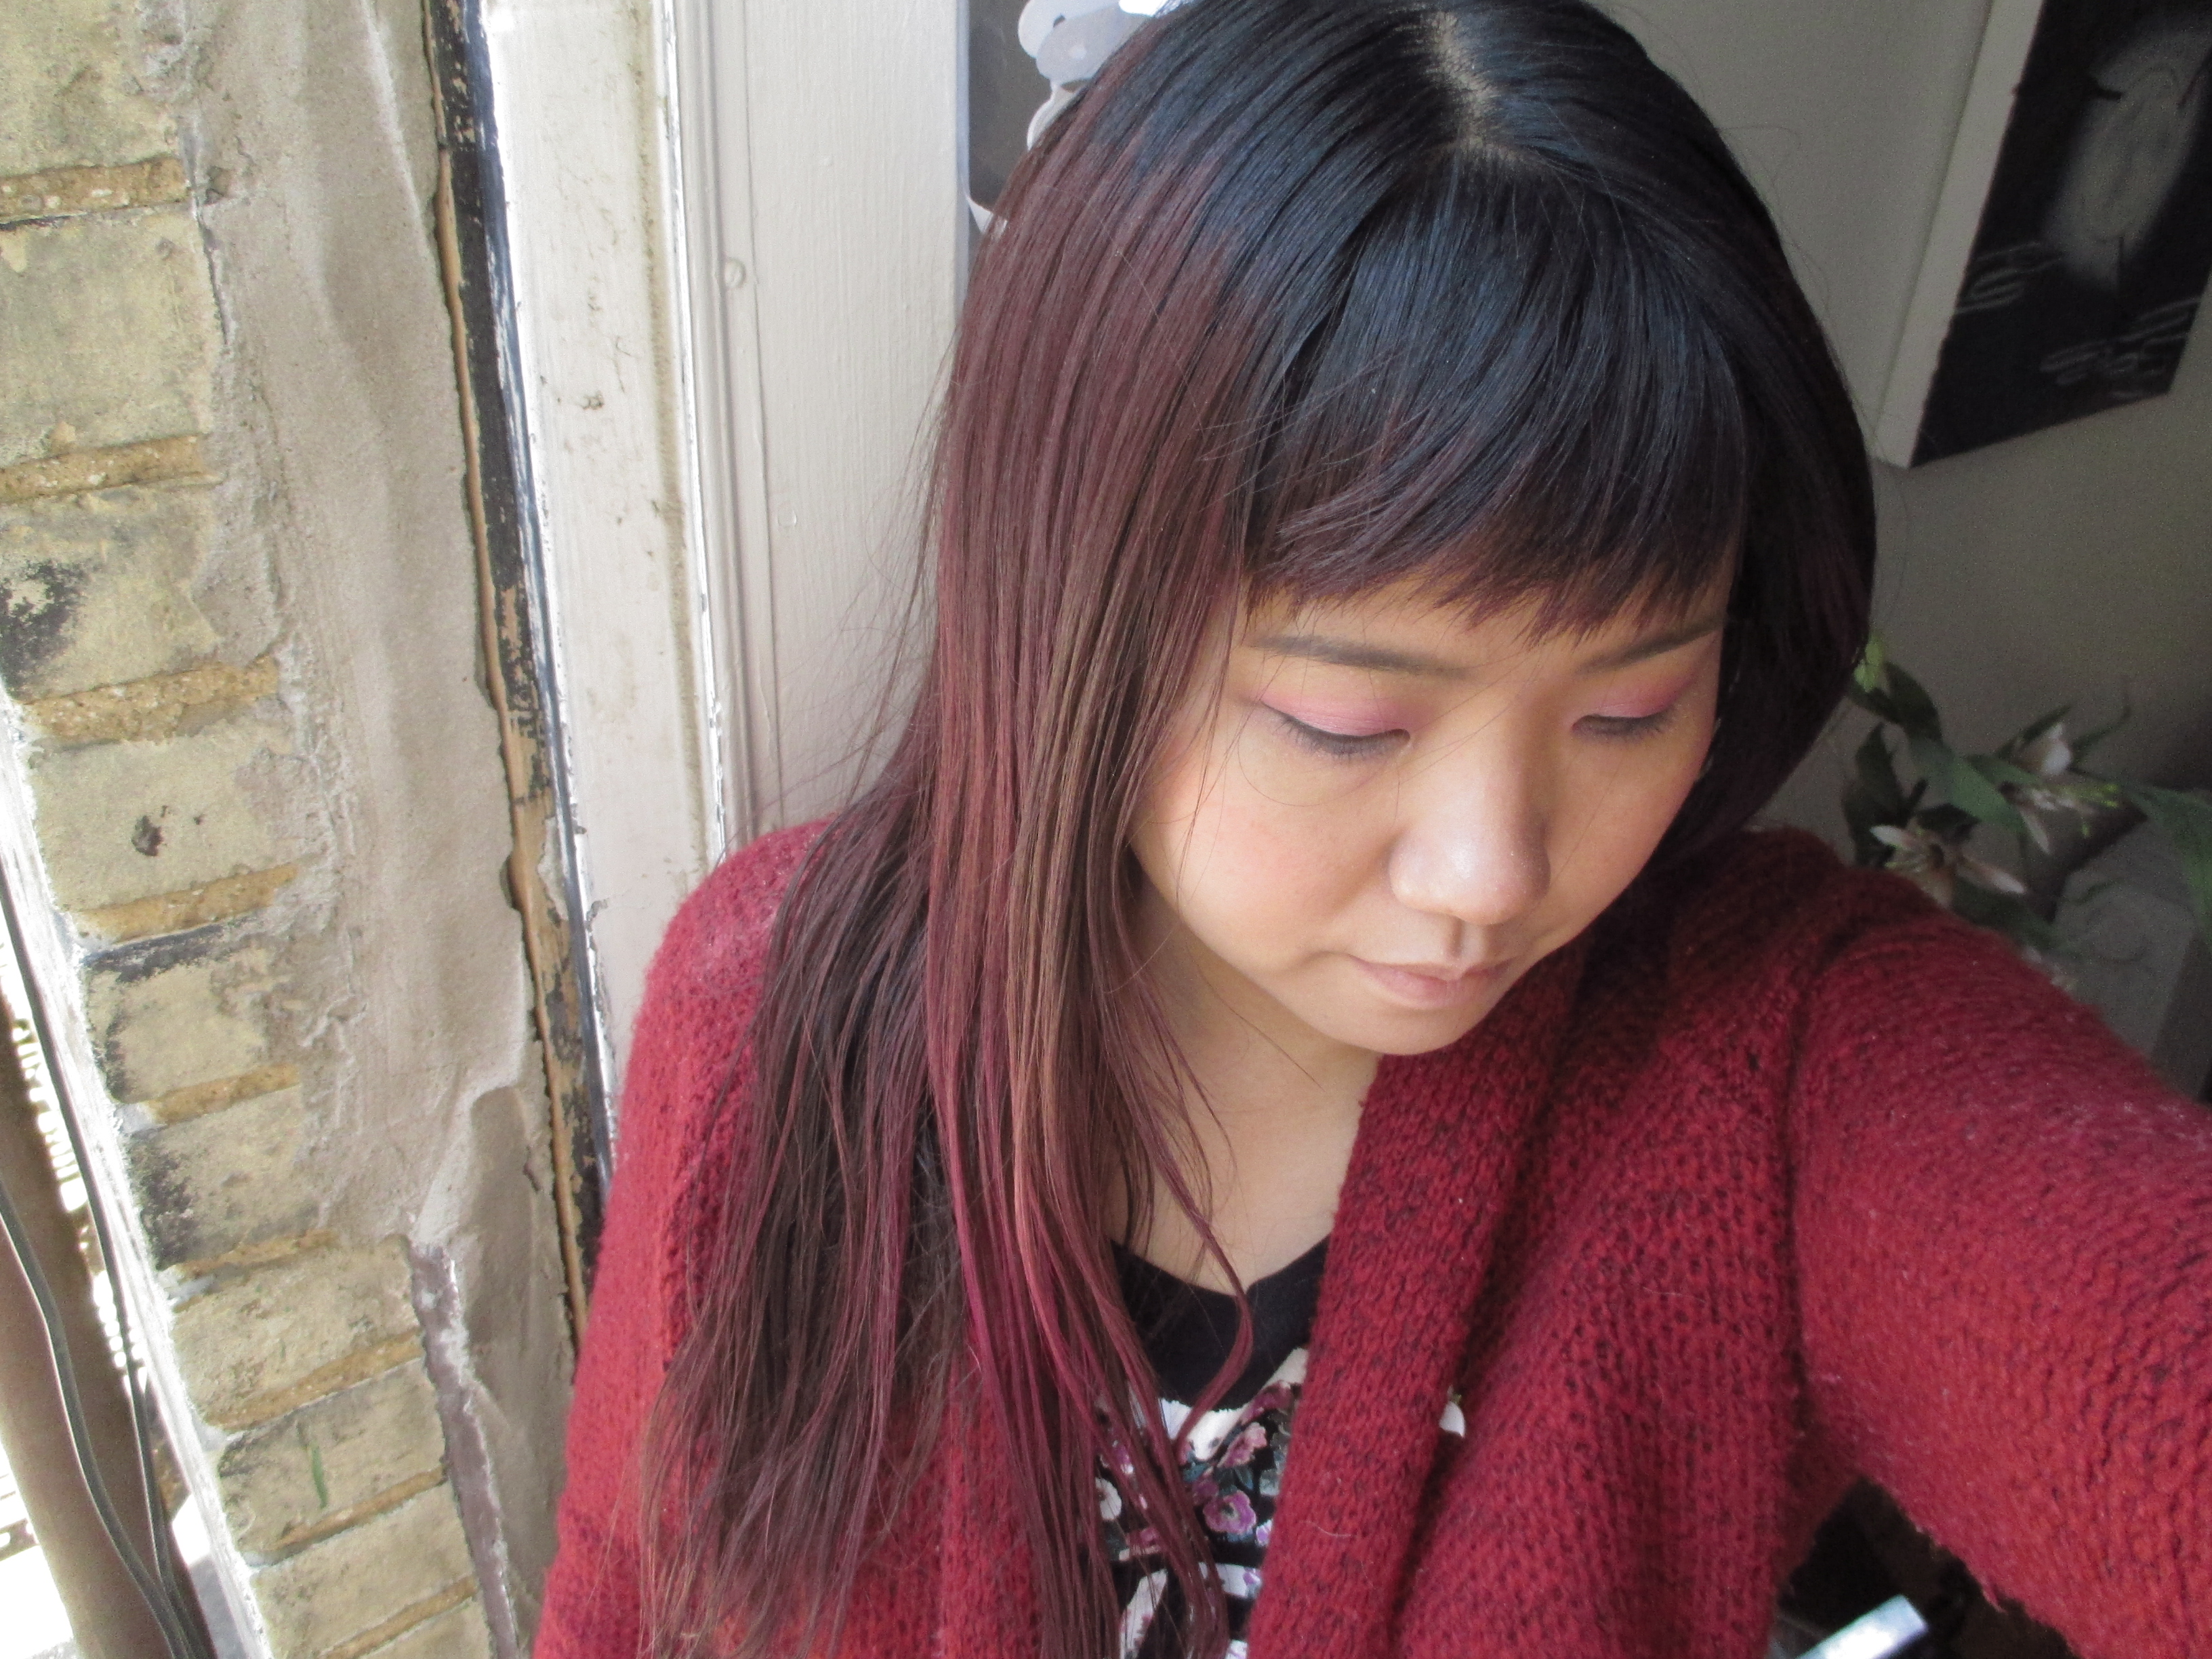
3. Wear your hair DOWN.  I can’t say this enough.  But for some reason, this makes all the difference.  Hair that is up makes your face look larger, because of the awkward cropping of all ID photos.  Not that a large face is bad, but in photos, smaller usually looks better in my humble opinion.

4. Make-up: Lots of people say to wear neutral make-up, and I kind of disagree.  I feel you ought to wear the make-up colours you feel like wearing.  So if you often wear bright eye shadows, why change to neutral for a passport photo? For my most recent passport photo I wore a bright fushia eye shadow in the corners of my lids and I love how they made my eyes pop!

5. Concealer and other tricks: I love the look of natural skin with its freckles and marks, and am not a big fan of concealer just because unless you have acne, what good is it really for on a day to day basis?  But for ID photos I would recommend it.  I saw the way those flashes magnify every flaw on the face…so use accordingly.  The day of my photo taking I had under-eye puffiness, so I used a bit of ice on it to deflate them before my photo.  Stay really hydrated to avoid water retention and bloat.  All these little things do make a difference to the end result.

What tips do you find help you take good government ID photos?  Is it just too much trouble to worry about these things and do you just don’t care when it comes to how you look on photo documentations?  Or do you think official documents should show a good photo of you most definitely?  During my recent photograph session, I remember a lady customer before me at the shop.  She was also taking her passport photo, and she walked into it with no prep, just dabbed some lipstick on before jumping into it.  The lady was so disappointed with her results, when the store showed her the proofs.  Don’t we all wish that it was just as easy as putting on lipstick!

IMG_2403 (2) edit
This is my new pic. It looked better in the proofs, but the reprint of it into the passport is very grainy. Still, I liked it, considering how I couldn’t smile, and the photo peeps took it in 2 seconds flat! Does it say “run away with me!”?  Hee hee.

Make your own dry shampoo so you can sleep-in during mornings!

Lazy is good.  It’s great actually.  When it comes to shampooing hair, there is nothing more healthy for your scalp and hair than skipping as many days as you can between shampoos.  The reason is simple.  Shampoos are harsh.  They strip away natural oils, you use a lot of friction to make them lather, and your hair (unlike a pair of distressed jeans), do not look better when they are put through the washer and dryer.  On the other hand, oily strands of hair do not look polished or pretty either.  A solution?  Dry shampoo.  When I use dry shampoo, I can go a up to a week between washing with a regular shampoo.  This is great in two ways:  It is healthier for your hair, and also it saves you plenty of time in the morning because you don’t have to shampoo and condition in the shower, and you don’t have to restyle/shape your hair again. I dust dry shampoo in my hair roots, and it looks as if I had showered and re-curled my hair! A handy and healthy short cut to clean hair.

So this is my hair after a few days without washing.  Kinda gross and oily as you can see.
So this is my hair after a few days without washing. Kinda gross and oily as you can see.

The best part is it really isn’t cheating.  Your hair is actually getting cleaner with the use of a dry shampoo.  The reason is is that oily hair is a magnet for dust and dirt.  When your hair is oily, particles of dirt stick to it, making your hair more “dirty” as each day without a wash passes. Dry shampoo works by soaking up the oil, along with any unwanted dirt, then falling out of your hair.   So technically, a dry shampoo really does “shampoo” your hair and clean it.  It is not a cosmetic effect, it  cleans by absorbing grease and oil and it is not as “gross” as some people may think.

Doesn't my hair look a lot cleaner and better?  It took two minutes with a dusting of dry shampoo.
Doesn’t my hair look a lot cleaner and better? It took two minutes with a dusting of dry shampoo.

How I use my own homemade dry shampoo is simple. On day 3 or 4 I dust in a thin amount of dry powder into the roots to mid shafts of my hair all over.  I actually use a blush brush and dip it into the bowl of dry shampoo and then brush it all over.  I like using a blush brush because there is more control, but you can also use a shaker type container to shake it in.  Then once applied shake and massage your head and hair so it can do it’s magic.   Then simply comb gently.  Thou’st ready to go out now!

Simple recipe for home made dry shampoo:

1 part cornstarch (absorbs oil like crazy)

1 part arrowroot flour (absorbs oil, but is softer in the hair)

1/3 part cocoa powder ( this ingredient is optional for those with darker hair)

Mix and blend all three powders until consistency is smooth and uniform.  I like to add jasmine and rose oil drops to make the shampoo smell amazing!

I keep my dry shampoo in a tin and dust it into my hair with a blush brush.  So easy, and fast too!
I keep my dry shampoo in a tin and dust it into my hair with a blush brush. So easy, and fast too!

3 summer fashion hacks I just came up with, and am quite pleased with…

If you’re like me this summer, you don’t have an unlimited budget to spend on updating your wardrobe to follow all of the latest trends in depth.  Even with scoring cool stuff on sale, or by settling for the quality of cheaper stores like H&M or Forever 21, they don’t always suffice in delivering the goods you want fully.  There is always compromising and settling involved when trying to stay current while not breaking the bank!  It is hard, but these are a couple of tricks of modifying clothes that I’ve tried with some success.

My distressed denim hack:

The store I work for part-time, Smartset doesn’t have a jean that is distressed enough to follow this season’s line-up of sporting really wrecked-beyond-hope denim, so I can’t use my staff discount there to save.  My solution?  I had a pair of light greyish blue denim from Smartset last year that was just boring.  They had no distressing, and as a full-length light coloured pant,  they just kept getting gross and dirty at the ankle parts because it was a bit long.  This was not stylish or cool.  So I decided to cut them into crop pants and distress them myself.  I cut off the pant legs past the ankle, hand sewed some cuffs in them and then ripped the heck out of them with different denim distressing techniques I learned online.  I ended up really liking the casual undone look of them, and wrecking them gave me some therapy too!  I saw similar jeans to mine at Urban Outfitters later that week.  I was happy to say I may have saved about $70, doing it myself by recycling unwanted old jeans in my closet.

Feeling like I gave these jeans a face lift by cuffing them into crops and distressing them to fit in with current trends...
Feeling like I gave these jeans a face lift by cuffing them into crops and distressing them to fit in with current trends…

My Strapless Romper Hack:

Such a reasonably priced romper, made with cotton and even had cute pockets.  The only down side was the fact that one pull down and I would be exposed...
Such a reasonably priced romper, made with cotton and even had cute pockets. The only down side was the fact that one pull down and I would be exposed…

Summer isn’t fun without a romper. Why?  Because you can do it all in a romper.  It’s a onesie made for adults!  For those of you that don’t know, a romper is basically a dress at the top, but instead of it turning into a skirt at the bottom, it turns into shorts, all in one piece.  It’s great.  Casual, super cute, and really comfortable.  You get to keep cool this summer, by covering just what you need to cover, and unlike short skirts, you won’t show everything when you move.  Rompers however tend to be expensive.  Don’t know why cuz they seem easy to make and don’t require that much fabric.  I however did find one at Forever 21 that was only $10!  Sometimes you can’t even get a tank top for that.  The one flaw with the romper I found was that it was strapless.  All of a sudden, summer care-free behaviour is restricted in this romper by the fear of it being pulled down by accident.  But it being only $10, I bought it, took it home and sewed on halter straps to keep it from falling down, making it much more functional, for no cost at all!  I even like the look of it with straps more than without!

After sewing on two pieces of drawstrings from another top.  Not my strapless romper is functional as a halter romper. yay!
After sewing on two pieces of drawstrings from another top. Now my flawed strapless romper is a functional halter romper. yay!

Jersey Bodycon dress hack:

Jersey (t-shirt material) bodycon dresses are the best basics.  They fit your body well, can be dressed up or down, great for summer, and they hug your body and show off your feminine curves.  They also are an effortless way to make yourself look put yourself together in two minutes. Add heals and you’re ready for the club, wear with flat sandals and it’s a casual day at the cottage.  The awesome thing too is that because they are simple dresses made out of stretchy jersey material, they don’t cost a lot.  I recently snagged a nice floral bodycon dress from the Smartset were I work.  With my discounts and specials, I got it for only $15!  I was thrilled.  I could possibly match that price at some other discount stores, but the ones at Smartset were so much better quality, and the length was not too short.  The only problem was that the neckline I noticed was not flattering.  It barely scooped in the front.  I noticed it scooped a lot more in the back, so what did I do?  I carefully removed the stitches of the label on the back collar of the dress and then wore it backwards!  The scoop back became the front, and well, now I am liking it more.

This was originally the back of this fitted jersey dress.  Just by carefully removing the stitches on the label in the back, I can now wear this with the flattering scoop neck in the front.
This was originally the back of this fitted jersey dress. Just by carefully removing the stitches on the label in the back, I can now wear the flattering scoop neck in the front.

Remaking clothes that you have or got on sale is great.  It saves you a money in the long run and more importantly, you get what you want for the price that you want it.  🙂  Let me know a hack that you have done to your summer wardrobe to make it your own!