Graphic liquid Liner…can basic black be replaced by grey for everyday?

An inky black marker type liquid liner, verses a brush on liquid grey liner...
An inky black marker type liquid liner, versus a brush on liquid grey liner…

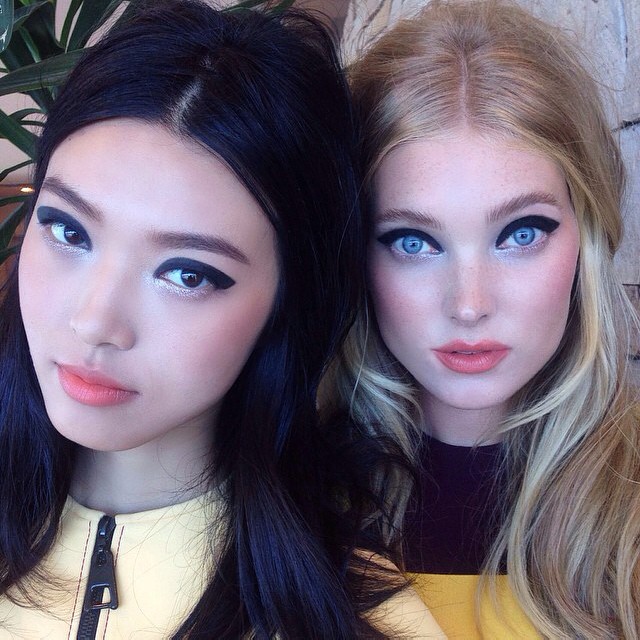
There is no make-up look I’ve seen more worn by women than that of the ubiquitous “cat eye” makeup.  It is usually done in a combination of ways, but always involves liquid liner to produce that hard edge top eyelid line that defines a graphic “cat eye” make-up.  And with a flick up in the corner, any girl can instantly get daily glam without feeling too made up.  When buying liquid liner, by default I always go to black, for some reason and I get it in pen style for ease of use.  Liquid liners with a brush and a bottle go on too black and thick for me and for some reason and I end up looking too hard, but pens can still be really harsh if they are very dark…like the one I use now. My eyes are like daggers lined by black ink.  I accept that black is the fashion… But  I recently discovered that charcoal grey is a great alternative, if you like the polished elegance of the cat-eye, want to still be in vogue, but don’t want to look as stern with super black lined graphic eyes.

So the left photo is black liner and the right photo is grey liner.  All other make-ups are the same.  Can you spot the difference?
So the left photo is black liner and the right photo is grey liner. All other make-ups are the same. Can you spot the difference?

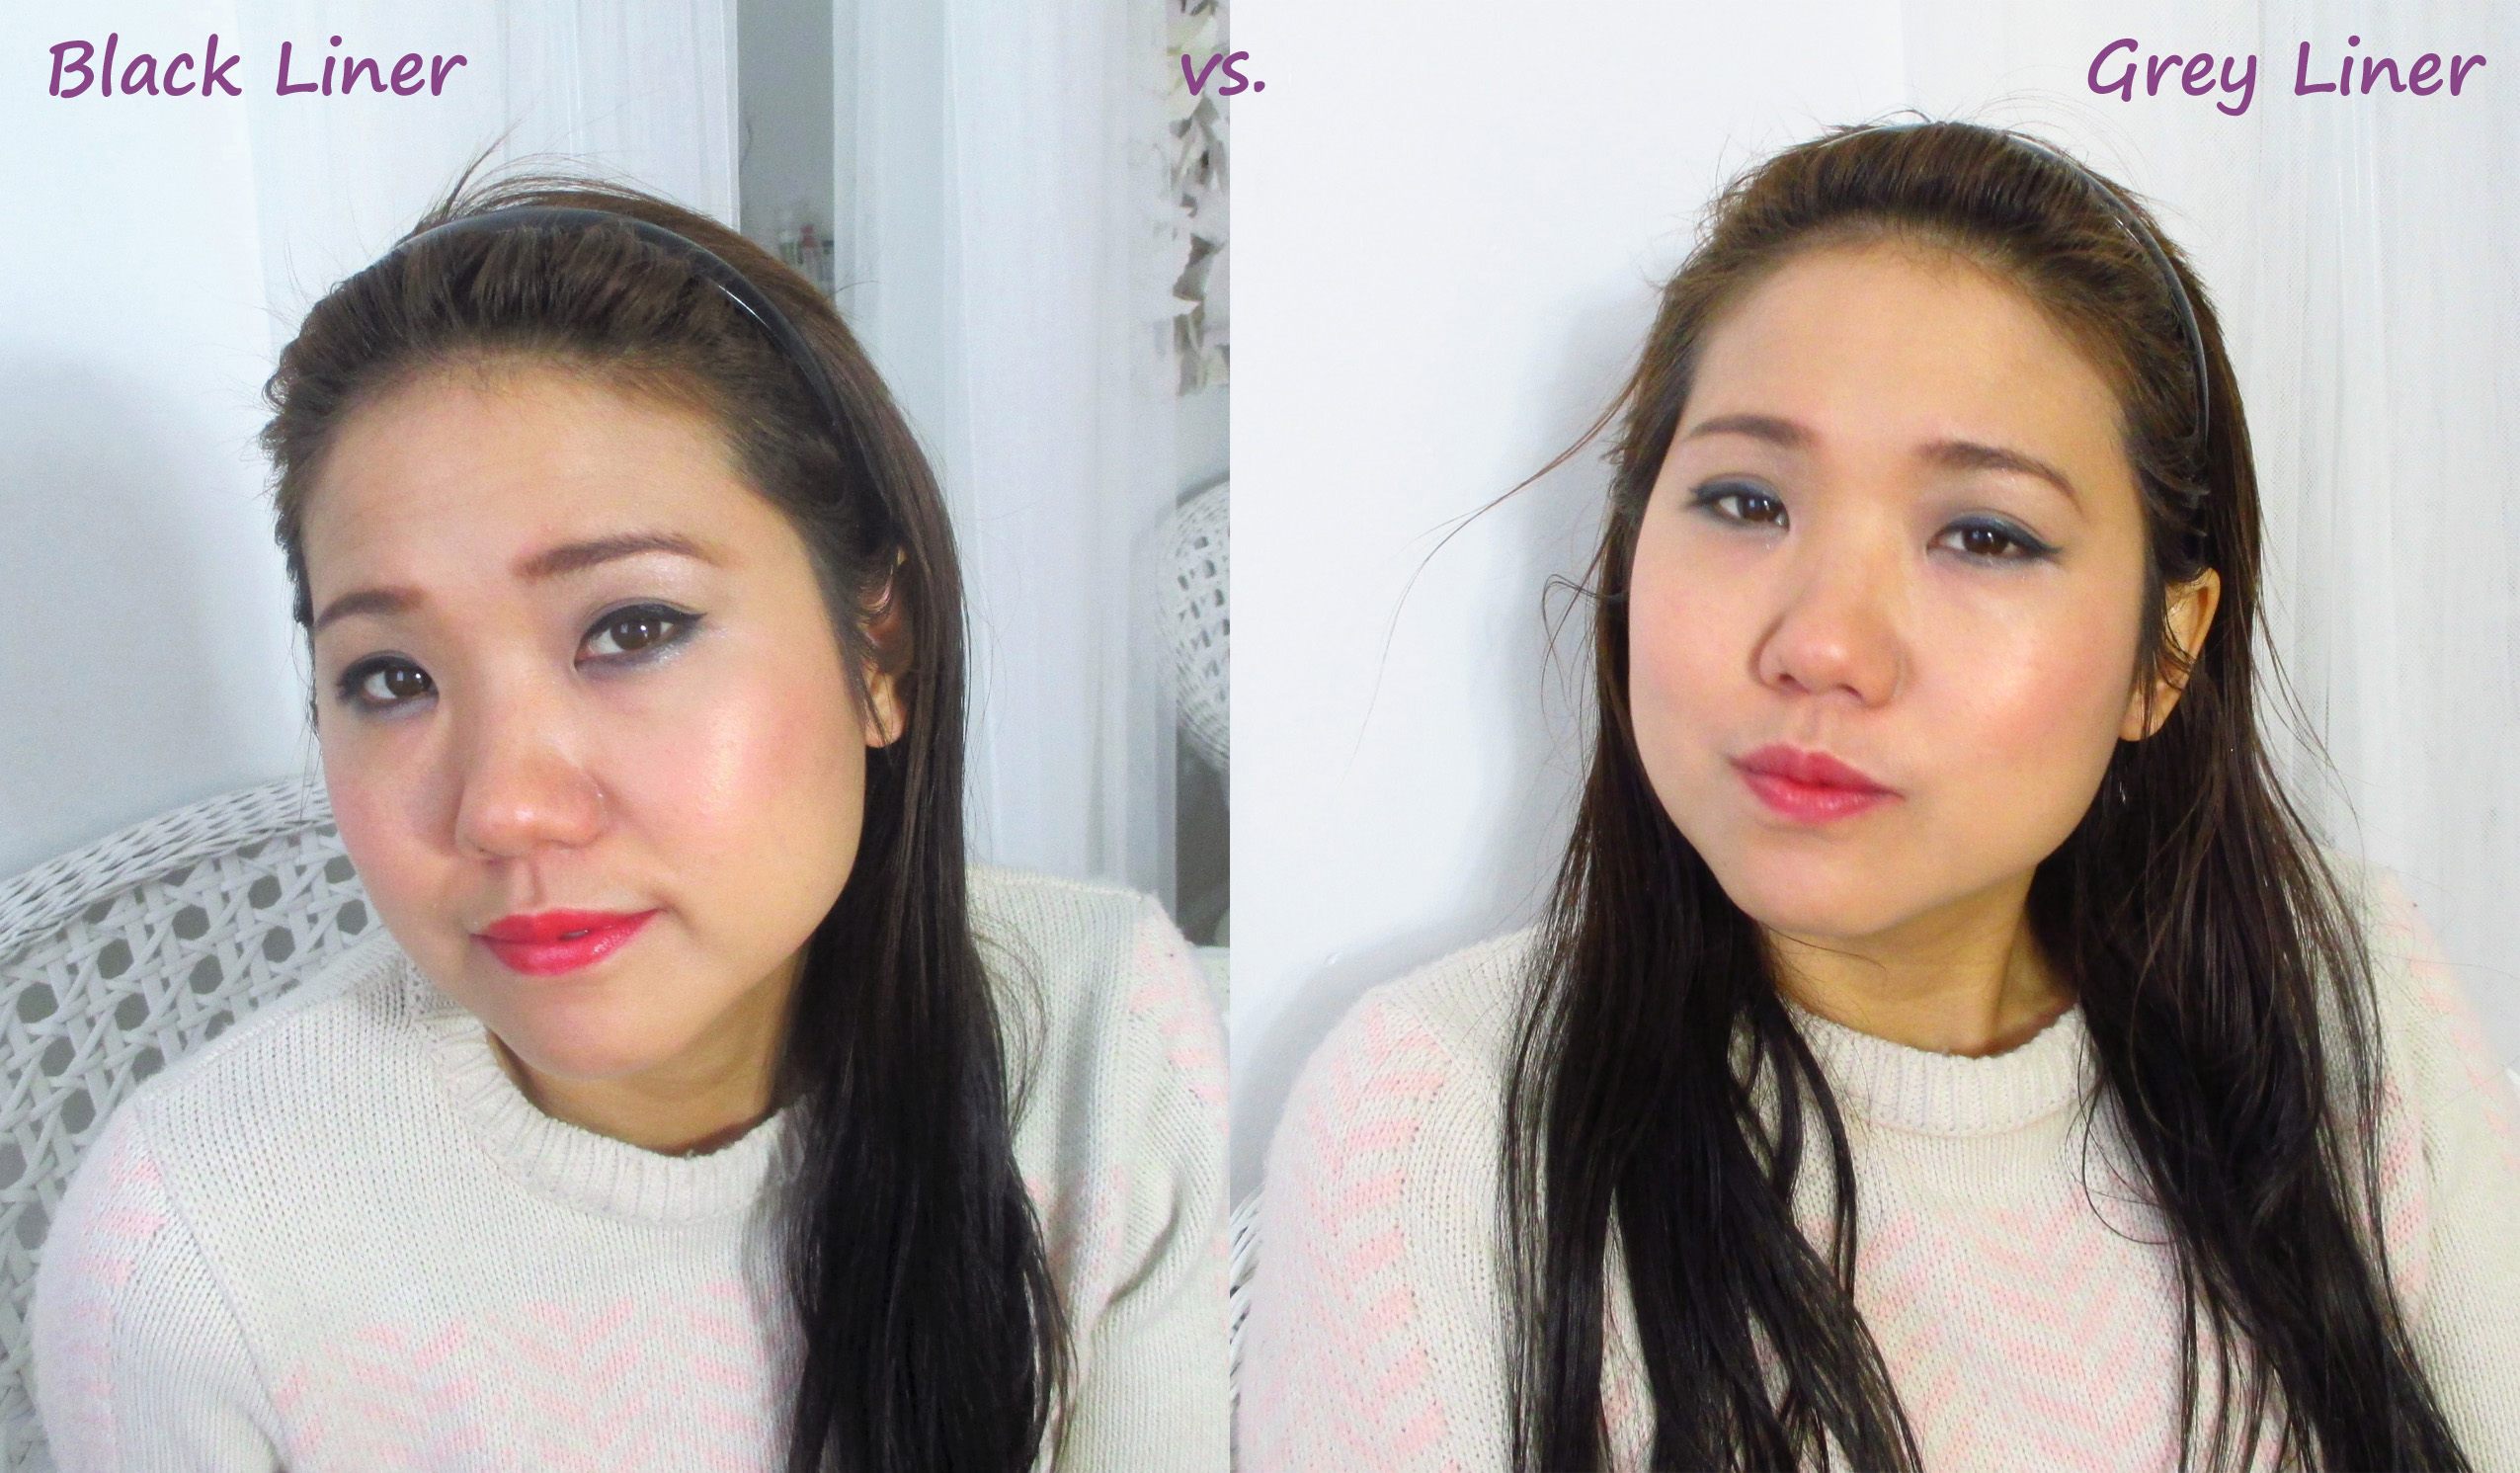
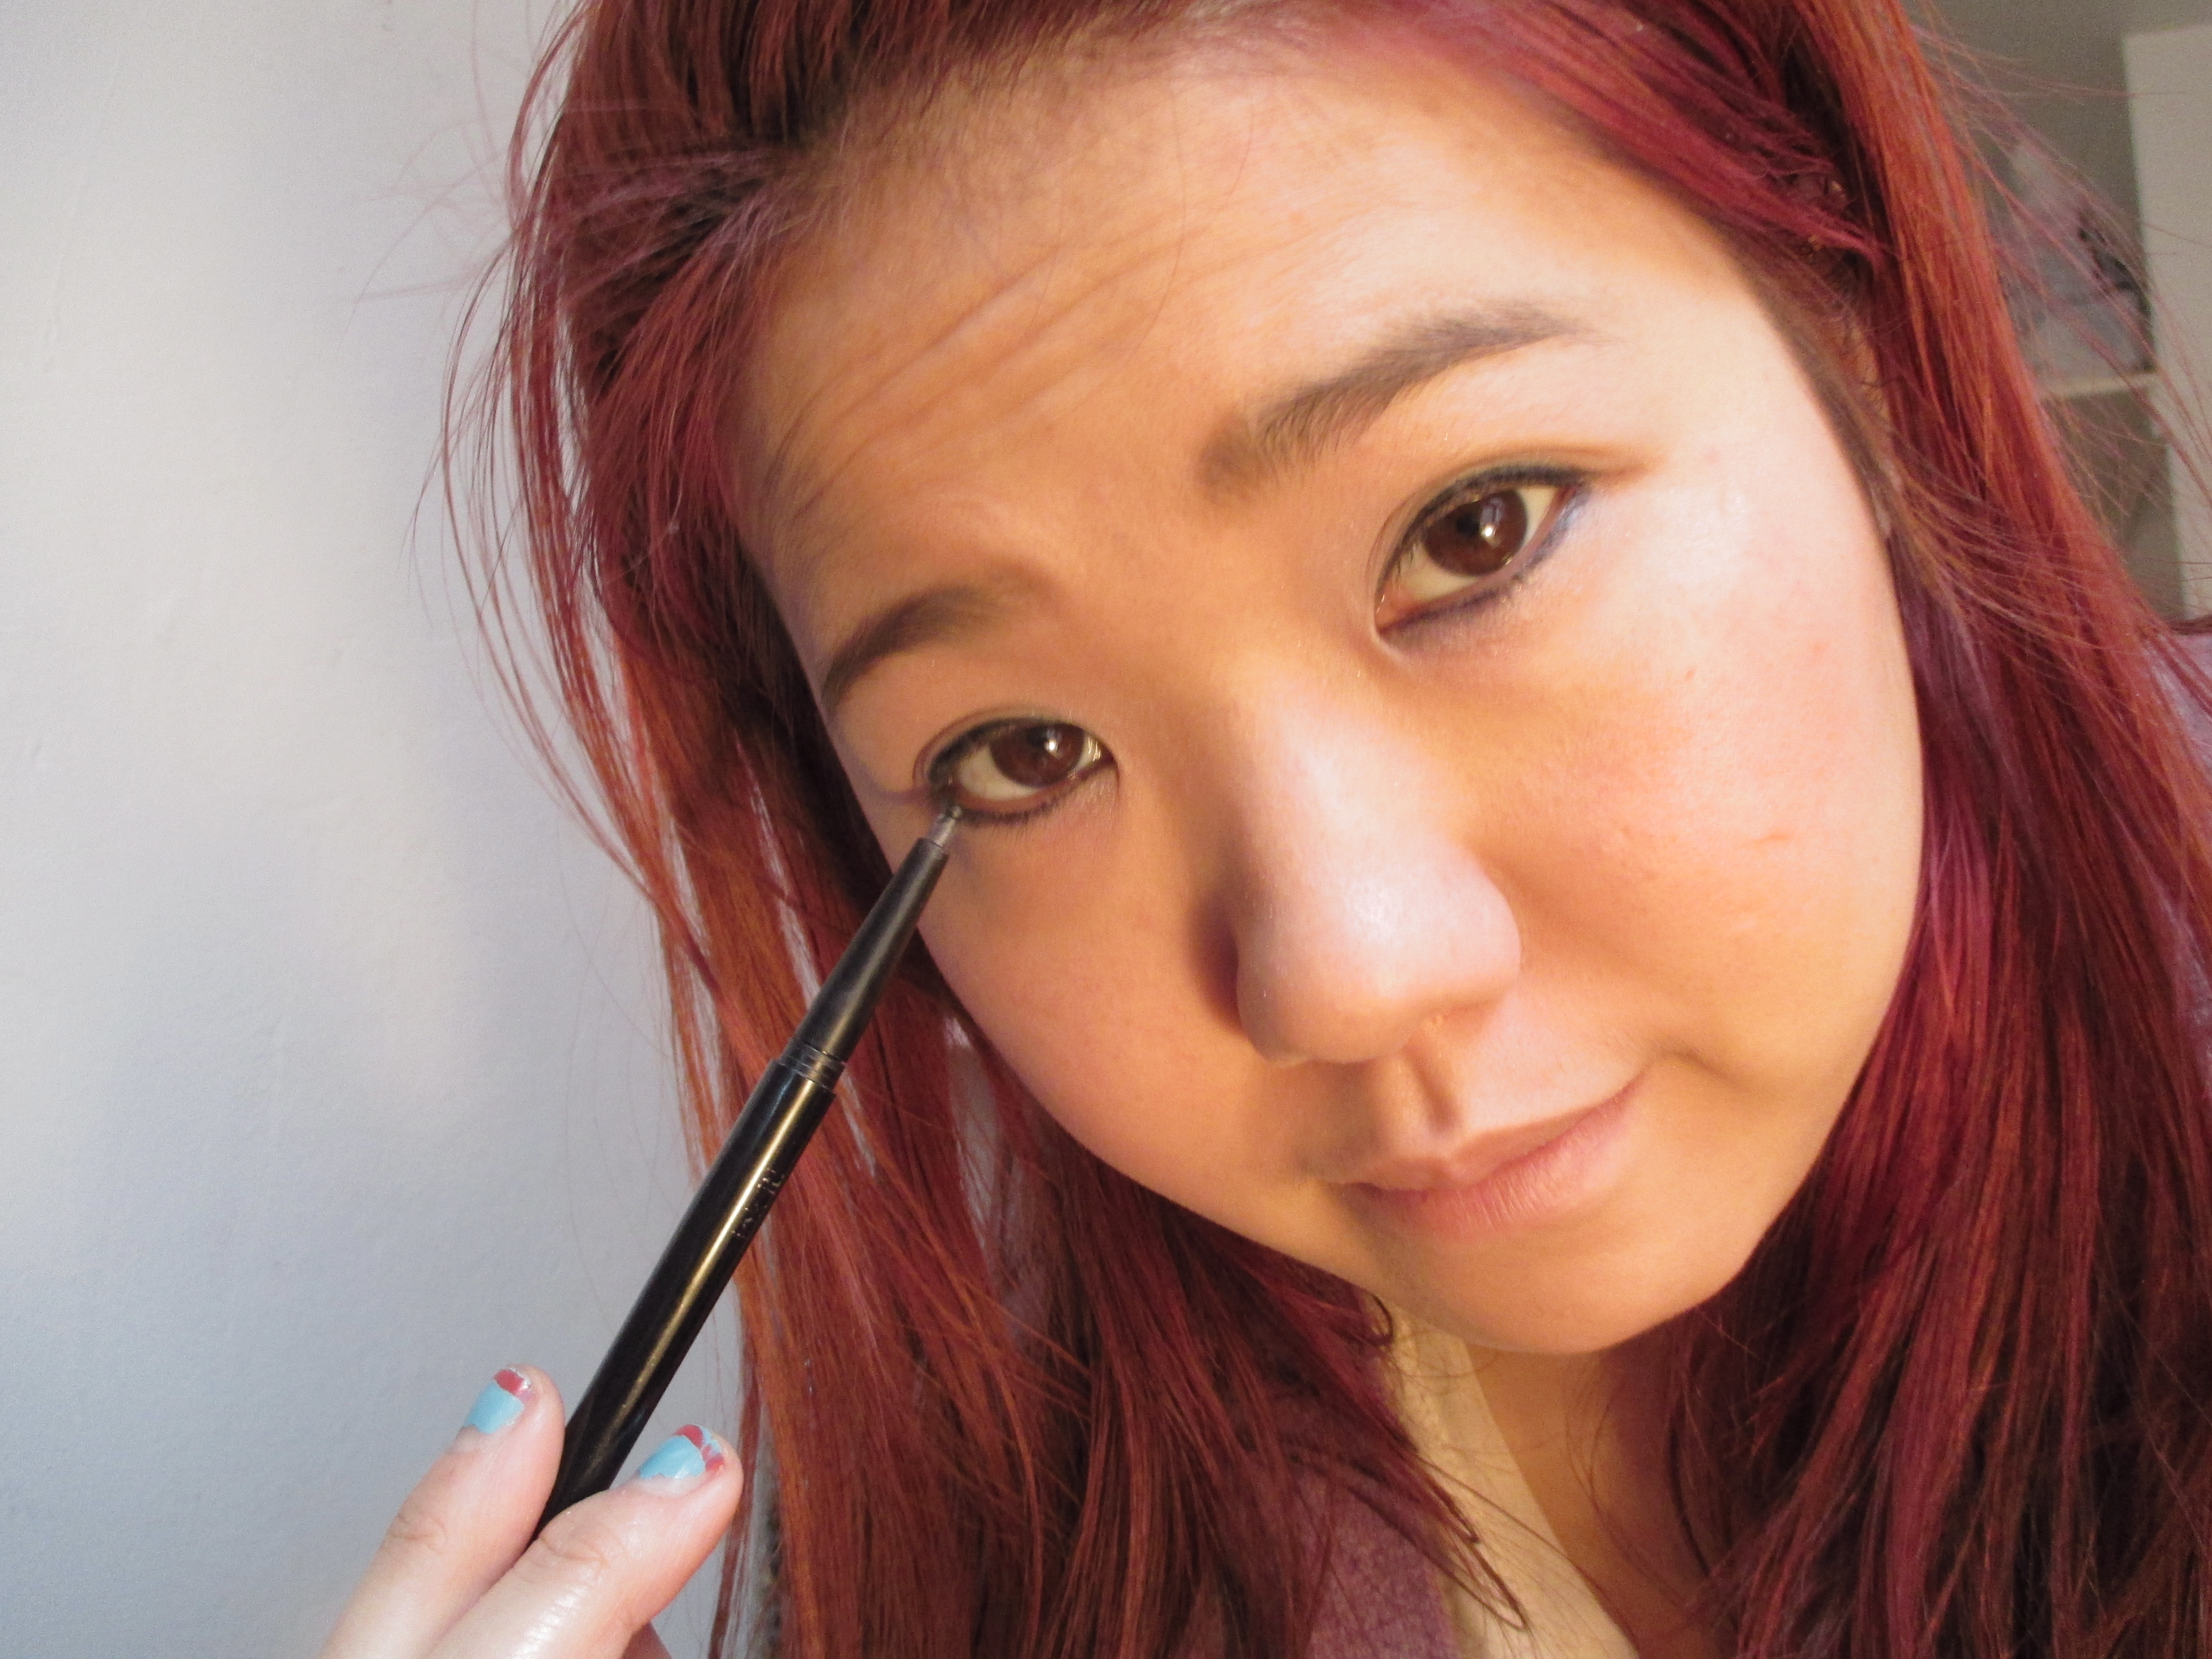
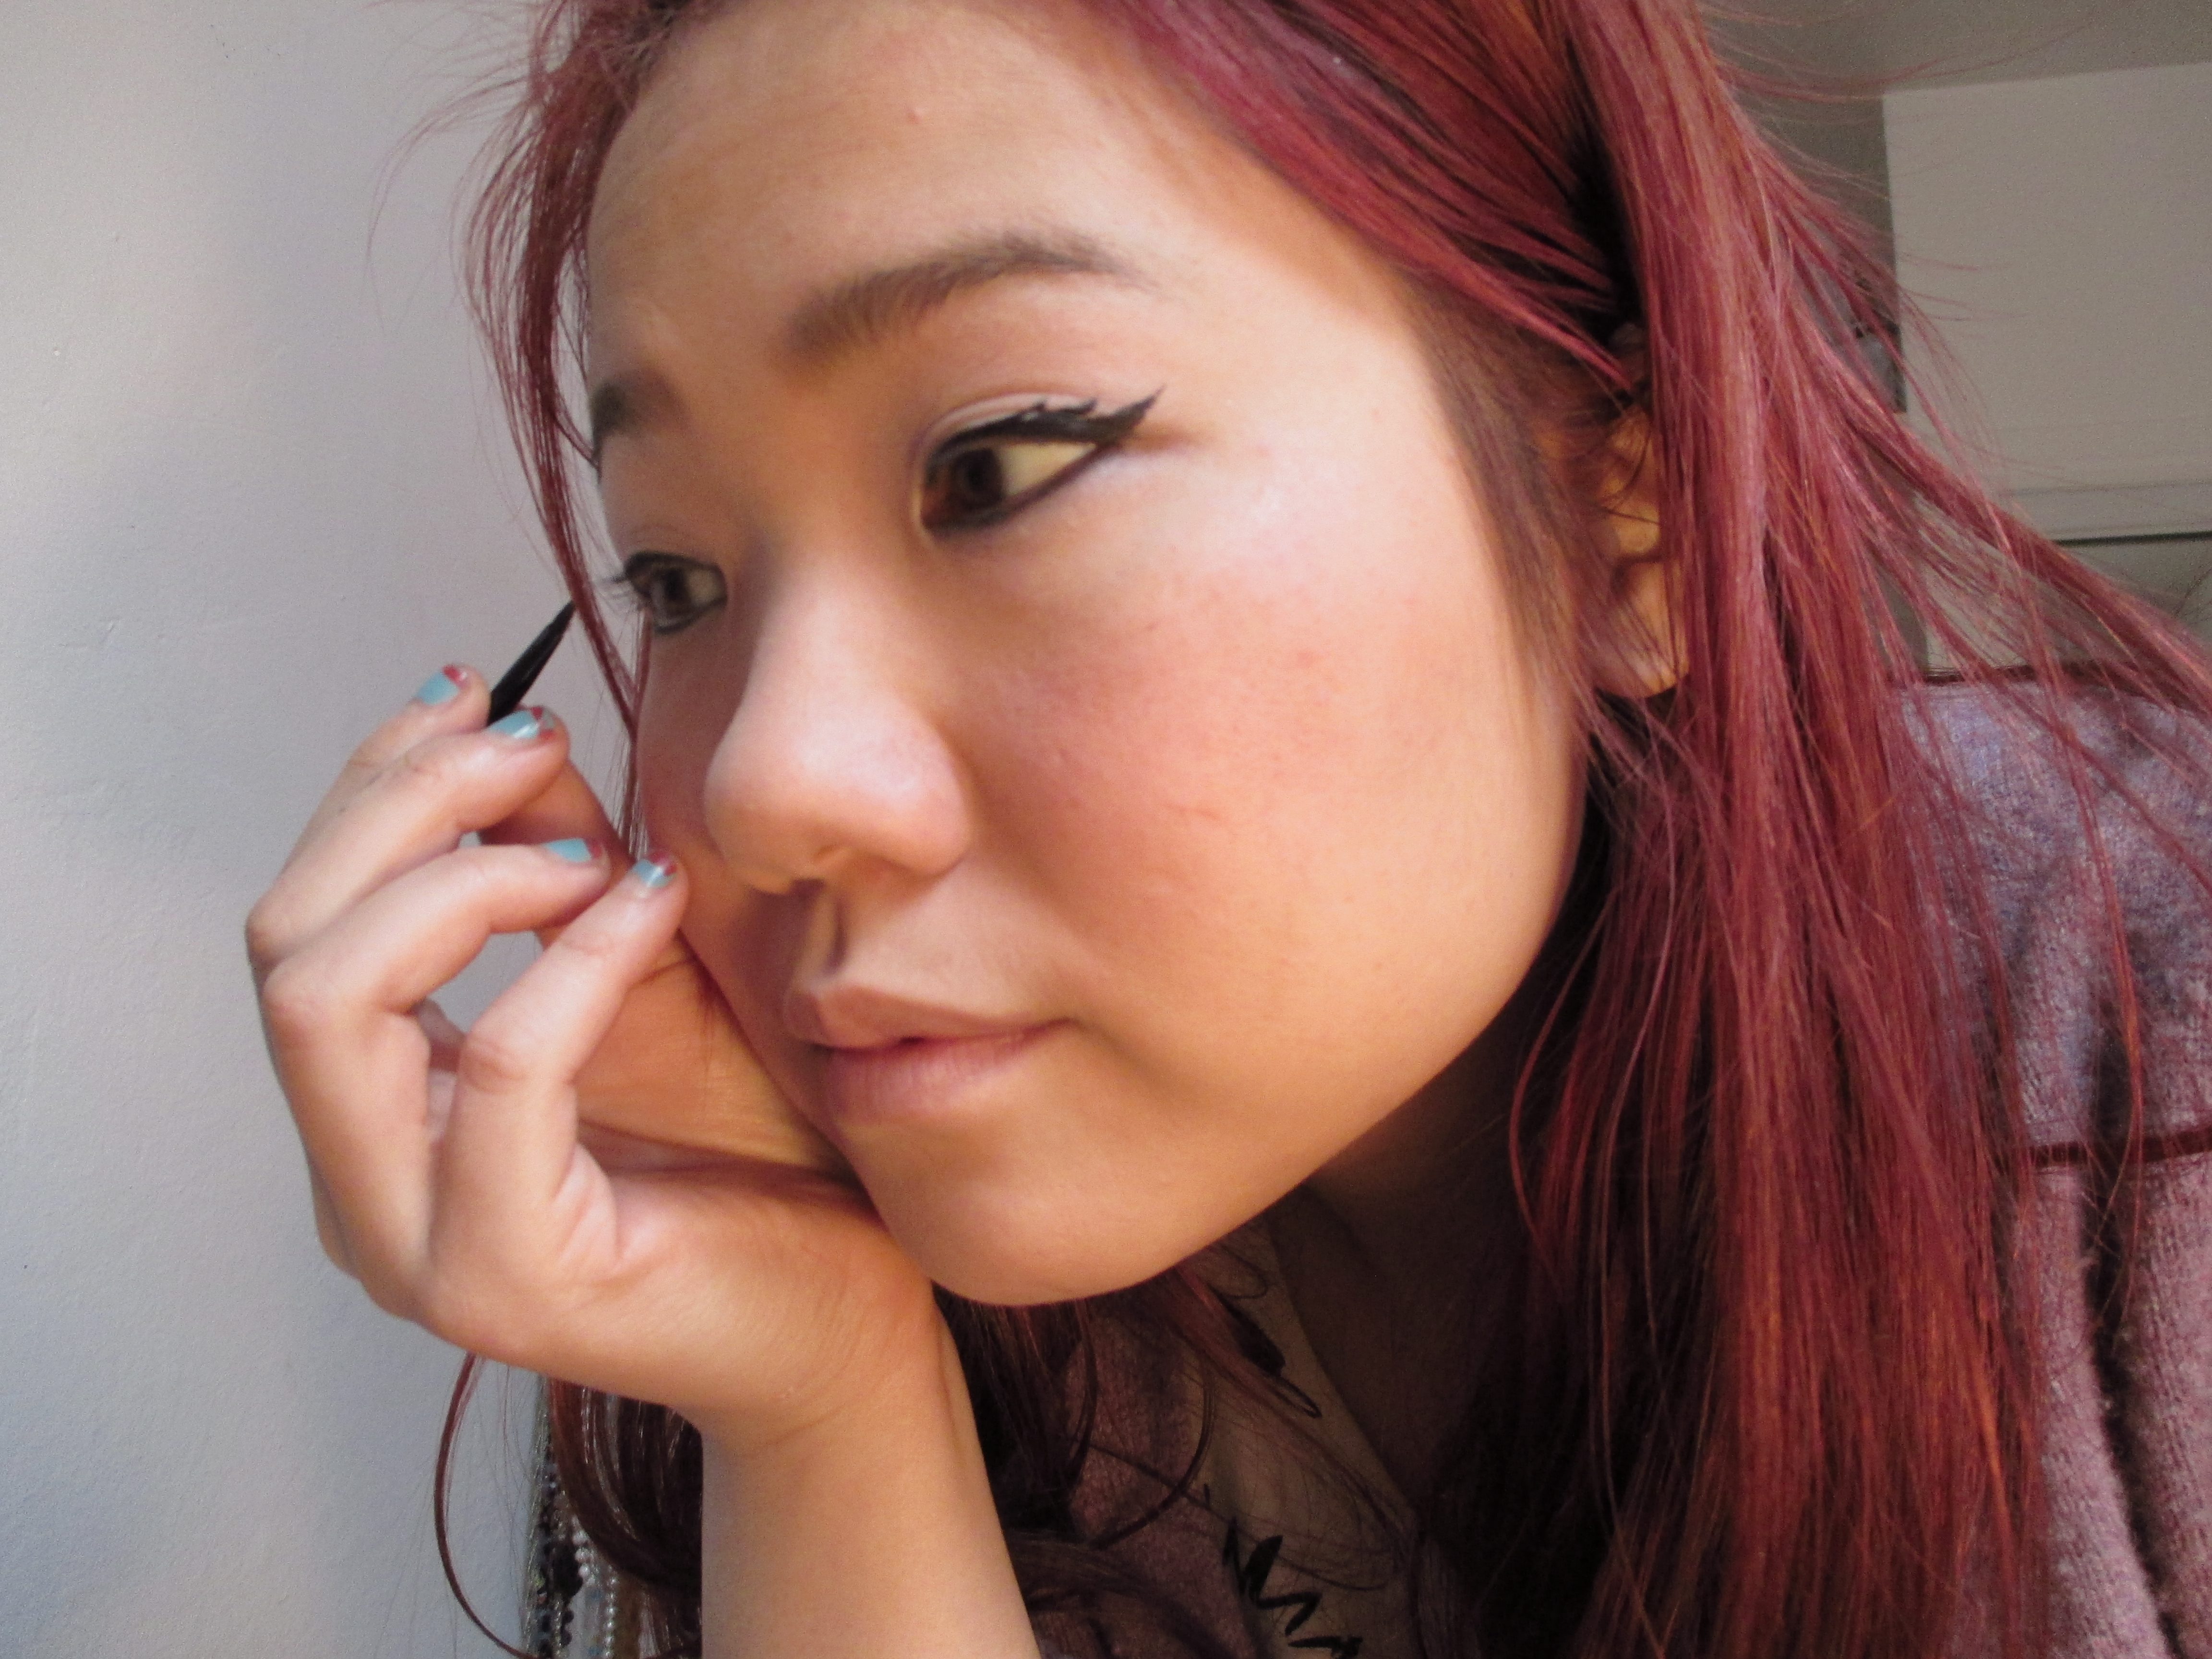
So as you can see with my photos, there is a only subtle difference between black and grey.  But you can see how grey liner is a lot softer, and gentler, it opens up my eyes a bit more and still is a cat eye make-up.  In the black liner photo, I used all the same make-ups as the grey liner photo, but with black, you can see how my eyes are more emphasized and I look harder and edgier.

So which do you prefer?  Hard edgy black, or sweetly composed grey?  These days I’ve been going for charcoal grey liner since I find that sometimes, less darkness on the face can actually be appealing, and maybe even more youthful.  Try it out and let me know what you think.  Make-up and being a girl is all about the details and small things!

Glamorous Eye Make-up for the Holidays and Parties

So the holidays have long gone, I am glad.  For some reason, end of the year festivities always make me sad.  Just so much obligation to buy presents, go to church, see family, go on vacation, eat, drink, party…etc. It’s just too overwhelming for me for some reason.  At least during this time, I was able to host two parties…and try out a glamorous make-up look that is dramatic, and formal, but still fun and pretty.  I like it because the use of colour is minimal, it relies more on the shape and boldness of the eyeliner.

I was inspired by these photos I found on tumbler:

Tian Yi! she is the Asian model in this pic. I think the fashion world needs more diversity in it. :)
Elsa Hosk and Tian Yi! She is the Asian model in this pic. I think the fashion world needs more diversity in it. 🙂
Ana de Armas, channeling all kinds of pretty!

Notice how these two photos have bold black liner on top lid as the main focus?  For my holiday party look I combined the looks above…the heavily retro, overly dramatic eyes of the models and meshed it with the classic gorgeousness of the simple cat eye of Ana’s make up.  And this is what I got:

IMG_3515 (2)
I wanted something bold, but still soft…
I did this one with more of a point flicked up...but still bold...
I did this one with more of a point flicked up…but still bold…

How I got my Dreamy Party Look:

  1. Do your make-up foundation as usual.  If it is a fancy party, you can put on more foundation or concealer where you need it. Line your brows.
  2. Pick a neutral eye shadow.  I find the more bold the liner, the more neutral the colour should be.  That keeps things elegant and not garish.  I used a gold pearly colour on my lids, but a nude with shimmer, or sparkle shadow would also work if you want a bit more glam.
  3. THIS IS THE SECRET: line your top lid with black eye shadow with an angle brush.  Get the general shape you want.  At first you will see how the eye shadow doesn’t give you the graphic look you desire.  It gives you softness, a soft thick even line.  Now part two: get out your liquid liner/pen and trace along the edges of where you put your shadow for bold edges, kind of outlining the shape.  You will not be able to see where the black shadow line ends and where the liquid liner begins, I promise.
  4. Add blush and fake lashes for extra oomph!

Notes: Why do two kinds of liner?  That is a good question. Liquid liner is a devil to wear on the lid.  It can be thick, crusty and just cakey and crackly if you wear it in large quantities.  As a little swipe on your lid to do a cat eye, just liquid is fine, but for thicker lines, the coverage is not as smooth as pencil or shadow lining.  So to get the best of both worlds: smooth colour and graphic edges, a lot of girls do this trick of just outlining the edges of shadow/pencil lines with liquid liner to give it shape and definition.  Give it a try today and see how it helps keep graphic eye make-up from being too heavy or harsh.

Tip:  I like to use a pen liner.  I get one with a pointy tip that makes nice fine lines and is dark and intense in colour.  Pen liners resemble markers, so it is like drawing on your skin and eyes.  But the control you get from the pen is so much more than what you get from liquid brushes…


You’ve mastered the “cat eye” make-up, now let’s do the “mouse eye”

I am not really that into Theme Parks.  They are tourist traps that suck up all your money on junk food, cheap souvenirs, and just temporary thrills.  But there is still something about being young at heart and liking Disney World.  There is definitely something magic in the Disney Parks, something they did well, something that can generate memories, just by walking down it’s whimsical streets to having your photo with Ariel, or with Mickey, himself.  That’s why this year, I took my kid to Disney World in Florida.

To celebrate this occasion, I’ve been thinking about different make-up looks to create and try on this trip.  How about a make-up that incorporates mouse ears somehow?  Hmm, I am getting a feeling that this would not be pretty.  What about Minnie Mouse…how can she inspire me?  She’s got some long lashes.  Three to be exact…

75519

Then I thought of the time that I caught a mouse in my house.  Well, actually, my cat caught it and almost ripped it to pieces.  I saved it, from my cat, but it still ended up dying.  I was sad.  It had the cutest little beady eyes, surrounded by what seemed to be bushy eye lashes.  So now, combining Minnie Mouse’s eyelashes and that of a real house mouse, I’ve created “mouse eyes”!

Similar to the famous “cat eye” make-up of an angled slanty-eyed look with black liquid liner on the top eyelid, I decided to get a bit more playful and curly with my “mouse eye” look.  Here’s how to do it:

This is me without makeup.  Not too shabby I hope!
This is me without makeup. Not too shabby I hope!

Start with a clean face.  I apply my bb cream/foundation, and set with a dusting of powder.  Next up, my brows…fill in with a pencil or with a powder filler.  Then start with the eyes.  First of all, trace a thin black line around your eyes, making an almond shape.

perfectly pencil lined eyes

I don’t usually do tight lining (which is lining the bottom lid as close to the eyeball as possible), but I get as close as I can, without hitting the wet lid.  Then, this is where the artistry and steady hands come in.  Using gel liner in black, I draw in some bushy curly lashes, that extend from my outer eye, and curl two more times to form three pointy peaks.

IMG_0041

The result is  the illusion of incredibly thick lashes, that resemble that of a mouses lashes.  What do yo think of it?  “Mouse eyes”.  I’m going to be wearing this during my trip to Disney World…and hopefully some of the magic that is in the air there, will be reflected in me!  Don’t forget to add a smidgen of blush and a bit of lip gloss.  Th oust ready to go theme parking at Disney now!

IMG_0043

IMG_0056