Anti-quarantine Glam Make-up looks…

The worldwide lock down has brought my spirits down as well. Physical distancing has bound everyone to their homes hiding or imprisoned; letting one’s appearance go is sadly is the new normal daily life. No hair or nail salons, no spas or gyms…basically no beauty allowed.  And with myself being in the beauty industry, I’ve been unemployed for six weeks now. I’m so bored with my inner thoughts and no amount of youtube, disney + or netflix can distract me from myself. I’m trying not to gain a ton of weight during my unemployed home times, and I’m basically living day to day wondering the necessity of pants. This is a dangerous time. I wanted to find a way to make social distancing more bearable. So what better than to share some glamourous full face make-ups suitable for happier days. These make-up looks I have designed are useless during the lock down, but give me something to look forward to wearing post covid, when all eyes may be on myself and the beauty of others!

Plum Smoke Romance:

I originally did this look for valentines, and I liked it a lot for the flirty sultry aspect. Plum is also a lot more inviting and interesting than the usual charcoal/grey smokey eyes.. So here is how to get it…

  1. Prepping the face…for this look, the less shine, the better. everything has to be matte and smokey. That includes the foundation, concealer and powder. I will even do my eye shadow base in a matte nude color.
  2. Define and fill in brows: pretty standard in all make-ups actually.
  3. Find a matte plum eyeshadow and sweep it on the whole lid from eyelash line all the way to the brow bone. Smoke out and deepen the plum with a charcoal violet shadow for a second coat on the entire eye lid.
  4. Using a soft eyeliner, line the top lid and smudge the line with a dark shadow to blend and set the liner. Use that same shade for the bottom lid and line the outer corners of the eyes.
  5. Two coats of mascara always, and falsies if desired. Blush is optional for this look and I kinda prefer without.
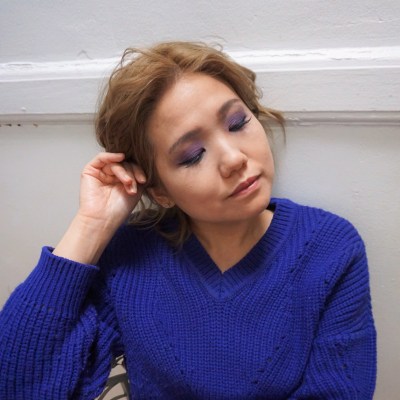
Carefree and smokey. I have dark days too.

Playboy Bunny Neutrals:

I made this look one Halloween when I contemplated donning the iconic  playboy bunny costume. The elegant body suit with stockings, bow tie, ears and tail. It’s pure feminine prowess at it’s best. The make-up for this look is a glam relies heavily and a retro cat eyeliner and shimmering nudes and taupes and goes well with any going out outfit.

  1. Foundation and concealer as always. Concealer is particularily important for a flawless matte complexion. Add powder generously.
  2. Fill in brows bushy and fluff them up fully!
  3. Matte shadow base all over top and bottom lid. Shimmer eyeshadow just on the bow bone and inner corners.
  4. Dark shimmer taupe shadow in the crease. Shimmer nude in the main center upper lid. Line with black pencil. Set the pencil line with a dark shadow, black or brown…outline the bottom lid with a bit of the same dark shadow (just the outer corners)
  5. Do a dramatic cat’s eye liner with liquid liner.
  6. Add two coats of mascara and falsies of desired.
  7. Use a matte blush on the cheeks.
  8. Finish with a red lipstick matte or gloss.
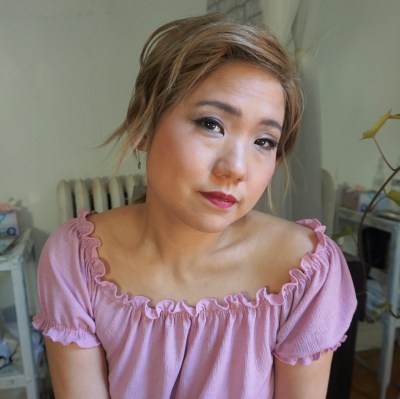
I do like to be girly sometimes. What better than to don a neutral glam look.

Ice Blush Princess:

If one could be the fairest in all the land!  Magical and fancy, pretty yet cool, behold the ice princess make-up. With ice pinks and plenty of dewy glow it’s a grown up way to show off baby doll pink.

  1. Moisturize the face with a non greasy lotion: This looks best when the skin is highly mosturized. Cool shimmery colors show every crack/crease on the face when it is too dry.
  2. Foundation and  concealer or brightening serum under and around the eyes is key to achieving that flawless glow; use face powder lightly to set. Finish brows with and filler and fluff aiming for a natural definition.
  3. Shadow work: Neutral non shimmer eye shadow base on top lid. Shimmering highlight shadow on bottom lid and inner eye corner and brow bone under the brow. Blend lightly with a blending brush. Dark mauve pink for the crease, and cool true pink shadow for the main lid area, Blend.
  4. Black eye liner tight lined to the upper lashes. Smudge the pencil line with charcoal gray shadow to widen and smoke up the line. Use the same gray shadow for bottom lid line (just the outer edges)
  5. Double coat of mascara. Falsies if desired! Spray with a dewy setting spray for moisturizing to take away any remaining powdery look!
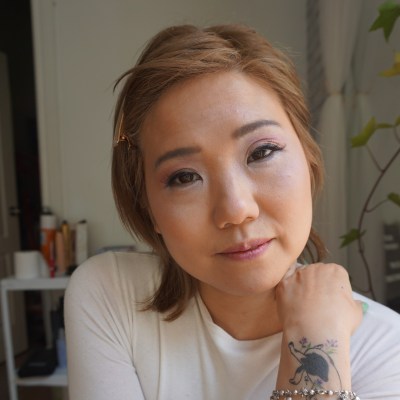
Ice pinks are so subtle. But hopefully my shiny color palette is visible here.

So which look is the most glam and fitting for me? I like all three and am happy to have been able to try out these looksduring these sad times of having no reason to get dolled up and be glamorous. Hang in there…beauty will reign supreme again some day.
Some basic, but important Tips for Make-up Beginners

First: A Throwback of my Past Make-up How-to’s:

I write a lot of articles about different make-up looks, whether it be a natural or vampy look, or valentines’ day flirty eyes; I have fun expressing unique make-up applications. Here a few of my escapades with make-up and color:

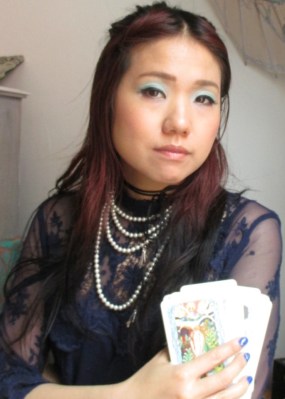
This is from my article on how to do be-witching eye make-up! check it out here.
Very dark lined cat eyes for a fashion forward winter holiday look. Article here:
An 80’s electric eyeshadow look for a bold statement. Article here

What works for New Make-up Wearers?

My make-up looks are certainly fun if you want to change up your daily routine, but what about people who want to start wearing make-up and are intimidated by all the complicated/trendy tutorial out there? I think the best make-up looks enhance your facial features simply, and doesn’t change or hide them. Like making your eyes look brighter with a shiny shadow, or making your skin creamier with a bb cream… In essence, make-up is basically playing up what you have naturally, and it shouldn’t feel odd or awkward. It’s a fun form of self expression, and one of my favorite ways to show off. Here are some basic suggestions I want to give beginners who are starting to wear make-up.

Tip # 1: No substitute for Good skin

Before putting on make-up, one needs to take care of the skin. Cleanse, exfoliate, moisturize, and use an antioxidant nightly on your skin. When you have healthy skin, make-up can actually do it’s job properly. Check out my line of natural skincare to learn more.

Tip # 2: Use an SPF or SPF loaded foundation

The sun is not your friend.  UV rays and ultra violet light from the sun IS what causes premature aging and wrinkling, so wear a sun screen under the make-up. If that is too heavy of a base, find a foundation with higher than 15 SPF to help protect your skin from harmful rays at the same time as giving you coverage.

Step 3: Level of coverage in Foundation:

Be honest about the level of coverage you want.  There are three levels of coverage: Light coverage is a tinted moisturizer, with no powder, medium is a light foundation/bb set with a bit of powder, and full coverage is a heavy foundation and concealer set with powder. I tend to like a medium coverage for day to day, since that often means I can skip concealer for minor uneven tones. But if you want the flawless skin look, you will have to go for full coverage. All options are fine, but choose the one that you want, not the one that you think you should want. Just because you have been make-up shy all your life doesn’t mean you can’t have the flawless full coverage look. Be willing to experiment to find what works for you!

Step 4: Definition of the face:

Using a foundation will mute all your other features. Your eyes will look smaller after foundation application, your mouth will be colorless, your eyebrows non existent. Your cheeks without color. So this is the time to add back definition.The more products you use, the more defined your features become. My minimum staples for definition are eyebrow color, eye lid color, mascara and blush. If you want extra definition, you can add an eyeliner, liquid or pencil, contouring/bronzer, lipstick, false lashes…etc. But again be honest with the level of definition you want!

The Bottom Line:

I feel that when starting to wear make-up for beautifying effects, it’s really important to be honest with yourself and how much coverage/definition you want to present to the world. Take the time to figure out what level of “made-up you really want”. And just like when wearing fashion, you want to have fun while expressing yourself with your make-up looks! Having a positive attitude and a willingness to try new things will get you farther in anything, any day!

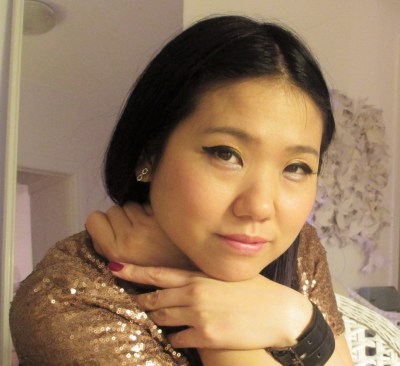
My day to day make-up look. Very minimal: Medium coverage foundation with a light powder, eyebrow definition, thin lined top lid and neutral eye shadows…no lipstick, but a bit of blush! My go to natural look…

My current Hair Color: “Bronde” and how to get it…

(**Disclaimer! I’m not a hair professional, but have just done my research and worked with my own hair to get results I’m happy with. But whenever dying your own hair at home, please follow manufacturer’s directions and consult with a professional when possible or in doubt)

As you all know…I’ve been lightening and coloring my hair since late last year, in an attempt to get a lighter color that is neither brassy, or too harsh/dark for my complexion. Check out my articles on hair coloring and soap capping. And recently I’ve been rocking a hair color that I found out was called “bronde”; too light to be a solid brunette, and too dark to be a blonde. Kind of a caramel color in between two opposites. A nice neither region that I would like to reside in for the next little while. Why? It’s not as high maintenance as a light blonde, and it’s not as brassy as that rust color dark hairs get when they lift too little color. It’s just peachy. Check out this Vogue article about this hair color to get some inspiration. But for how, here are some famous “brondes”:

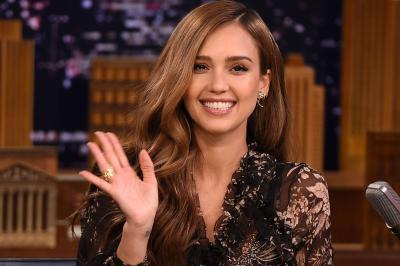
Jessica Alba: at the tonight show with just the perfect balance of light and dark caramels and soft, bouncy waves.
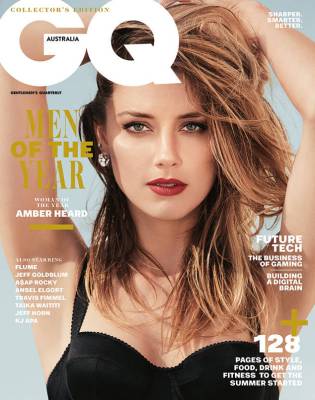
Amber Heard on GQ? As a darker blonde than she normally is, I think she’s got a lot more mystery and allure…
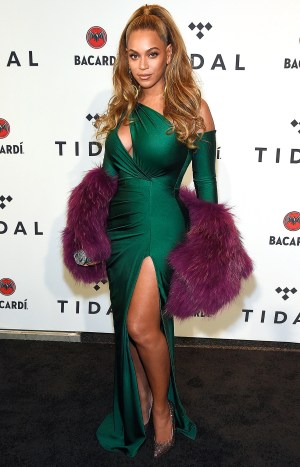
Beyonce is Bey-youtiful with a hair colour that compliments and warms her complexion. 

Okay, so you get the idea…how the color should look, but now how to achieve this neutral tone, middle level “bronde”color…Go to an expert hair stylist who does great hair color, or try it at home with these tips!**

For Brunettes want to go Bronde:

Step 1: Lighten enough: Believe it or not, us brunettes (black or brown hair) have to lift a level or two above middle lightness to achieve ‘bronde”. It’s not fair, but it’s just the way it is. For those doing this at home, you need to get to a level 7 lightness, at least. Check out swatches on how light a 7 level is.

Step 2. Tone/Glaze: This is so important as it adds the finishing shine and touches to a lighter hair color. Lightening dark hair always brings out warmth. And warmth is the enemy when trying to achieve a gentle tone in hair. Use a demi permanent hair dye with a low peroxide developer to add ash (blue/green) pigment to your strands. Use a lighter level than your hair is. So as a level 7, get a level 8/9 ash tone color. Toning with an dedicated hair “toner” only works for hair that has been lifted past a level 8.

A bit on the warm side, but I will be toning/glazing with a demi in the next week or so.

For blondes wanting to go darker to Bronde:

I’m not the most experienced in this matter, since I am a brunette, but here’s what I do know:

  • Use a demi-permanent hair color, since you are depositing only and not lifting levels. It’s gentler and from what I hear, shinier!
  • Stay away from ash tones. Ash upsets the darkening process by getting too dark/green too fast and then you’re stuck with it.
  • Always use a demi color one or two levels lighter than you want to achieve. So if I were a light blonde, I would do a 7 or 8 with warm/golden tones to get to caramel. Depending on the intensity of bronde you want, diluting the hair color formula with a clear gloss demi would be smart for avoiding over saturation and it looking flat and fake whenever dying darker.

Hope these tips help for all that want this hair color. I find it suits all skin tones and ages and just looks really healthy. Try it today.

**DISCLAIMER: all advice I give is based on my own personal experience with hair color. I’m not a professional hair stylist, so use my advice with a bit of caution and never hesitate to consult to a professional! Thanks!