Valentine’s Make up: Plum smokey eye with peach lips and dewy skin…

So, I was trying to think of a shorter, catchier title for this post…but alas, this eludes me! I’m just writing an article on make-up styles for Valentines this year…and want to share with all this idea: A smokey eye…but with a twist…it’s a lot lighter and softer than the traditional smokey charcoal eyes, instead it is more about pewter and plum tones, colors that add darker colors to the eyes without overwhelming them. Instead of being a vampy vixen on a night in the town…I think plum smoke is more along the line of “fashion student bored and trying to spice things up”…

So here is my tuturial on how to get this look…

  1. Start with a previously moisturized face.  Then mix a heavy moisturizer, like a night cream, with a pigmented bb cream/foundation in the palm of your hand. Use a ratio that makes sense, around 1 part moisturizer, 2 parts foundation. Spread the mixture evenly on your face. Now you have a dewy complexion. Set with a light dusting of illuminating face powder. If you have a glycerin spray, or a dewy make up setter, spritz that all over the face now.
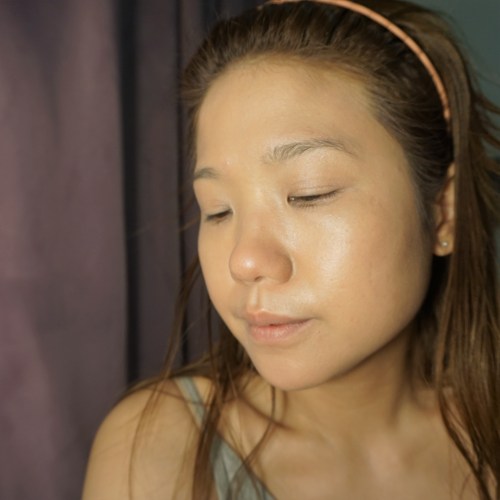
    A mixture of heavy face cream and pigmented bb/foundation leaves skin naturally glowy…set lightly with illuminating face powder
  2. Eyebrows need to be filled in, and an eye shadow base in a neutral skin tone must be applied on both the upper and lower lids. Then get a highlighter shadow (a light shadow that shimmers and reflects) and do the brow bone, the lower lash line and inner eye corners…
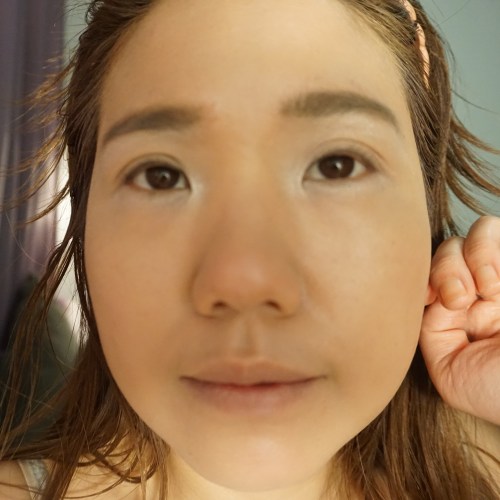
    Brows filled in, and the eye shadow base is on…shimmer highlight in the right places…
  3. Now you are ready for the dark colors: Do a light even sweep of the pewter color on the whole upper lid, just to the brow bone. Now switch colors…do a purpley plum color on top of the pewter shadow also to the brow bone. Line the bottom lid thinly with the same purpley plum shadow and diffuse all hard edges of shadow with a clean blender brush.

    I used the NYX full throttle palette. But plum and pewter shadows can be found anywhere…
  4. Line the top lid with a black soft eye pencil. Set the pencil and smudge it a bit with black shadow and an angled fine brush. Line the lower lid thinly just on the outer corners with black shadow as well.
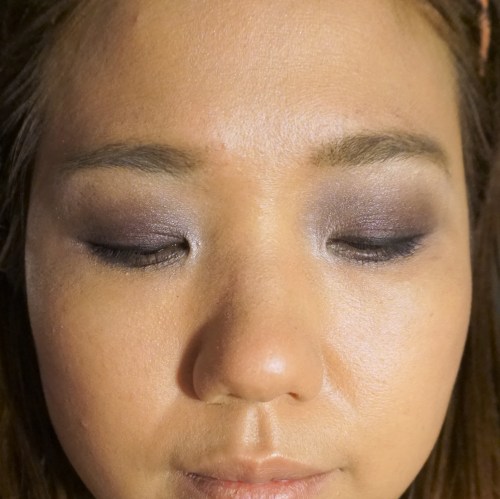
    This is two shadows on top of eachother; a must is a blending brush to soften the edges of color.
  5. Mascara: A good, black, non-clumping formula mascara…two generous coats on the lashes before drying.
  6. Lining the smokey eye top lid with a black liquid liner; I like to use pen liners since they make getting the cat eye flick so much easier.
  7. False lashes: These are optional, but kind of a must, for giving flirty drama.
  8. Blush. Use lots of this…on the apples of the cheeks, extending up to the temples on the sides of the face…down stroke for the temples, up strokes for the cheeks. Choose a nude peachy pink lip color.
  9. Top with lots of setting spray or a glycerin spray. This helps with the dewyness, and reduces the powdery look.
    The finished product. On camera, it’s not really visible that it’s a smokey eye, but it is, just more subtle!  

    And there you have it…a very simple, one tone eye color and NO contouring necessary. You will look like yourself, but better, with a cute smokey eye this Valentines Day. Ask me in the comments if you have any questions and Happy Valentines…xoxo.


Going from Work to Party: Fashion/makeup hacks

So you have an event coming up at 6:00 and you’ve been working all day and are far from feeling like a model. After the recycled air, computer screens, standing/sitting and fulfilling the demands of clients/employers; and all the stresses of whatever work environment you are in, the bottom line is you’re pooped. And you probably look it too. Not exactly fun to have to scramble home, freshen up, change your clothes and touch up a make-up application that has long expired since the morning when you put it on. It is looking more like an oil slick, than prettily powdered, and well, you’re not exactly feeling primped and ready to go after work in general.. What to do? Let me share with you a few hacks that help me, when it comes to feeling glammed up, rejuvenated and able to face the world, whether for a date, a party or event when you don’t have a whole day to preen:

1. Skip putting on make-up in the morning and just moisturize heavily and allow your skin to soak it up all day. Make-up is drying to the face, which is why skin produces so much excess oil by nightfall. By not wearing make-up during the day, your face skin can breathe. Then you can do your make-up before the event after a quick face rinse or toning, for a fresher application.

2. Dry shampoo is your best friend. Hair gets limp and oily throughout the day. There is no time for a shampoo in the shower, but a little bit of dry shampoo will make sure that by night fall, it looks like you just got a blow out.  I like to do it the night before to make sure hair is not too powdery with residue from the dry shampoo, but if you have really greasy hair, during the day works fine too. Just shake it out lots when you’re done. Check out my article on how to DIY a dry shampoo.

3. Drink lots of water. Dehydration not only dries out your skin, but it also causes water retention, tired puffy eyes, and a look of fatigue in general. Aim for at least 2 litres during the day, especially after coffee. Having a nice hot herbal tea flushes out toxins and helps you de-stress so definitely try that.

4. Pre-plan your outfit. Believe it or not, even if you kinda know what you are going to wear, you don’t. Something you pictured working can suddenly look out of place or odd: ie a skirt your thought would match doesn’t, a sweater/top is too see through, (or not see through enough!) Put on the things the night before so that after work you are ready to go.

5. Over pack your arsenal: Unless you have time to go home (which you probably don’t) Bring all your trade secrets to work to use before leaving: perfume, hair spray, culing iron, straightening wand, combs, hair clips, lotion. Don’t be afraid of looking high maintenance with having to carry a huge bag to the event. Just leave everything at your workplace/office in a discreet bag that is in nobody’s way, and pick it up on your next shift…while you go out with the tiny purse that says you didn’t have to work at it!

6. Eat little meals through out the day. Nothing is grosser than feeling bloated and tired after eating a big lunch, having to digest that, and then topping that off with a big snack at the end of the workday too. Eating small meals through out the day makes your energy better, and lets you not have spiking sugar levels that add to fatigue. Also, it prevents you from getting too hungry so that when you are out, you don’t binge on food.

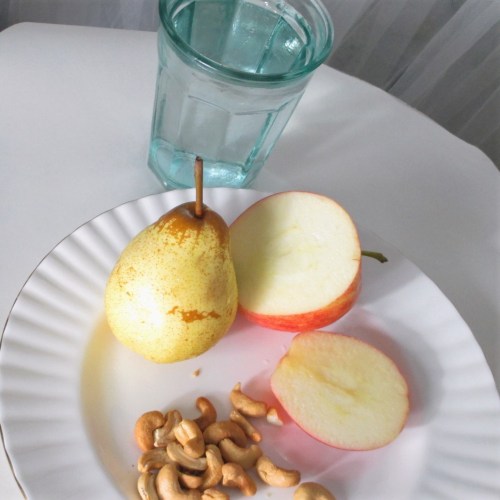
Is this not a yummy sight? Fruit and nuts and water make a great snack on busy work days leading into a night event. They are easy to digest and cause minimal bloating.

7. And the number one tip to looking your best in the least bit of time? Just make an effort to take care of yourself daily, event or no event. Have nice manicured hands, moisturized skin, brush your hair and your teeth. Always eat well and drink lots of water. When you are making self care a habit then the odd times that you have to hustle to glam up for a date are that much easier….because you are often looking your best anyway!

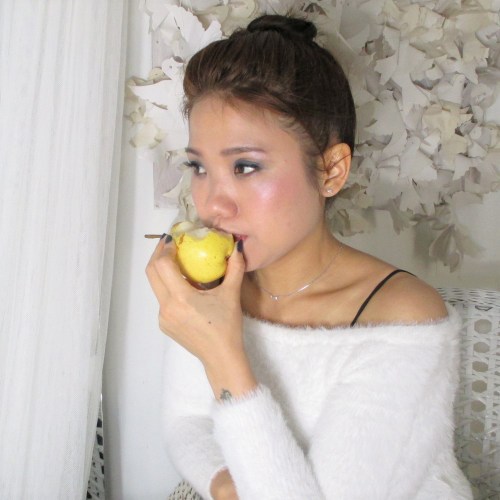
Just before an event I had to go to…and yes, I ate the heck outta that pear!

My Spring DIY projects!

Spring is a beautiful time to the year.  In pagan beliefs, it is a time for rituals of cleaning, renewal and rebuilding.  With that sentiment, it has seemed to fuel my current DIYs, and this is a douzy of on article with 3 awesome projects for fashion and home that I’d like to share with you all!

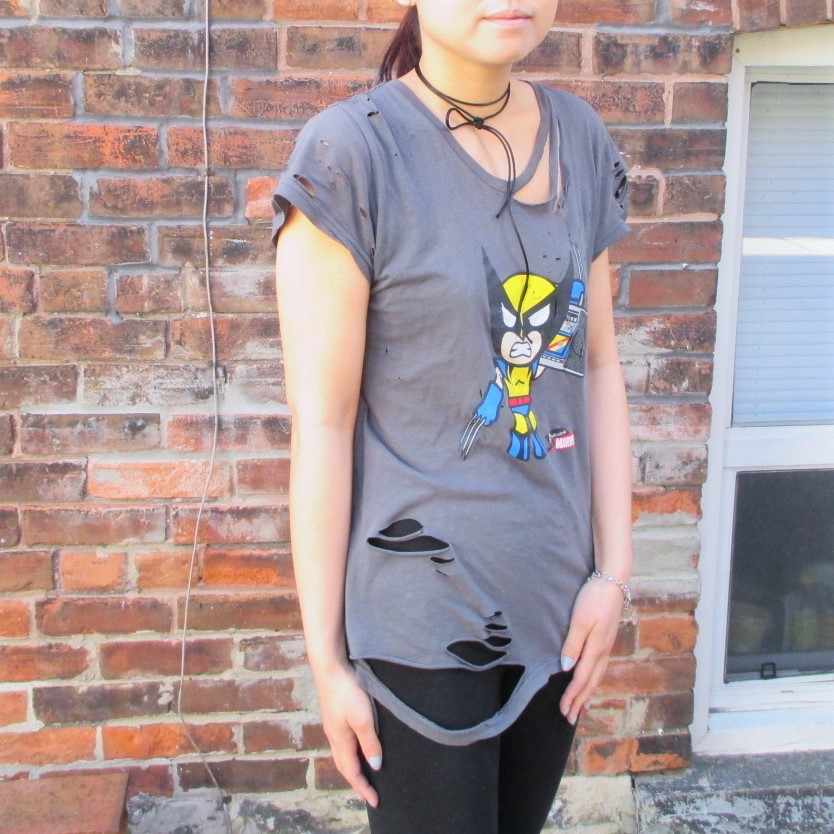
#1 Distressed and broken t-shirts

I work at a high end fashion boutique, so when raggedy beat up shirts started showing up at the store and I also saw this look in movies and tv, I wanted to get it.  But I wanted to get it for free.  So of course I would DIY this look, it’s so easy to. Who doesn’t have a t shirt in the drawer that is not getting used these days and could benefit from a make-over?  I used an old graphic tee that I barely wore and after a few tutorials from youtube on how to compose a good distressed pattern, I went out on my own.. and I quite like it. Try it yourself, it is really easy, but I recommend you distress a trial t-shirt you can dispose of first before doing it on the one you want to keep.  It really helps you learn what kind of distressing works and where you want it on the shirt…

I really like what I did on the hip/edge part of the shirt, and the sleeves are pretty cool too. all I need is to fade the graphic a bit more somehow…

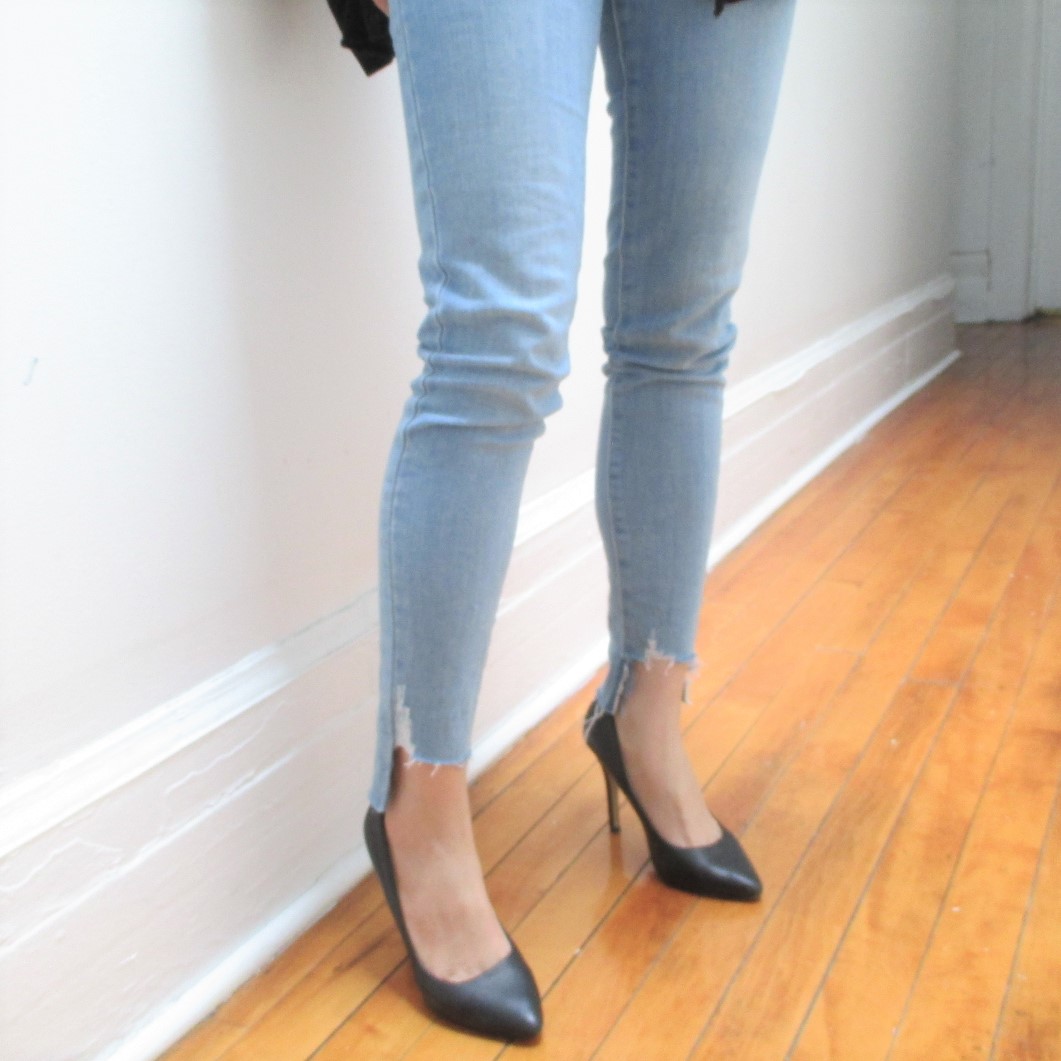
#2 Uneven Jean Hem

This trend is a bit more low key.  I have only seen it a few times, and it looks best with healed shoes or backless mule type slip ons or loafers. I like how it’s edgy, and adds just the right amount of street cred to a boring full length jean.  And it’s far from being the pedestrian looking cropped cuffed jean.  To get this look, you break apart the seams carefully with scissors on both sides of the jean leg bottom. Then cut straight across on the front panel, higher than the cut on the back panel.  I distressed the cut edges a bit too. And voila, you have an interesting looking jean hem that you will love to sport on errand days or for just getting out on the street…

Looks good with any kind of heels, chunky or stilettos. I think mules or slide on flats with it would be cool for the summer too.


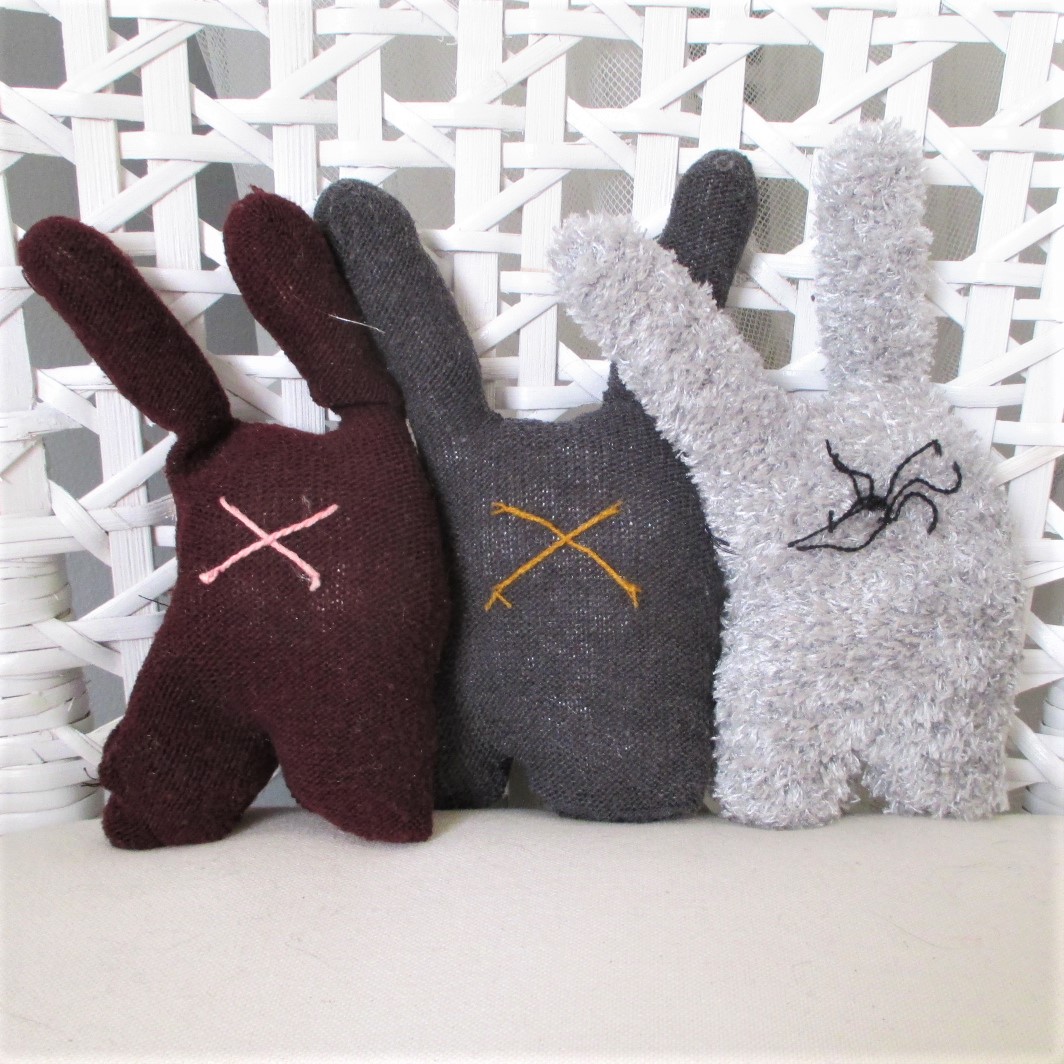
#3 Bunnies from unwanted gloves:

Ever wanted to have a cute plush toy made from things you didn’t think could be cute?  Enter these old gloves I had lying around my house that were not pretty enough to be worn in the winter, or too mismatched from losing the other pair over various winters.  I decided to make stuffed bunnies out of them for Easter. I cut off the thumb, the pinky, and middle finger, leaving just two finger for ears.  Then I sewed up all the holes, and added some leg shapes by cutting a slit at the bottom of the glove for where they would be.  I stuffed the gloves, and added whiskers and a ball tail.  And now I have the cutest stuffed bunnies this side of the world!  I am selling these on Etsy, so if you want one, just make an enquiry!

So cute, and handmade looking. Their appeal is the simplicity of the bunnies and the idea to reuse gloves.

What do you think of my Spring DIYs?  Are they fun and easy enough to inspire your projects?  I love being creative and re-inventing materials to make clothes work better for oneself’s life…