Holiday travel: Do you need a special skincare regimen?

We always get these kinds of travel tips.  But the actual useful ones?  Read on! (image from
We always get these kinds of travel tips. But the actual useful ones? Read on! (image from theguytravel.com)

I haven’t been travelling much lately since I’ve been busy with a lot of side projects.  But when I look back at my travels all over the world, one thing links them:  How do you arrive at your destination looking fresh, happy, and rejuvenated?  When I was twenty, I really could enter a plane and leave with perfect skin having done nothing.  Now that I am a bit older (just a bit), if I do nothing, I will have puffy eyes and dull skin after a trip.  It is a mystery why traveling on a moving vehicle brings out the worst in skin: namely bloating, dehydrated skin, eye bags, and water retention.  There is something about riding on a bus/plane/train that does this.  And every gal needs a plan to combat this.  Arriving at your destination looking well rested and fresh is important.  I want whoever is picking me up to be impressed.  Here are my tried and true tips for minimizing the damages of travel.

Do these steps during your trip on a plane/bus/train:

  1. Hydration: drink water, drink water, and then drink water.  It keeps your body fresh by flushing out toxins, and discourages water retention.  Water retention is your enemy because it makes you look super puffy.  Avoid salt, since it can make you bloat.
  2. Tea does something: A hot cup of tea steams up your face, gives your body antioxidants and soothes stomach and digestion.  It also help calm the nerves and provides hydration.  All things you need while on a plane/bus.
  3. Tone your skin:  Toxins and dirt stick to your skin while travelling.  Car and bus exhaust, recycled airplane air.  They all suffocate your skin.  Spritz a mister of spring water on your face, or do what I do and pack a bit of rose water.  Put the toner on a cotton swab and dab your way to refreshment.
  4. Moisturize.  After toning your face, put a good weigh moisturizer on your face.  I find creams to be a bit greasy for day wear, so cocoa butter and coconut oil are my go to’s.
  5. Sleep.  I can’t say this enough.  Arriving at a destination sleep deprived affects your spirit, personality and appearance.  You can’t think straight if you are tired.  I like to use a sleeping pill if travelling over night to ensure I sleep on those bumpy travel routes.
  6. Make-up: you need a bit.  Travelling while wearing too much make-up feels gross, so don’t over do it.  Just before you arrive at your destination, touch up with essentials such as bb cream, mascara and lipstick/tinted lip balm.  This makes all the difference and boost the effects of all the hard work you did during the trip for your skin.  Put in some hair salve to moisturize your hair ends.

Voila!  Arrive at your destination looking effortlessly gorgeous and enjoy the holidays!  You only live once so have fun looking and feeling your best.

Happy Holidays and Happy New Year! 🙂

Vinegar hair rinses…should you give them a go?

A year or so ago, I read on a beauty blog about rinsing your hair in a vinegar water solution after shampooing.  And for some reason, I cringed at that extra step in hair care, and did not consider trying it.  After all, I was already triple conditioning on top of other shower rituals that I had, so measuring out a vinegar solution ratio seemed too much, especially since I didn’t even know what it did.  The article said to use apple cider vinegar mix it with water and pour it into hair after shampooing.  The writer said it balances the hair’s ph.  And since I didn’t know what that meant, I ignored this strange tip.

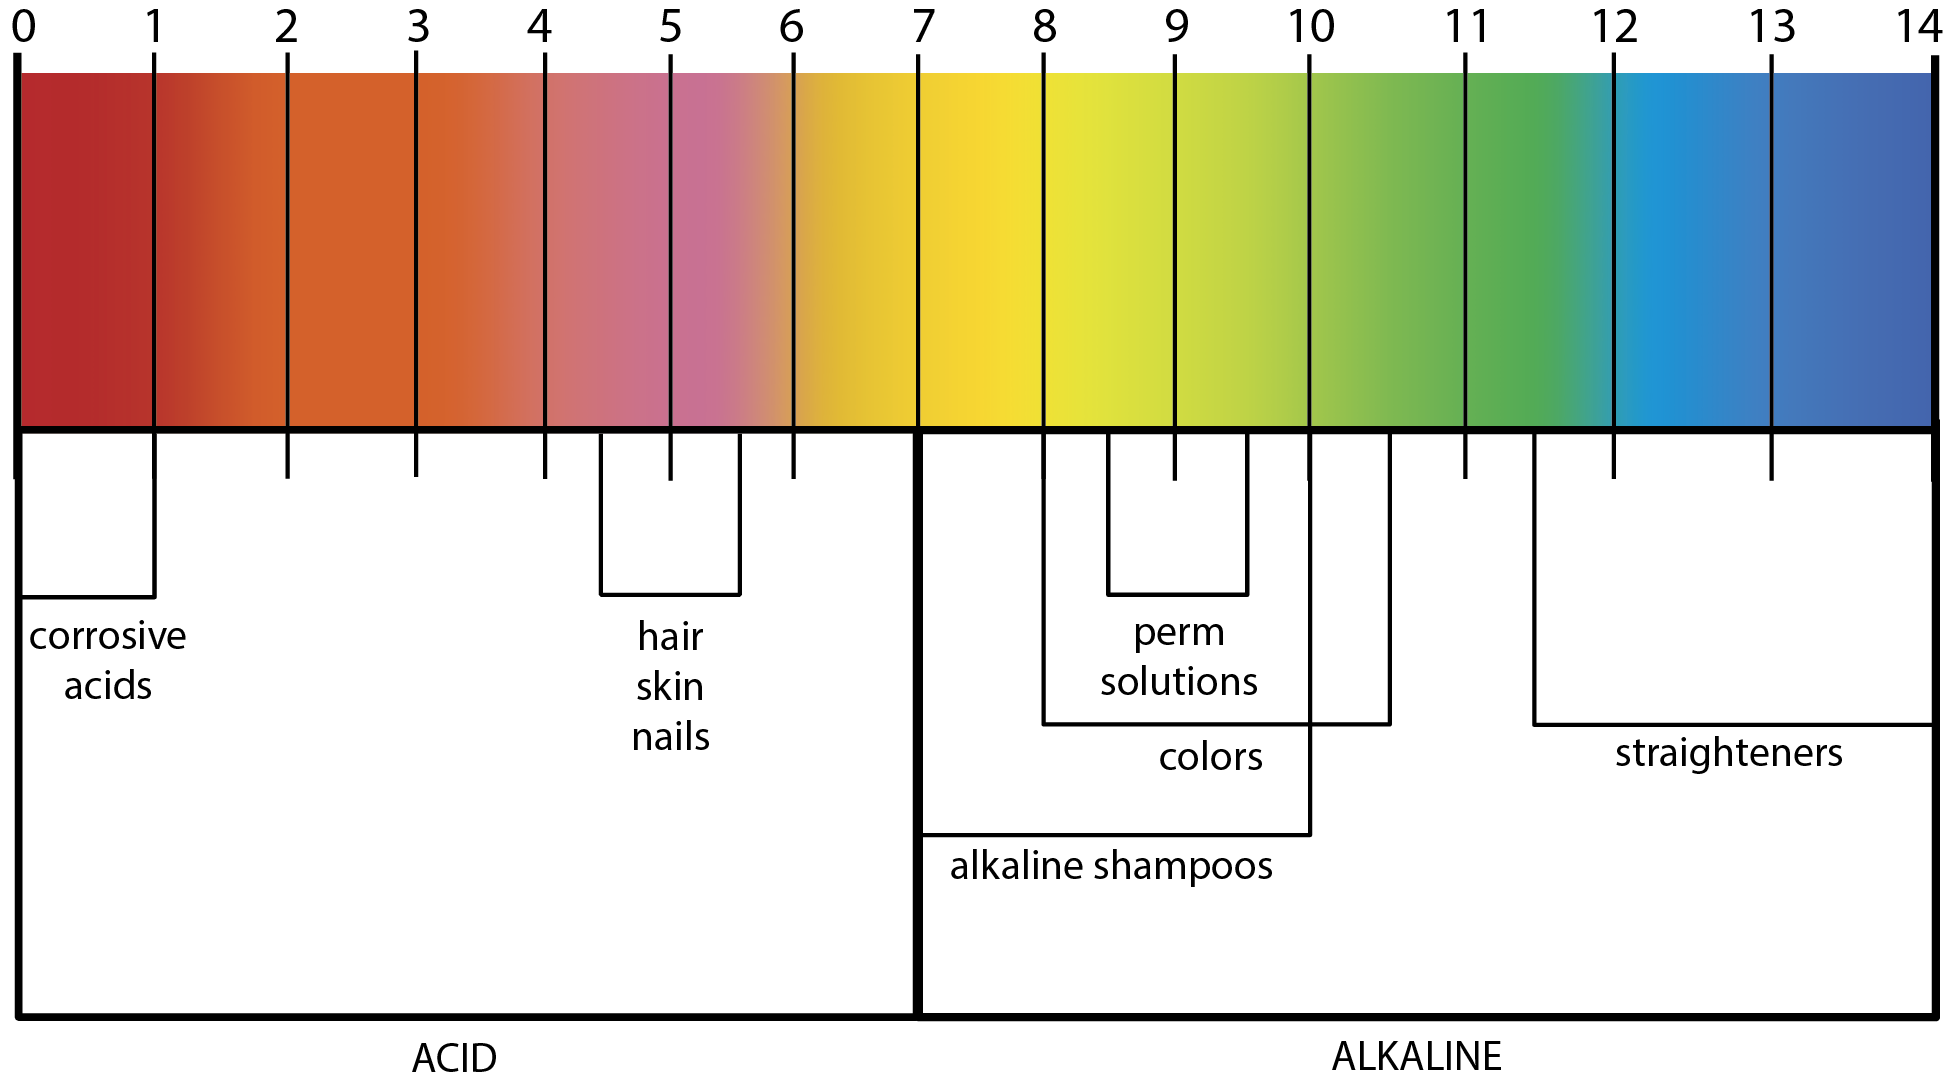
But more recently, I wanted to learn about rinsing with vinegar since I heard it can fix dull, limp hair.  I had been noticing how my hair felt stringy and dry even when it was freshly cleaned.  Adding too much products made it greasy and flat, so after more research, I was brought back to this simple home remedy.  Vinegar does balance the natural ph of hair, since hair is naturally slightly acidic.  After we shampoo, and rinse out our hair with water (neutral ph), our hair shafts remain slightly basic (because shampoo is basic), and that is on the opposite spectrum of acidic.  So your hair is not really “happy” and reacts by being limp, dull, hard to comb and needing tons of product to keep it behaving.  A vinegar rinse is supposed to cancel out what the shampoo did, bringing your hair back to its slightly acidic ph.  Yay, science!  But so what does balanced hair ph do?

I got this chart from the site: It shows how hair and skin is not actually neutral like water, and how shampoos are slightly basic on a ph scale.
I got this chart from the site menscut.com: It shows how hair and skin is not actually neutral like water, and how shampoos are slightly basic on a ph scale.

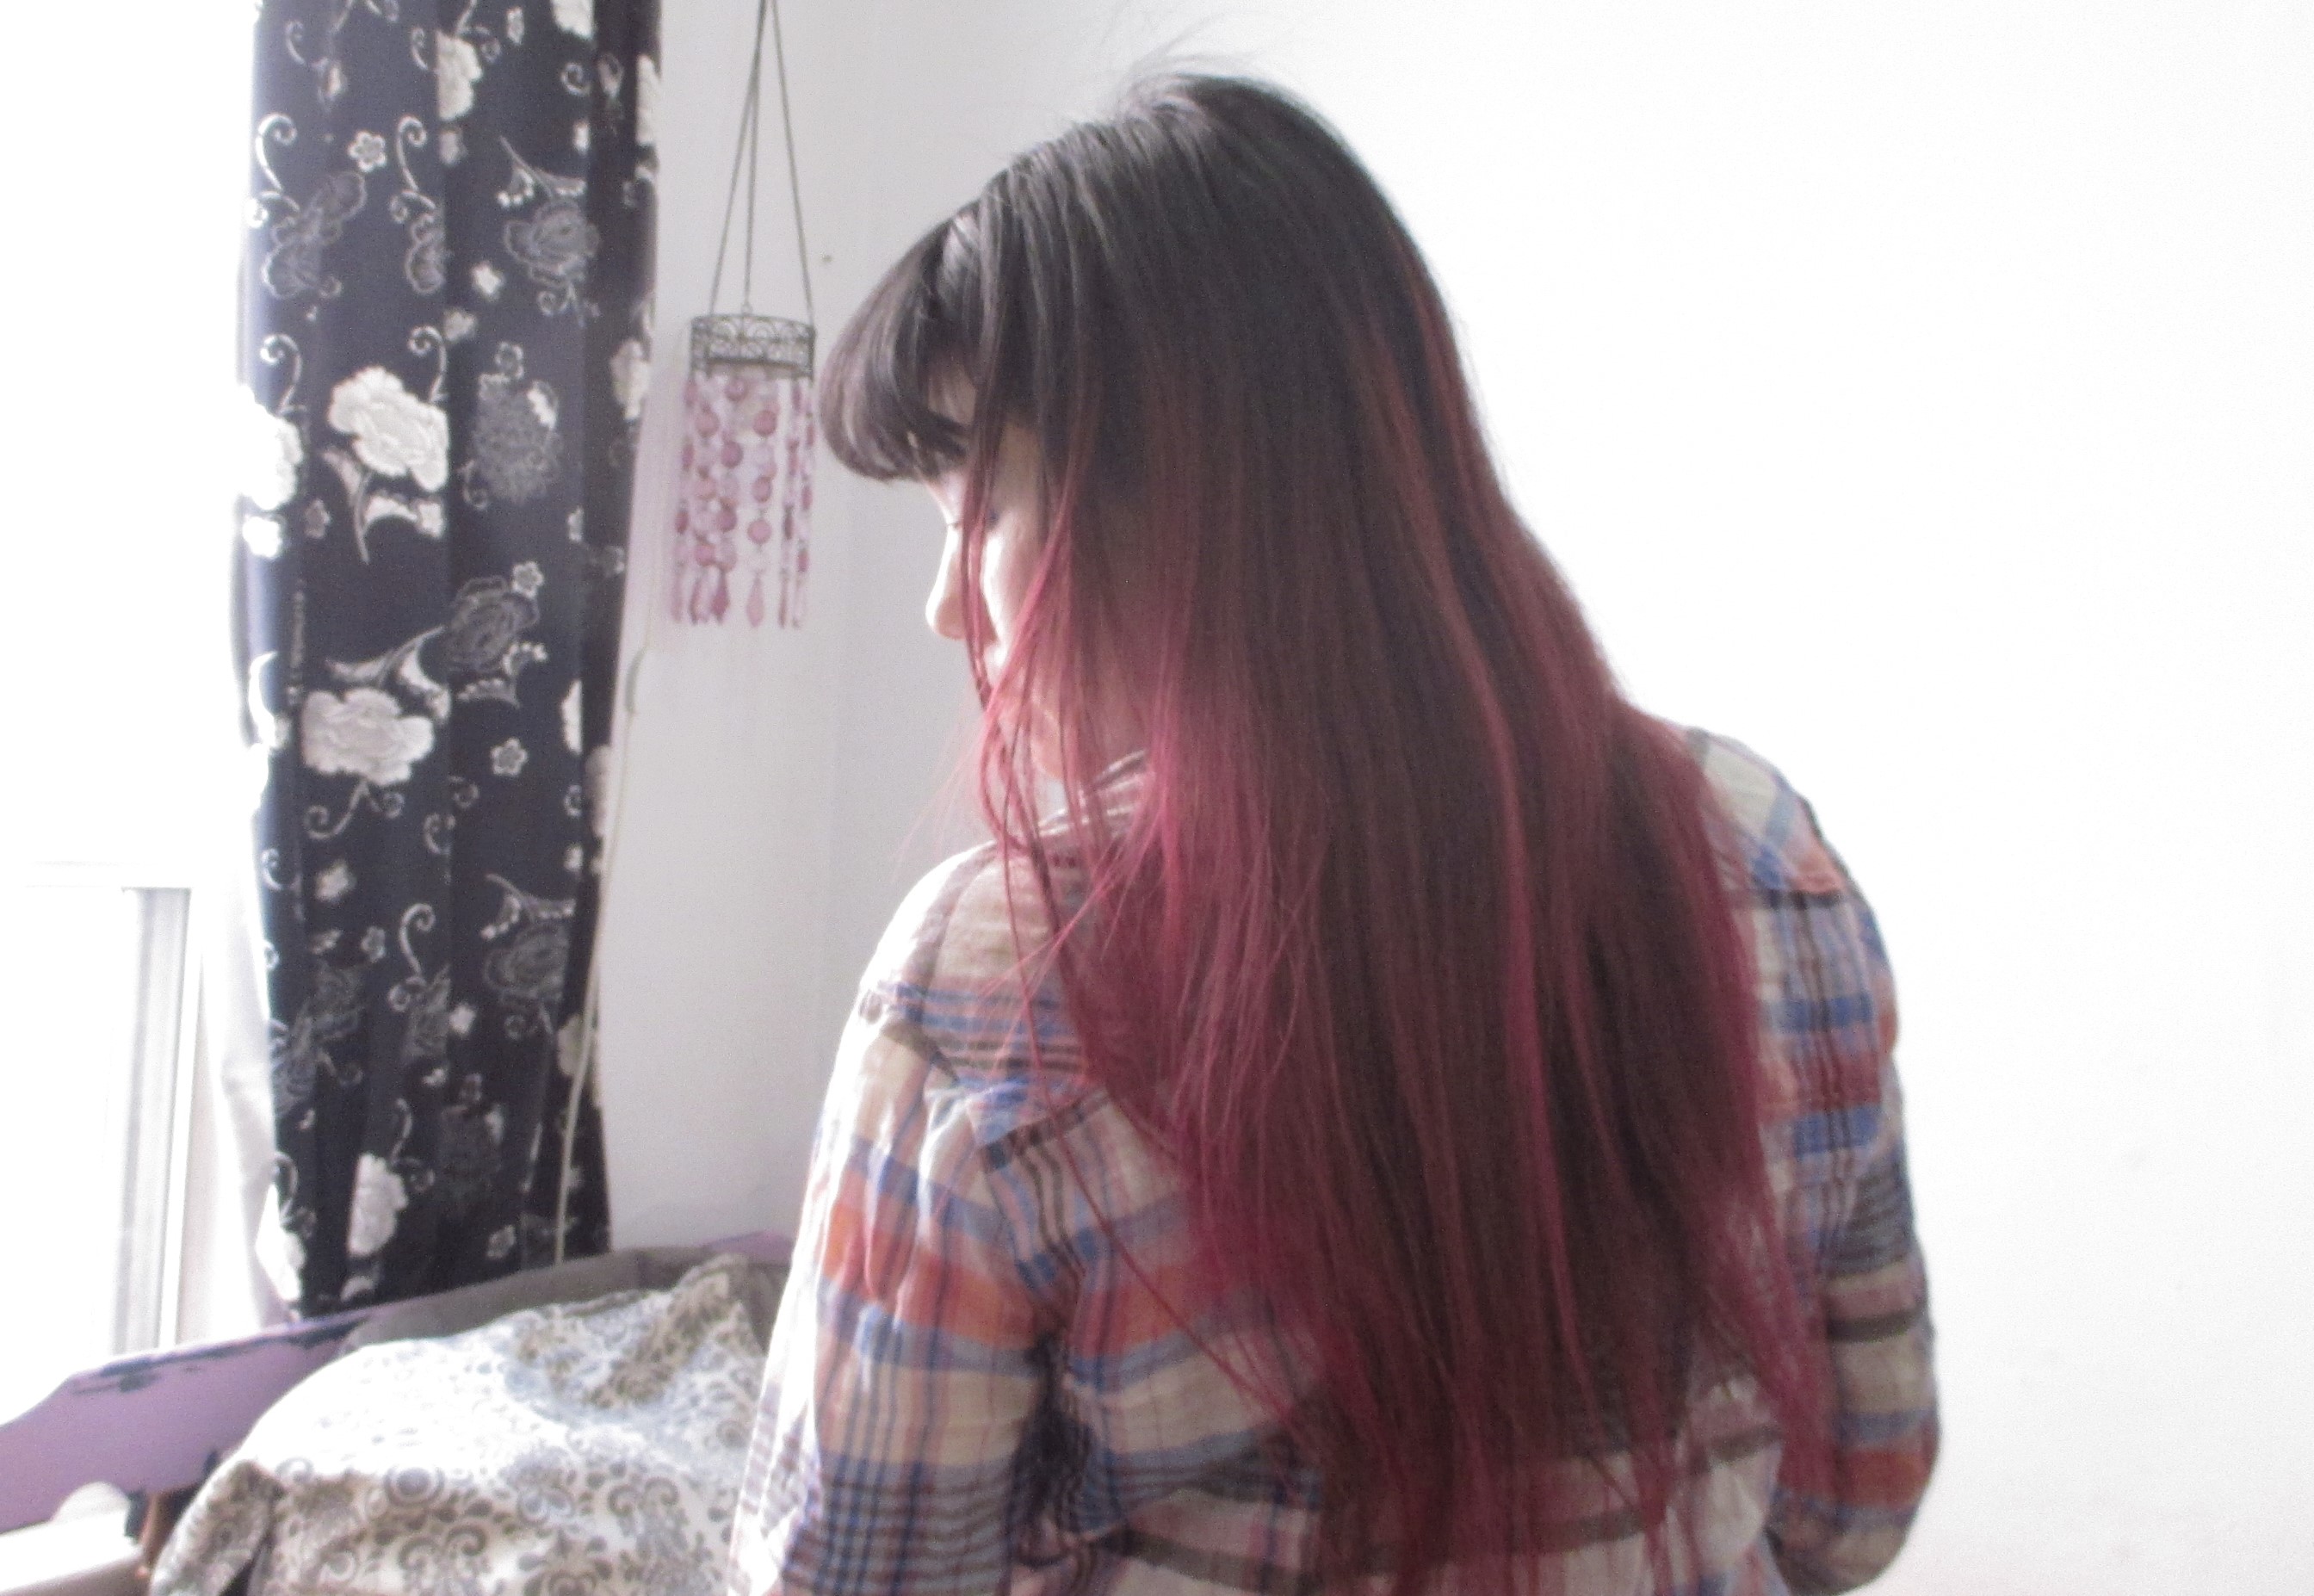
The results are supposed to be shinier hair, more soft and less dry.  A vinegar rinse is supposed to also get rid of product build up too, but I find mostly what it really does is coax your hair cuticles to lay flat and relax, so that it actually looks and feel healthier!  And less tangle-y.  I find after rinsing and drying, my hair feels thicker and stronger like almost like virgin unprocessed hair.  And I do use less leave-in products because it feels more manageable.  Translation, vinegar rinses make good hair days even better.  Infact, my own dad who never notices hairstyles, finally commented that he sees I have it dyed burgundy!  I think I owe this to vinegar rinses because they are rumored to enhance and preserve the dye in coloured hair.  So I would recommend this strange hair care trend indeed! (Don’t do it every shampoo, but every other…I hear that too much is not good? Correct me if I am wrong)

How I do a Vinegar Hair Rinse:

-2 and 1/2 cup of warm water.

-1/4 cup of vinegar (apple cider vinegar, but I actually use white vinegar)

Mix in a pitcher before your shower.  After shampooing and conditioning, seal in your hair cuticles by pouring the mixture all over your head and hair all the way to the ends.  Massage and bring the solution all the way to the tips of your hair.  Leave on for a minute, then rinse out with a blast or two of regular water.  I don’t want to rinse it all out, but I get out the excess because it does have an odor.  However, after it dries, it has no scent.  But don’t be caught in the rain because I find when my hair gets damp again, I can sometimes smell like fish and chips.  Oh well, the results are worth it!

Look at my long strands! After using the rinse and drying, they are still untangled after a night of sleeping on with no products put in! That is usually impossible with my hair.


Nail design: nude nails and a splash of colour

I saw this trend a while ago online in various fashion articles.  But only recently I tried to get it with a few trial and errors!  It is this way of painting each nail with colour polish only partially, so that the nude bare nail still shows up and is part of the look.  I think of it as a variation of french tips, where instead of just painting the tips of the nails, you work with other parts of the nail to create negative space and interest.  I think partially colouring your nails is super fresh looking, because it shows part of the bare nails, and hints at idea of being naked, natural.  It gives the nail a more graphic, designed look as well!

Hello bare clean nails! If you have healthy well-shaped nails, you really can skip polish and rock those! But adding colour never hurts!
Hello bare clean nails! If you have healthy well-shaped nails, you really can skip polish sometimes.  But I always feel I need a bit of polish, which is why the partial colour is great.  You get a bit of both worlds.

Steps to doing a Colour on Nude Nail Manicure

  1. Start with clean, well shaped nails.  This is an obvious must when trying to achieve this half painted look because your nude nails are actually the star of the show!  (I wash and moisturize my nail shaft for a day or two resting them without polish, to let it breathe and grow more healthy)
  2. Just before painting them, wipe your nails with a tissue moistened with water, to remove excess oils that can cause the chipping of polishes.
  3. Let your nails dry from the wiping.
  4. First paint your nails with a transparent base coat all over the nail shaft.  The base coat helps so much because naked nails don’t receive colour evenly, so it is like a foundation.  Base coats also smooth out ridges in the nail, just make sure it is transparent so the nude nail shows.
  5. Carefully paint the design in with the colour of choice.  I like to do the moons of the nail, which is the bottom half closest to the cuticle.  I do an arched shape.  I find middle-toned polishes to work the best with this look: ie. not too dark or not too pastel.
  6. Let the first colour coat dry, then do a second coat of colour, being careful to mirror the shape from before. (This step is optional: intricate designs are not easy to apply a second coat to)
  7. Put on a clear top coat All over the nail shaft to seal it in. I love to use a clear matte polish as a topper just because it looks super natural on an uncoloured nail.
So this is the finished product. A nude nail accented by a burst of colour! There are endless variations of the nude nail with colour! An single coloured stripe would also look cool!

Graphically designed and painted nails that show off the natural gorgeousness of the naked nail!  Try it yourself and let me know how you like it.  I’ve seen different variations, you can do a vertical strip, do a star shape or even dot nude nails with a few jewels.   The possibilities are practically endless.  Main point to do is remember to use a base coat and top coat for best results. 🙂